Calendar
Updated Recently
Create and Add Providers
Initially, to schedule an appointment, you need a provider so that they can schedule their appointment. Or the admin has to add providers.
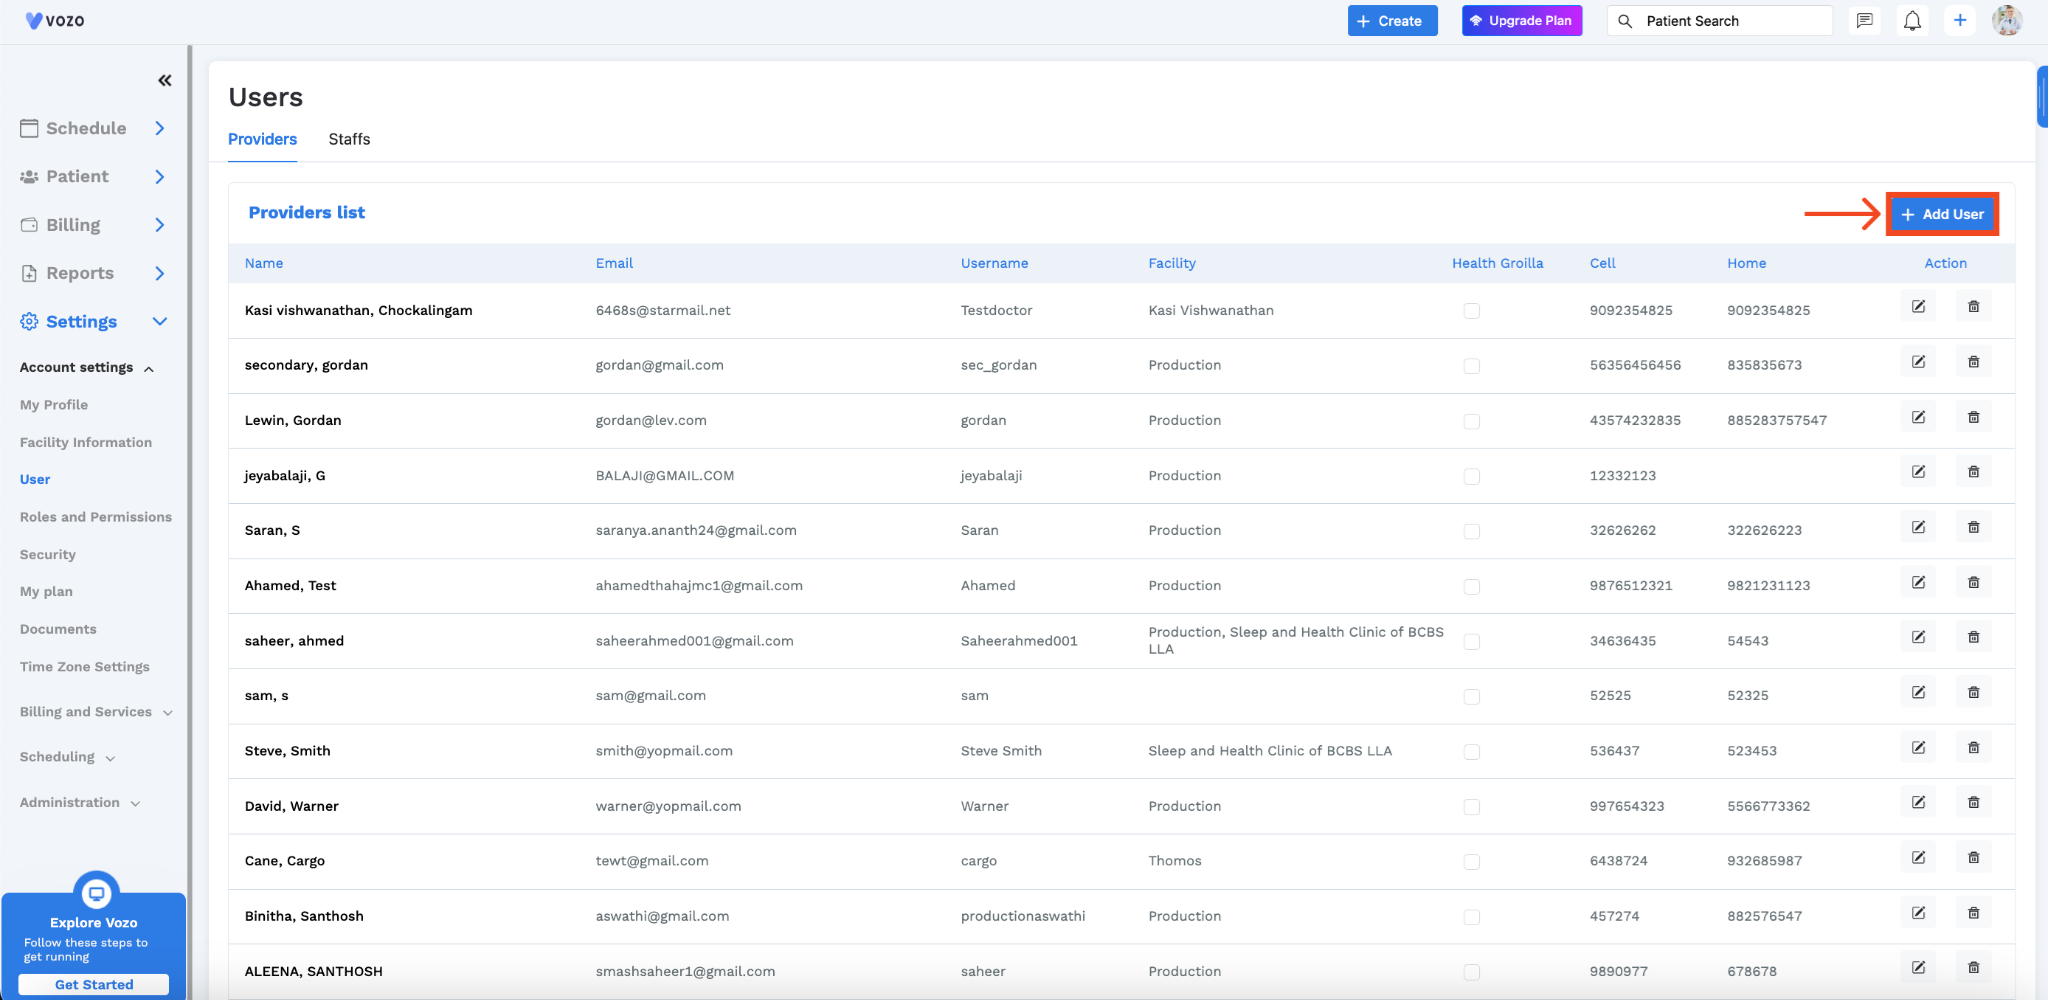
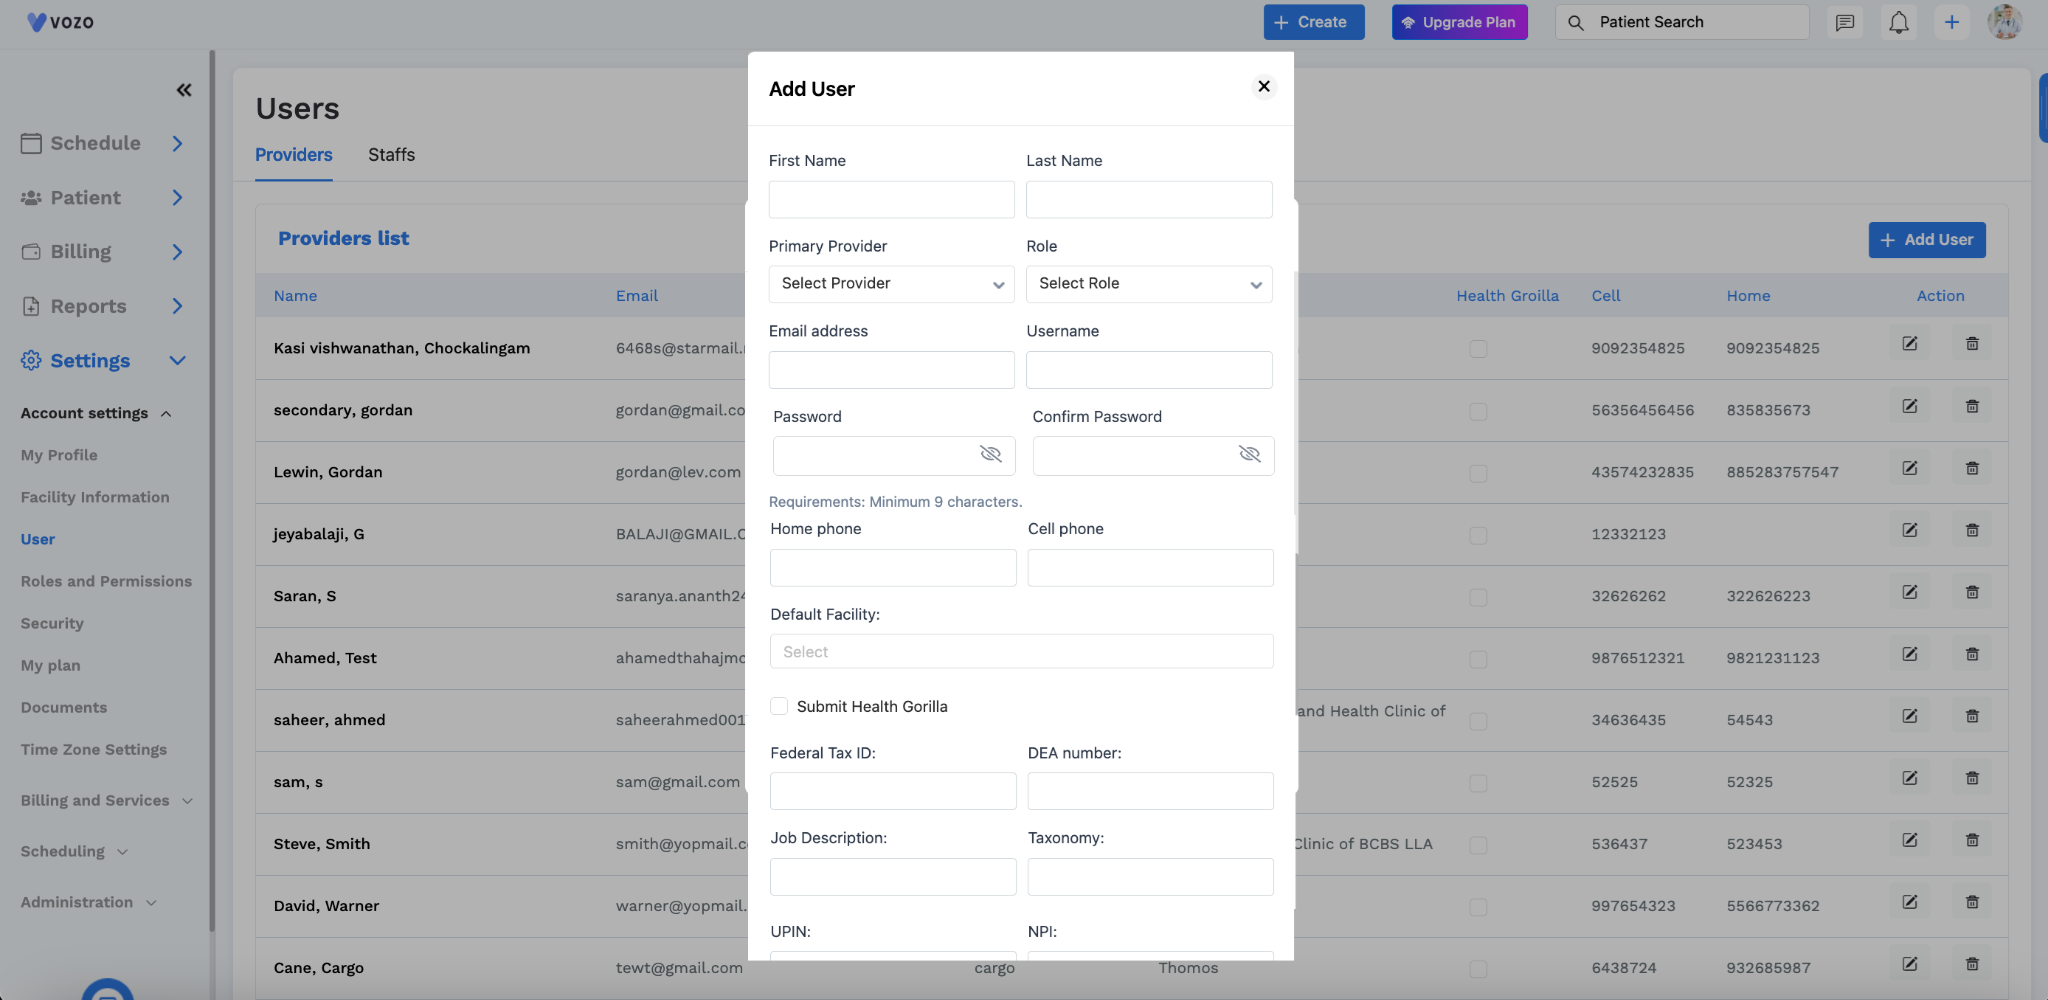
In that popup, the admin is required to add all the necessary information about the provider in the respective field. Enter the below provider details in the popup:
If you want to add another license for the provider, you can click “Add Licenses” and fill out the necessary details. Now, the provider is added.
Create and Add Patients
After adding providers, you need to add patients to schedule appointments. There are two ways you can add patients.


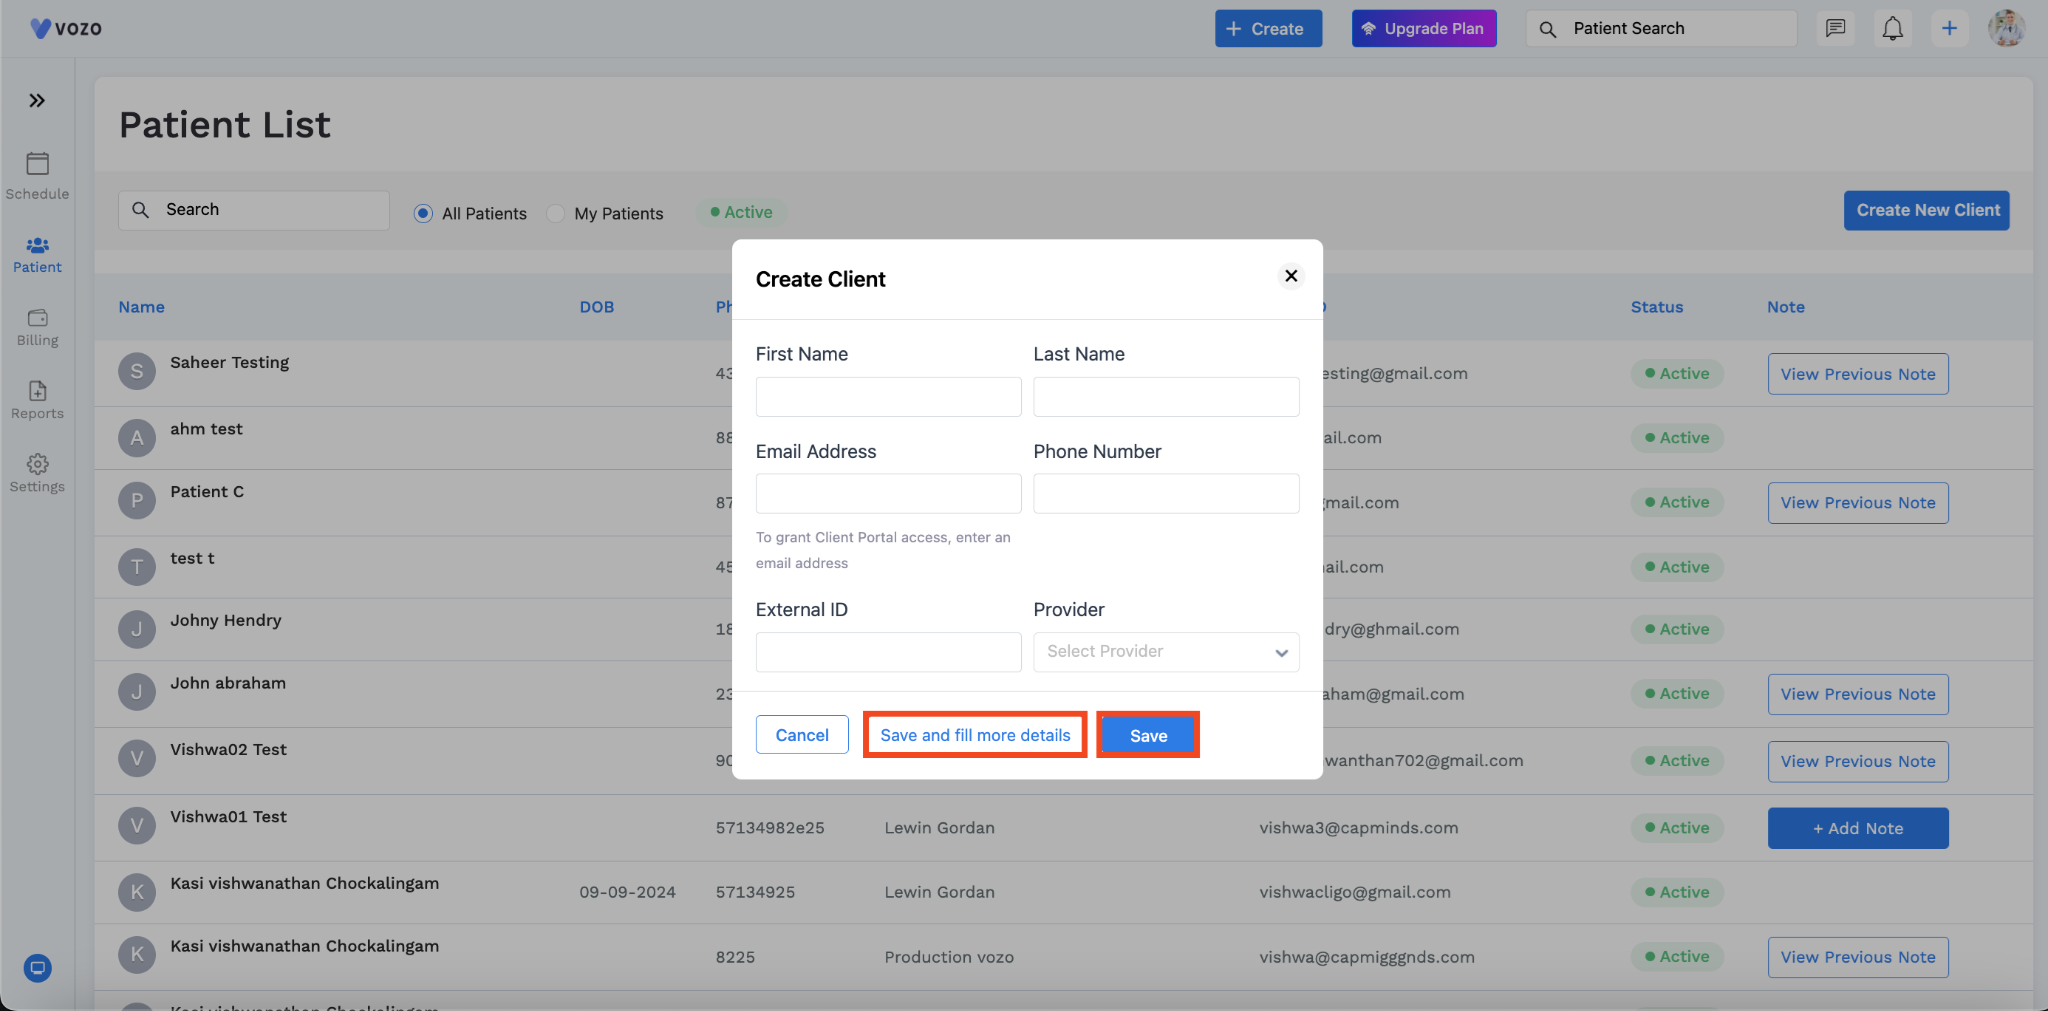
In that popup, you have to enter all the necessary information like:
You can click the Save Button to simply save the Client in the Client List. Or if you want to add additional information for the Client, you can Click “Save and Fill More Details”.
Updating Patient Demographics
This action will redirect you to the Patient Demographics page.
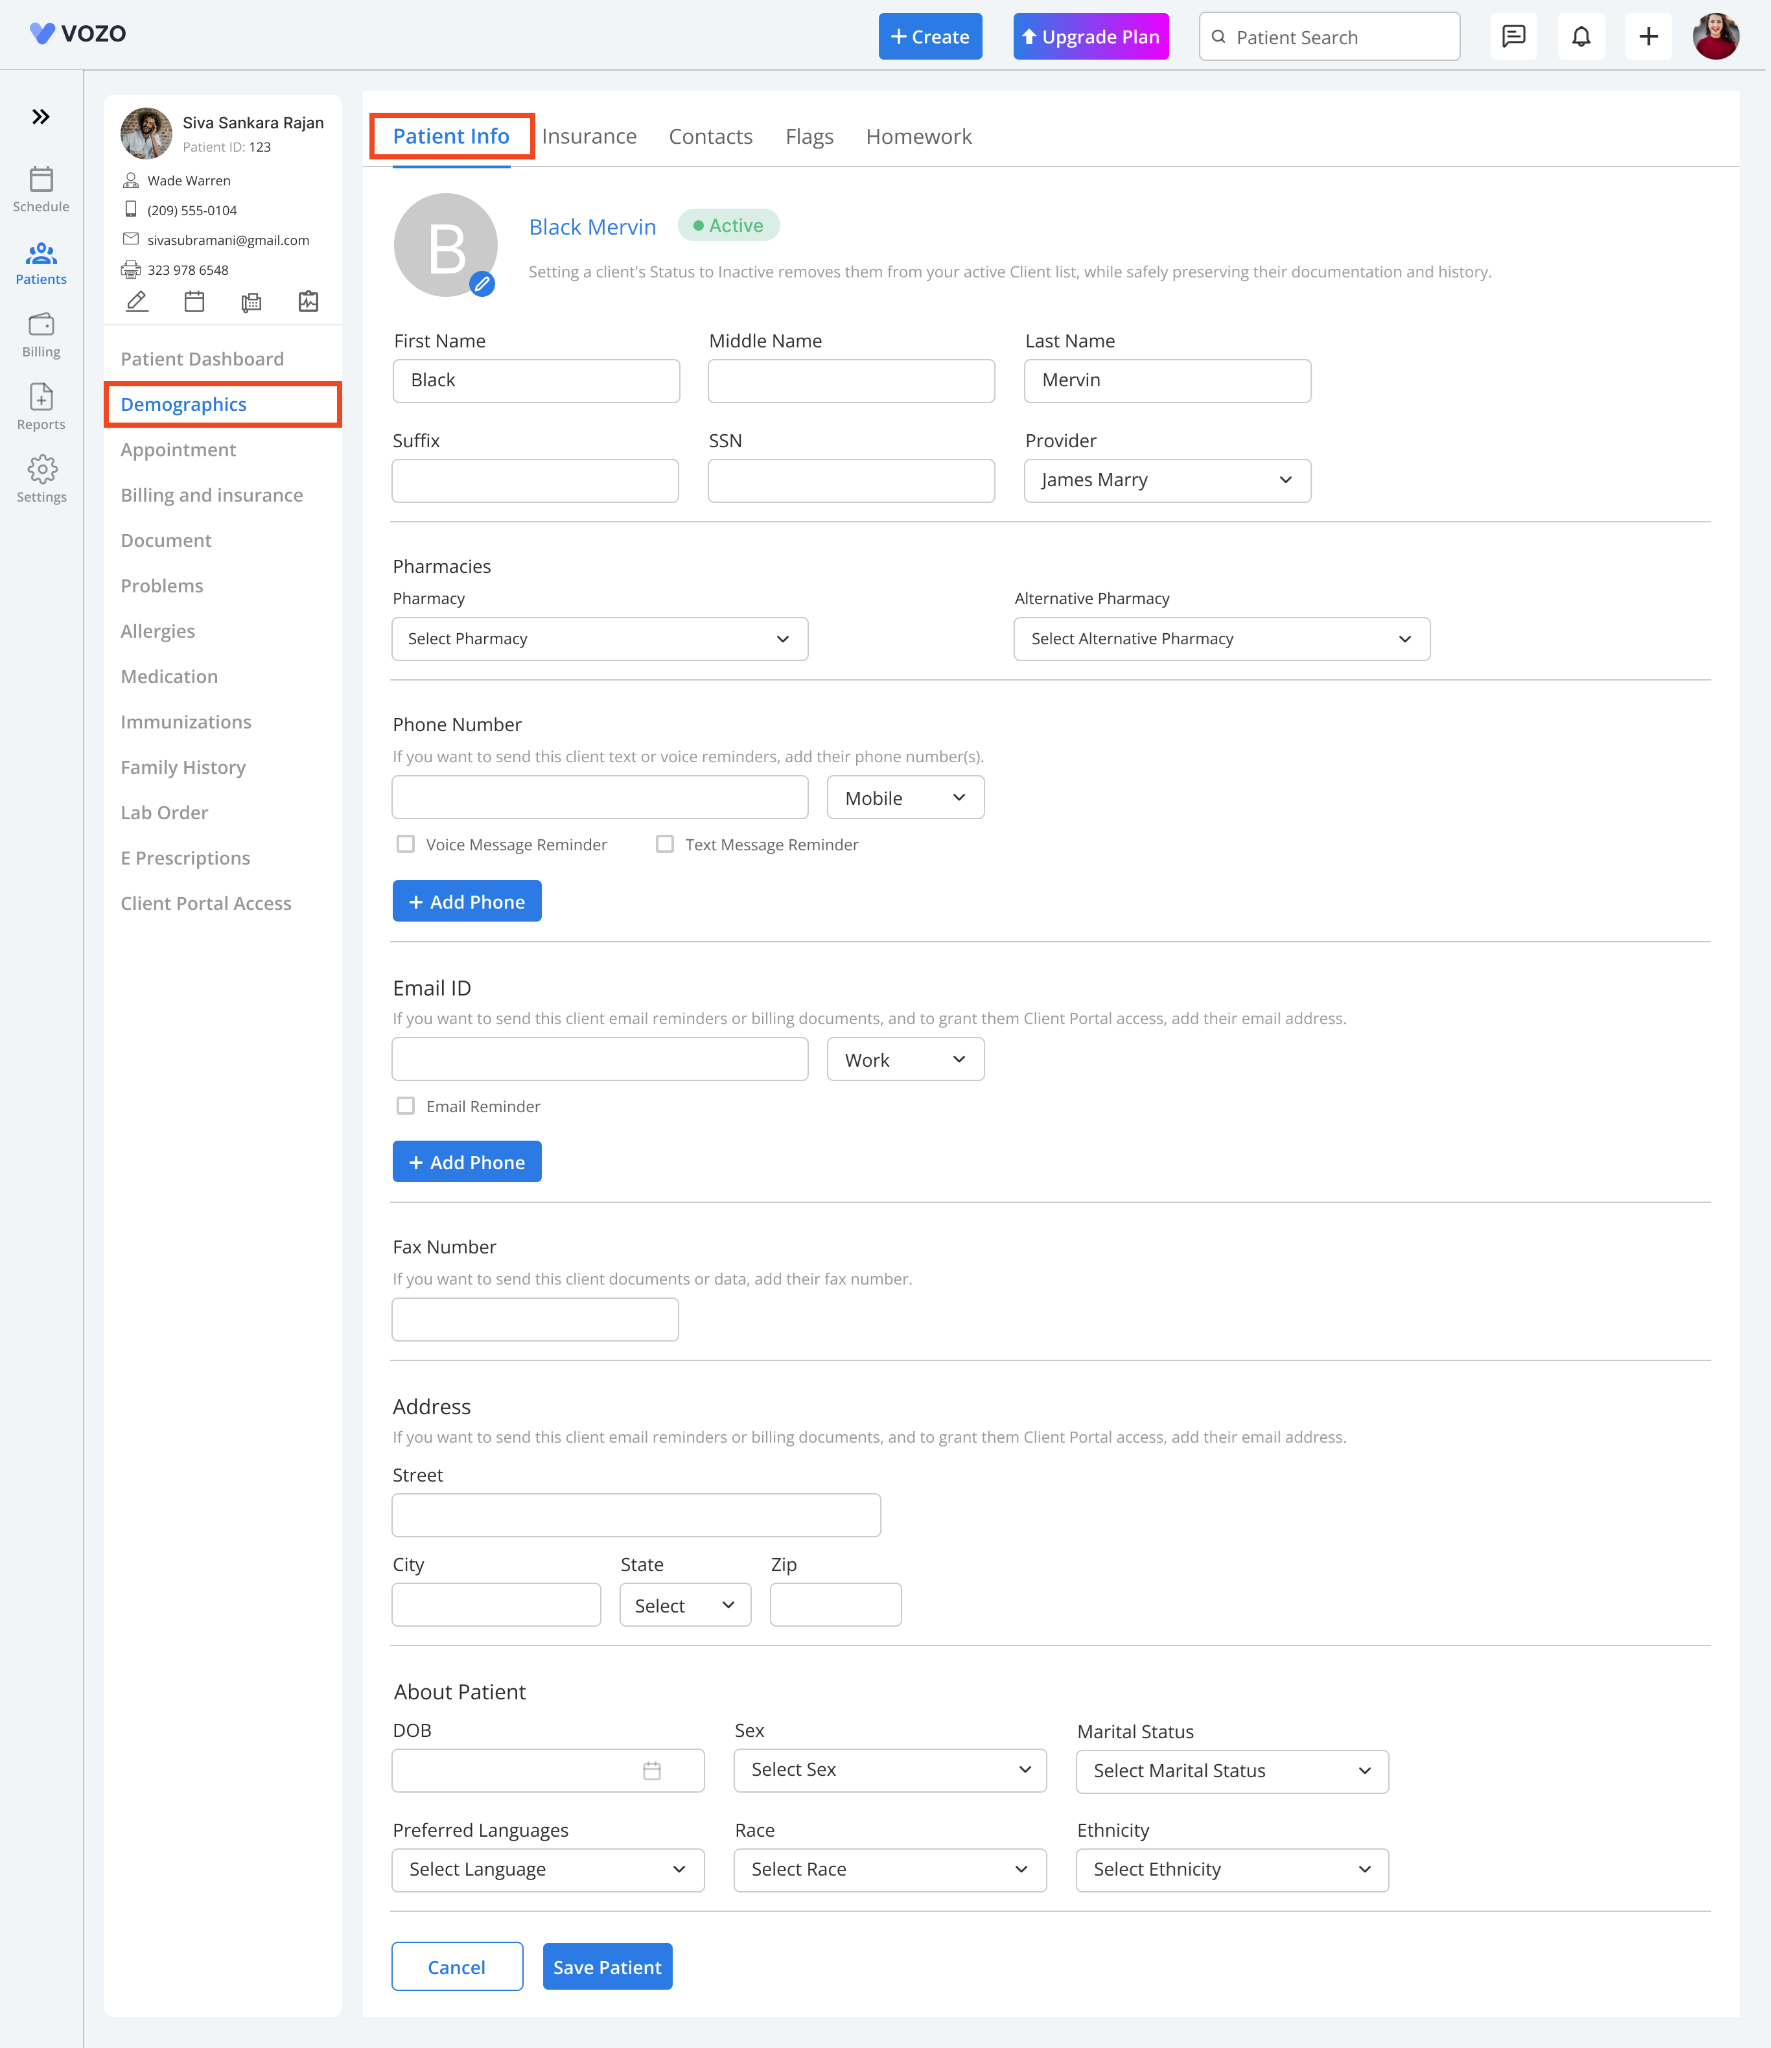
Where you can add necessary additional information for the patient like SSN, Client Address (which is required for insurance billing), DOB, Sex, Marital Status, Preferred Language, Race, and Ethnicity.
Create and Schedule Appointments
Based on the given provider availability before, you can click the timeslots in the calendar dashboard.
For instance, If you set “From time - To time” for the Provider like 10:00 AM to 6:00 PM, you can only schedule the appointment for the provider within the time frame.
You can not schedule an appointment before 10:00 AM or after 6:00 PM.
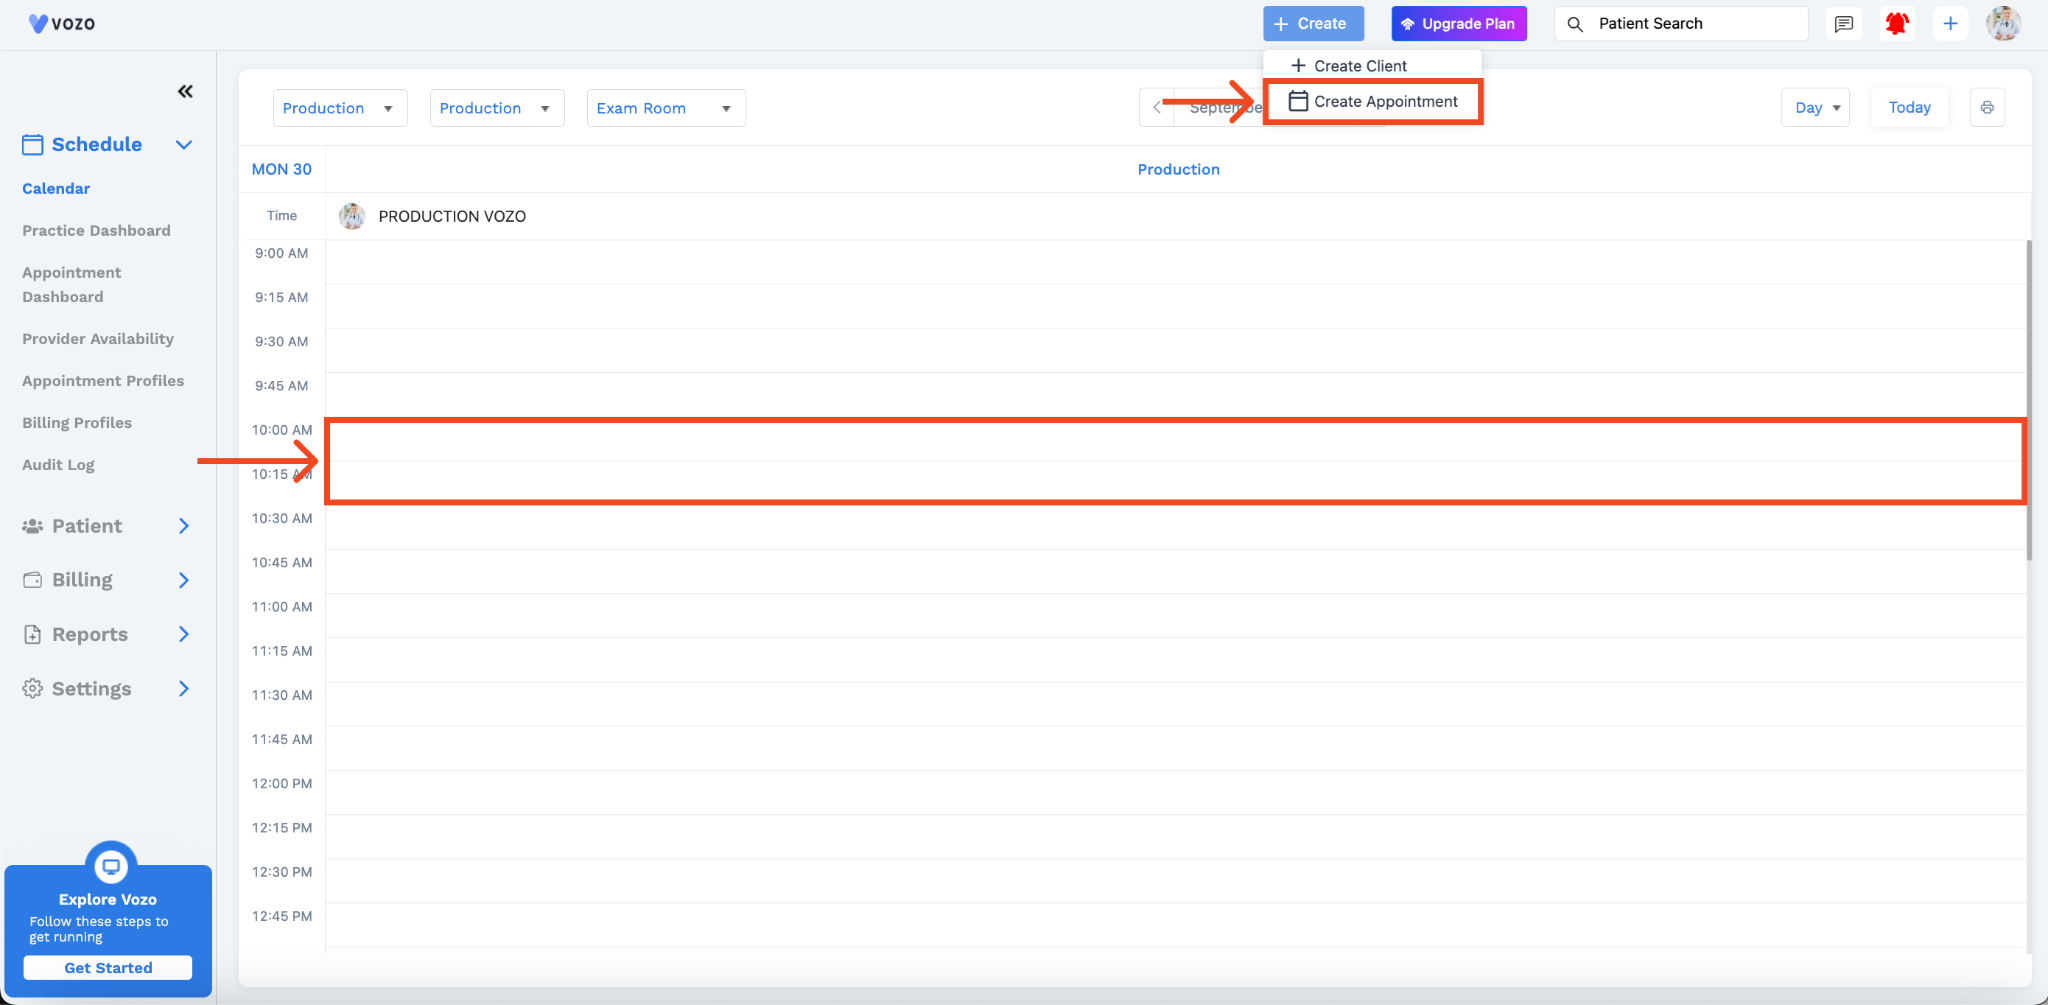
Now, click on the timeslots based on the provider's availability before.
Fill Appointment Details
A New appointment scheduling pop-up will appear.

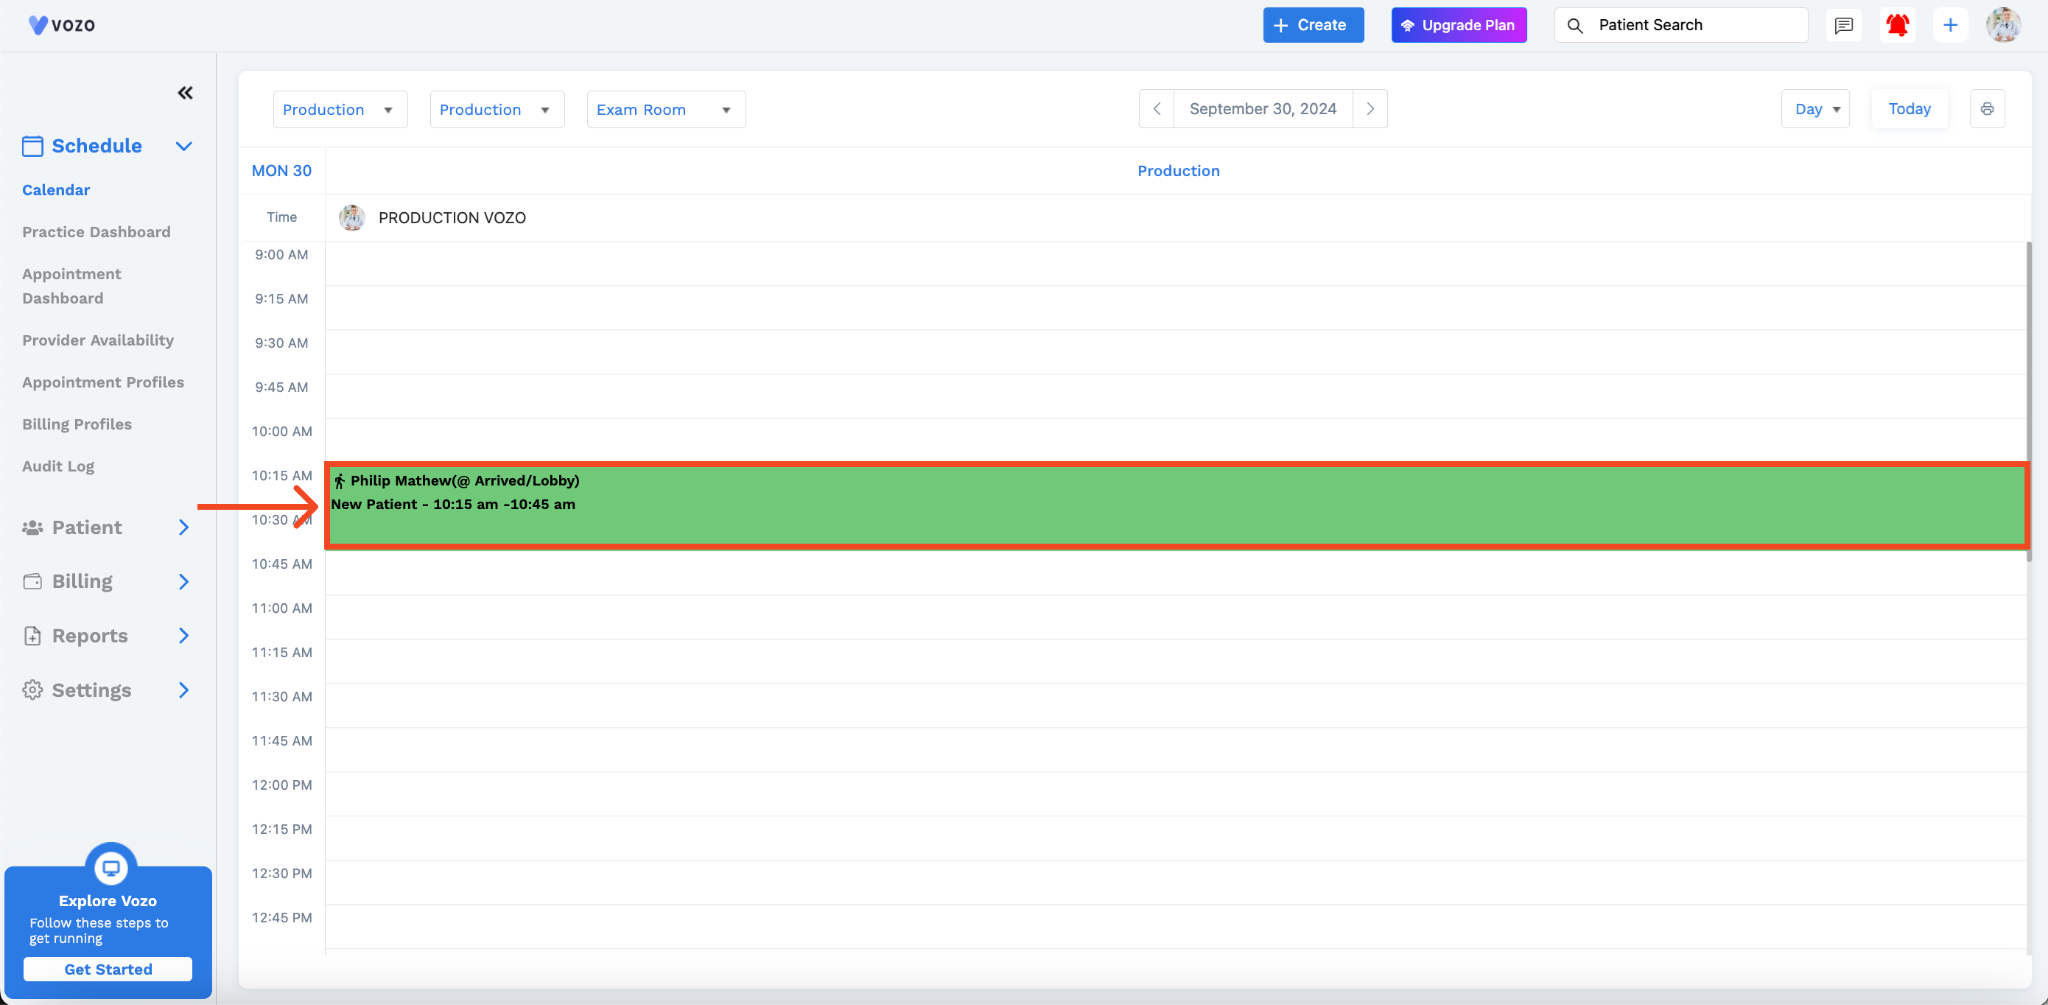
Using this form, you can create and schedule appointments for the patient for the available provider. Follow the below instructions:
Now, the appointment has been scheduled for the patient you have selected.
Note: When you are selecting the Specialty, only the available no.of provider in the selected specialty will be shown. Other providers will not be shown under the selected specialty
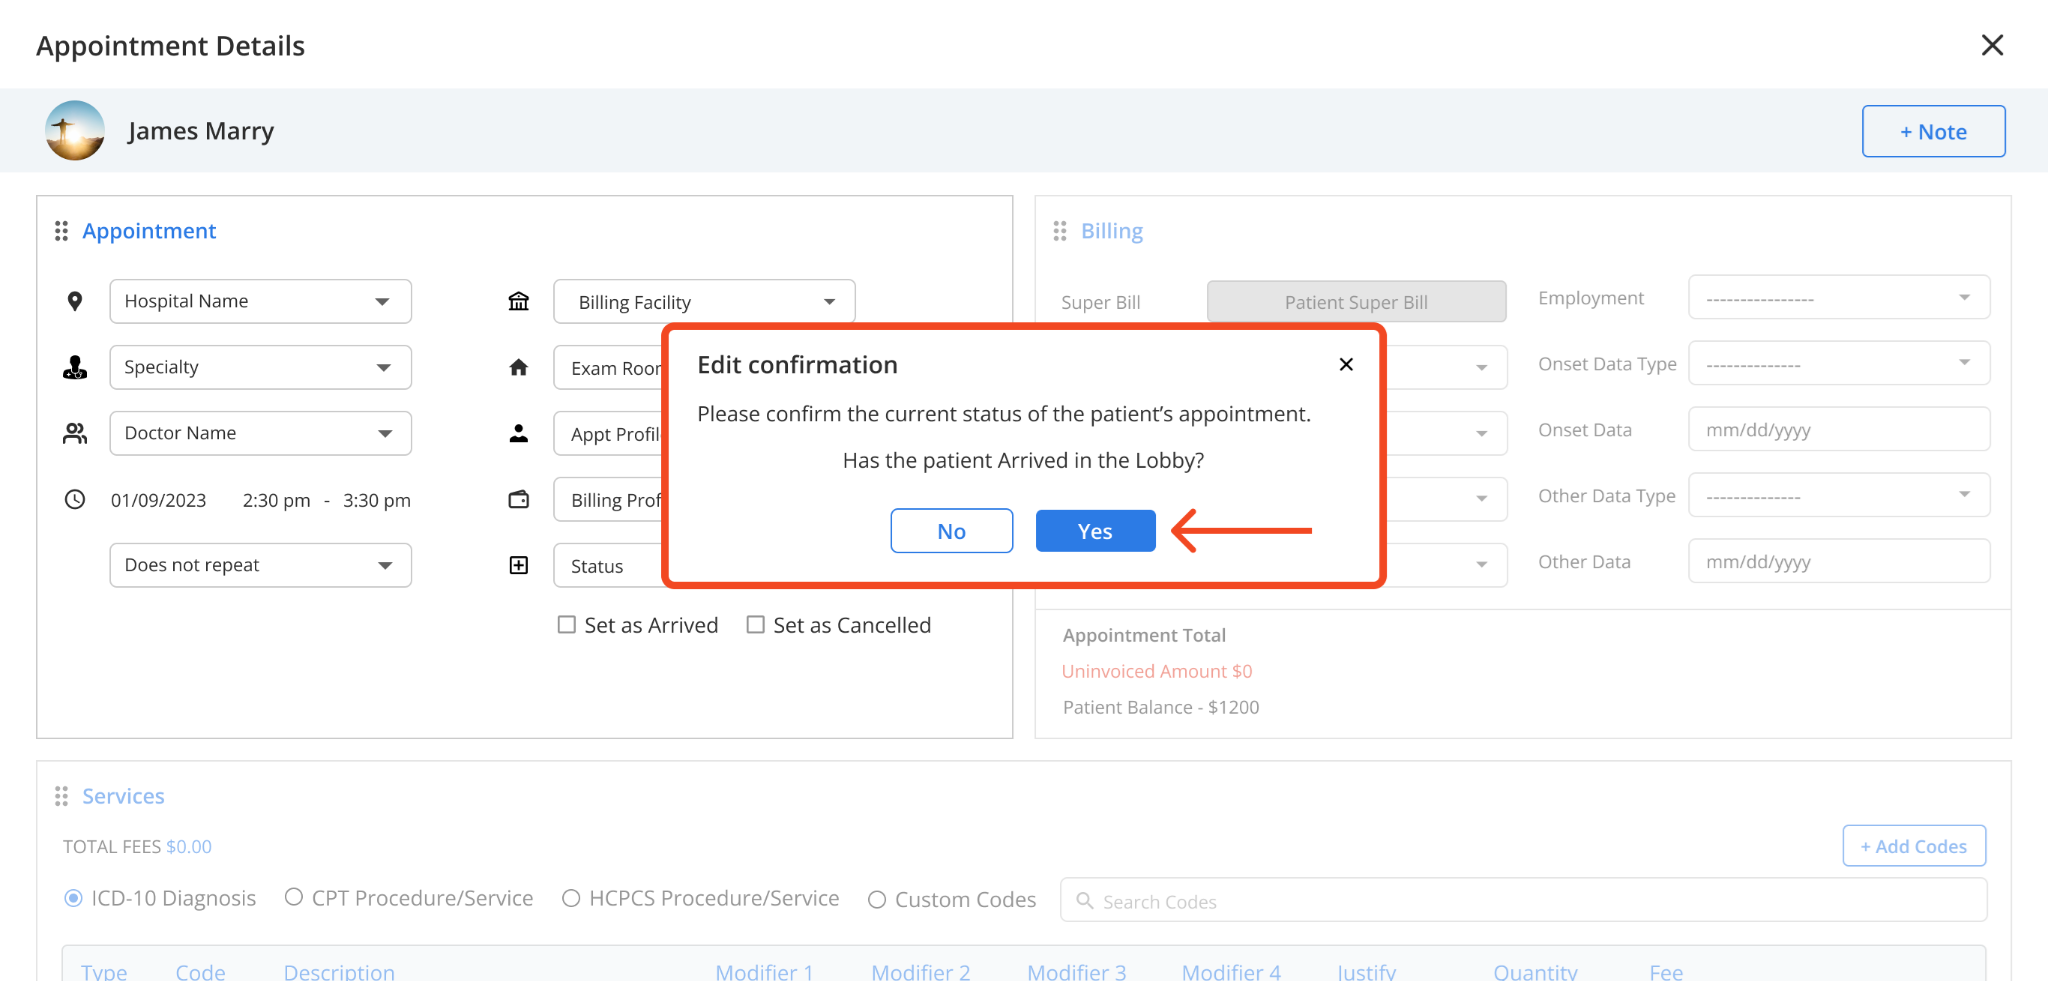
Editing Appointment Details
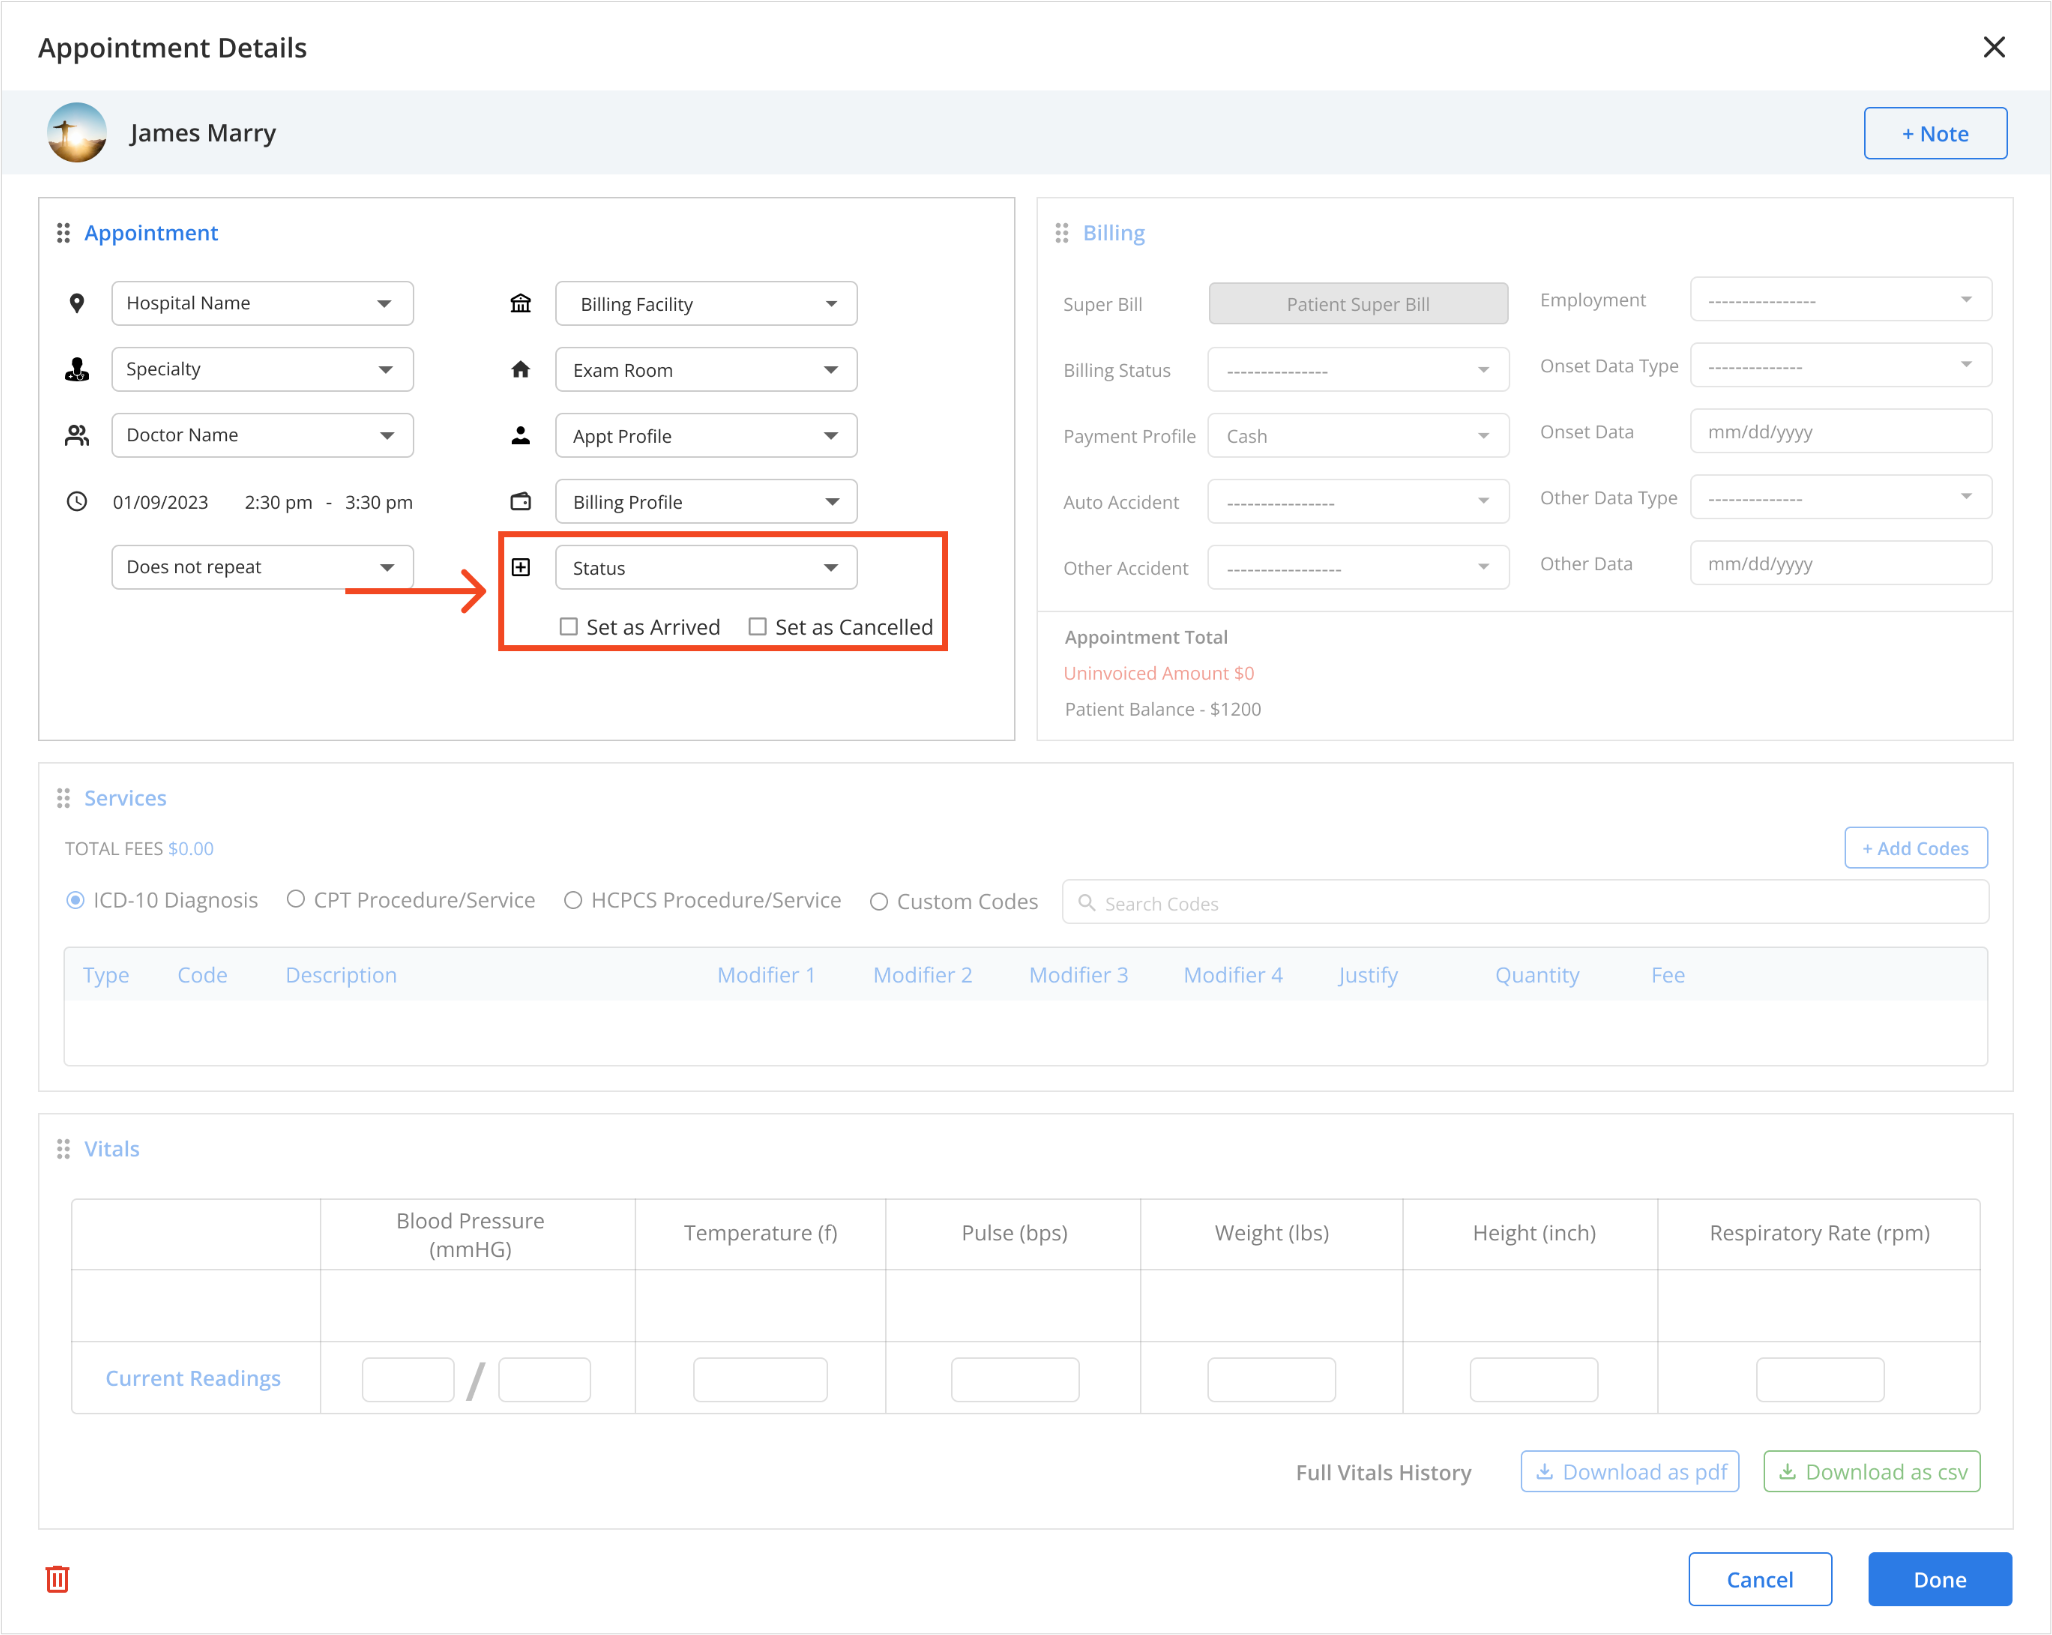
To edit the appointment details, click on the Scheduled Appointment.
You will be redirected to the Appointment Details popup.

For ICD-10, CPT HCPCS & Custom code, click on the radio button to select the code.
Then on the right side, you can see the “Search Bar”
Click it and enter the diagnosis or procedural code for the service provided.
Then generate Billing for the provided services by selecting the “Payment Type” as ‘Cash’ or ‘ Insurance’.
If you have selected the ‘Cash’ payment then you can create an invoice for the said services and can pay the amount using cash, credit card, stripe, & cheque.
If you have selected the ‘Insurance’ payment then if a Co-pay is available you can create an invoice otherwise you can directly go to the “Insurance claims” page and generate a claim form for the said appointment.
In the Vitals section, you can add the Vitals info of the patients and view the last updated vital info too.
If needed, you can download the vitals as a PDF or CSV file by selecting the appropriate option.
After entering all the details click on the “Done” button to save the information.