Create and Add Patients

Aravind
Aravind
Updated Recently

After adding providers, you need to add patients to schedule appointments. There are two ways you can add patients.
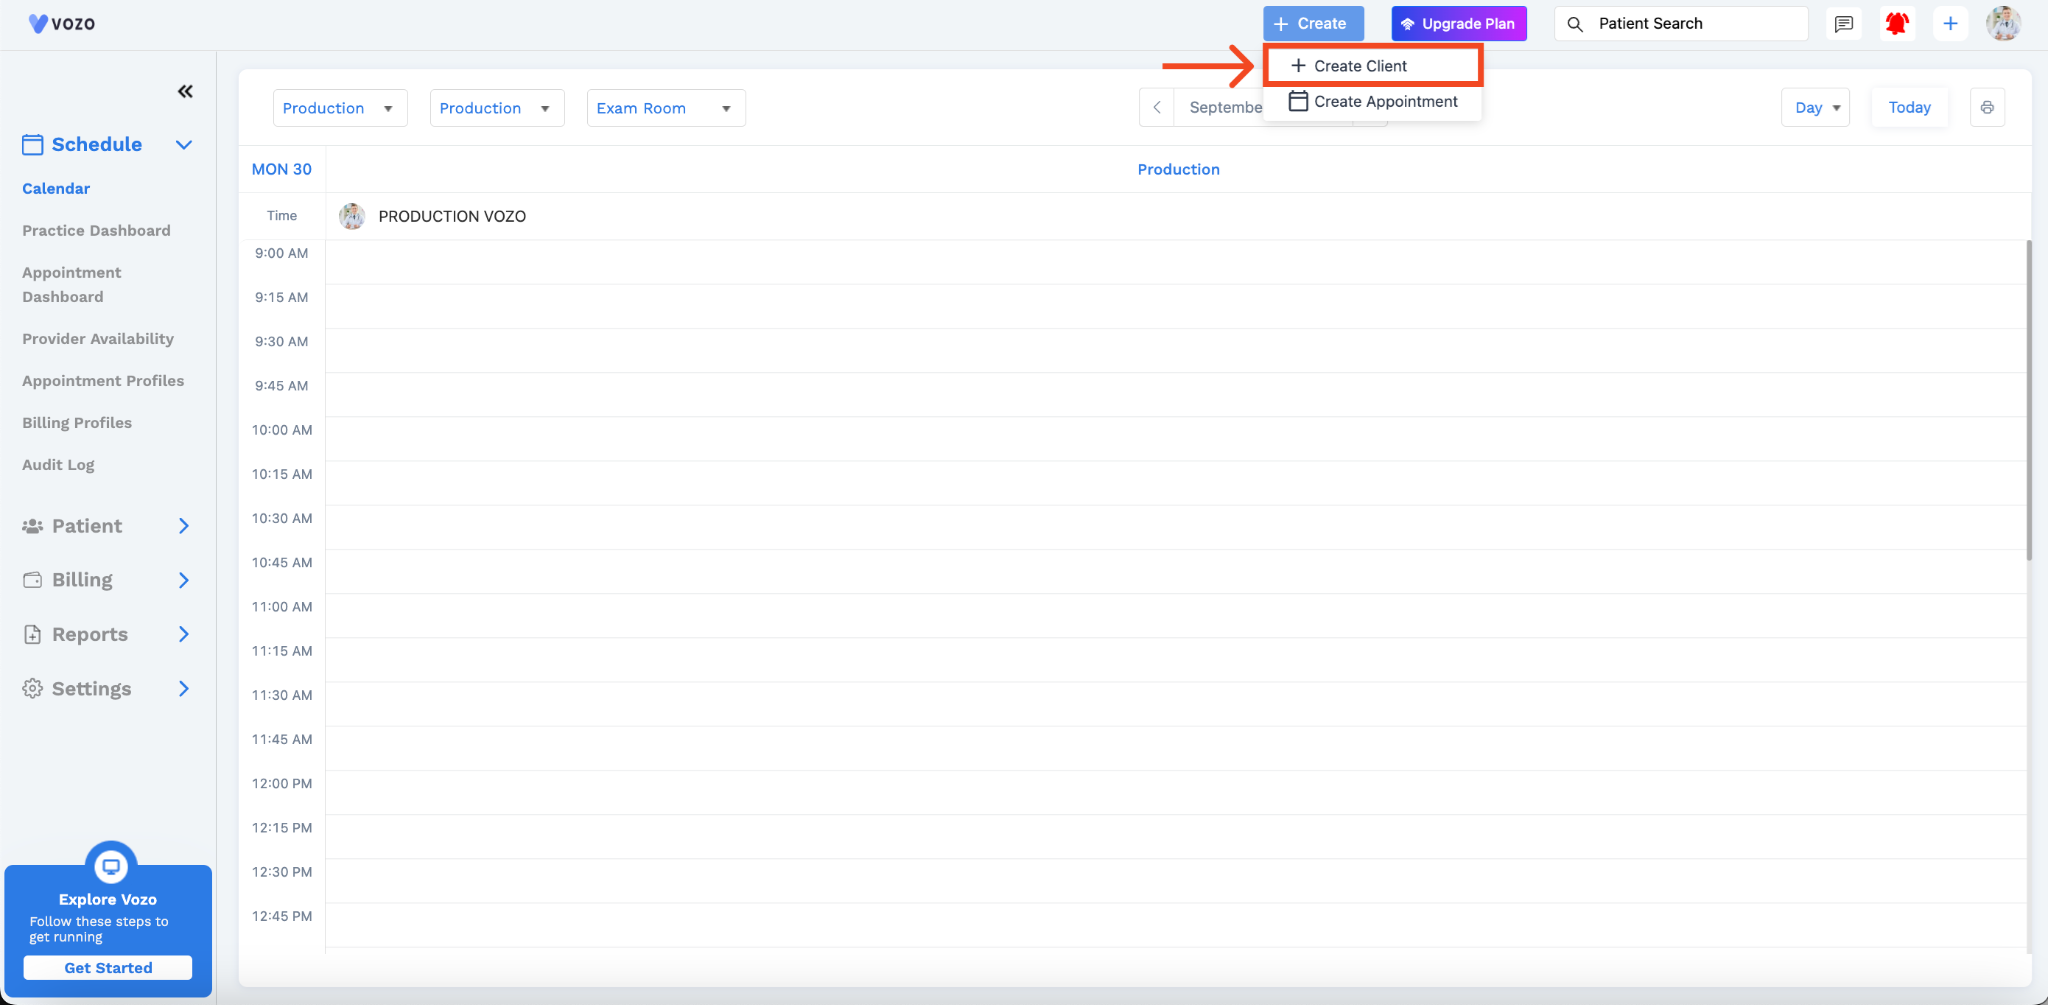
One is by clicking the top “+Create” button in the schedule dashboard and clicking the “+Click Client” option.

create appoinment
Create Client
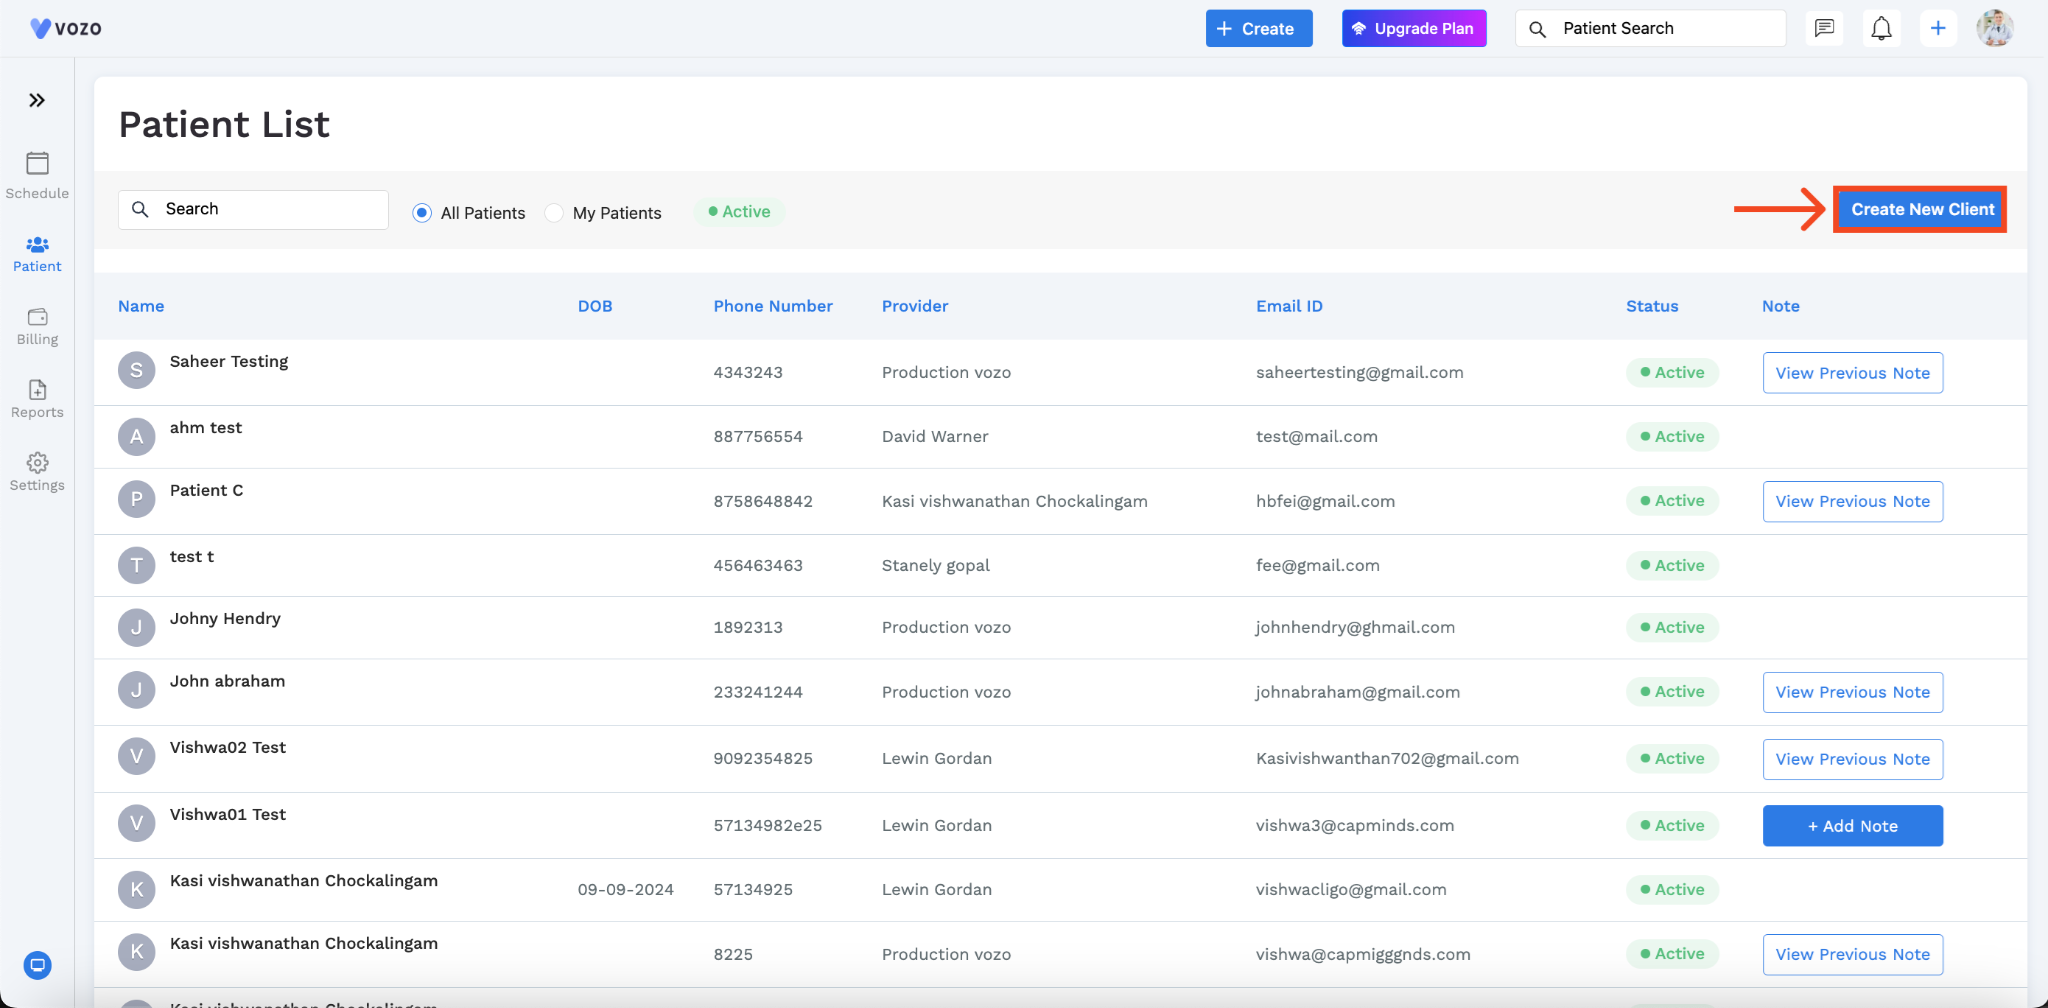
The other one is to navigate to the Chevron Menu (<<) Patient Patients
create appoinment
Create New Client
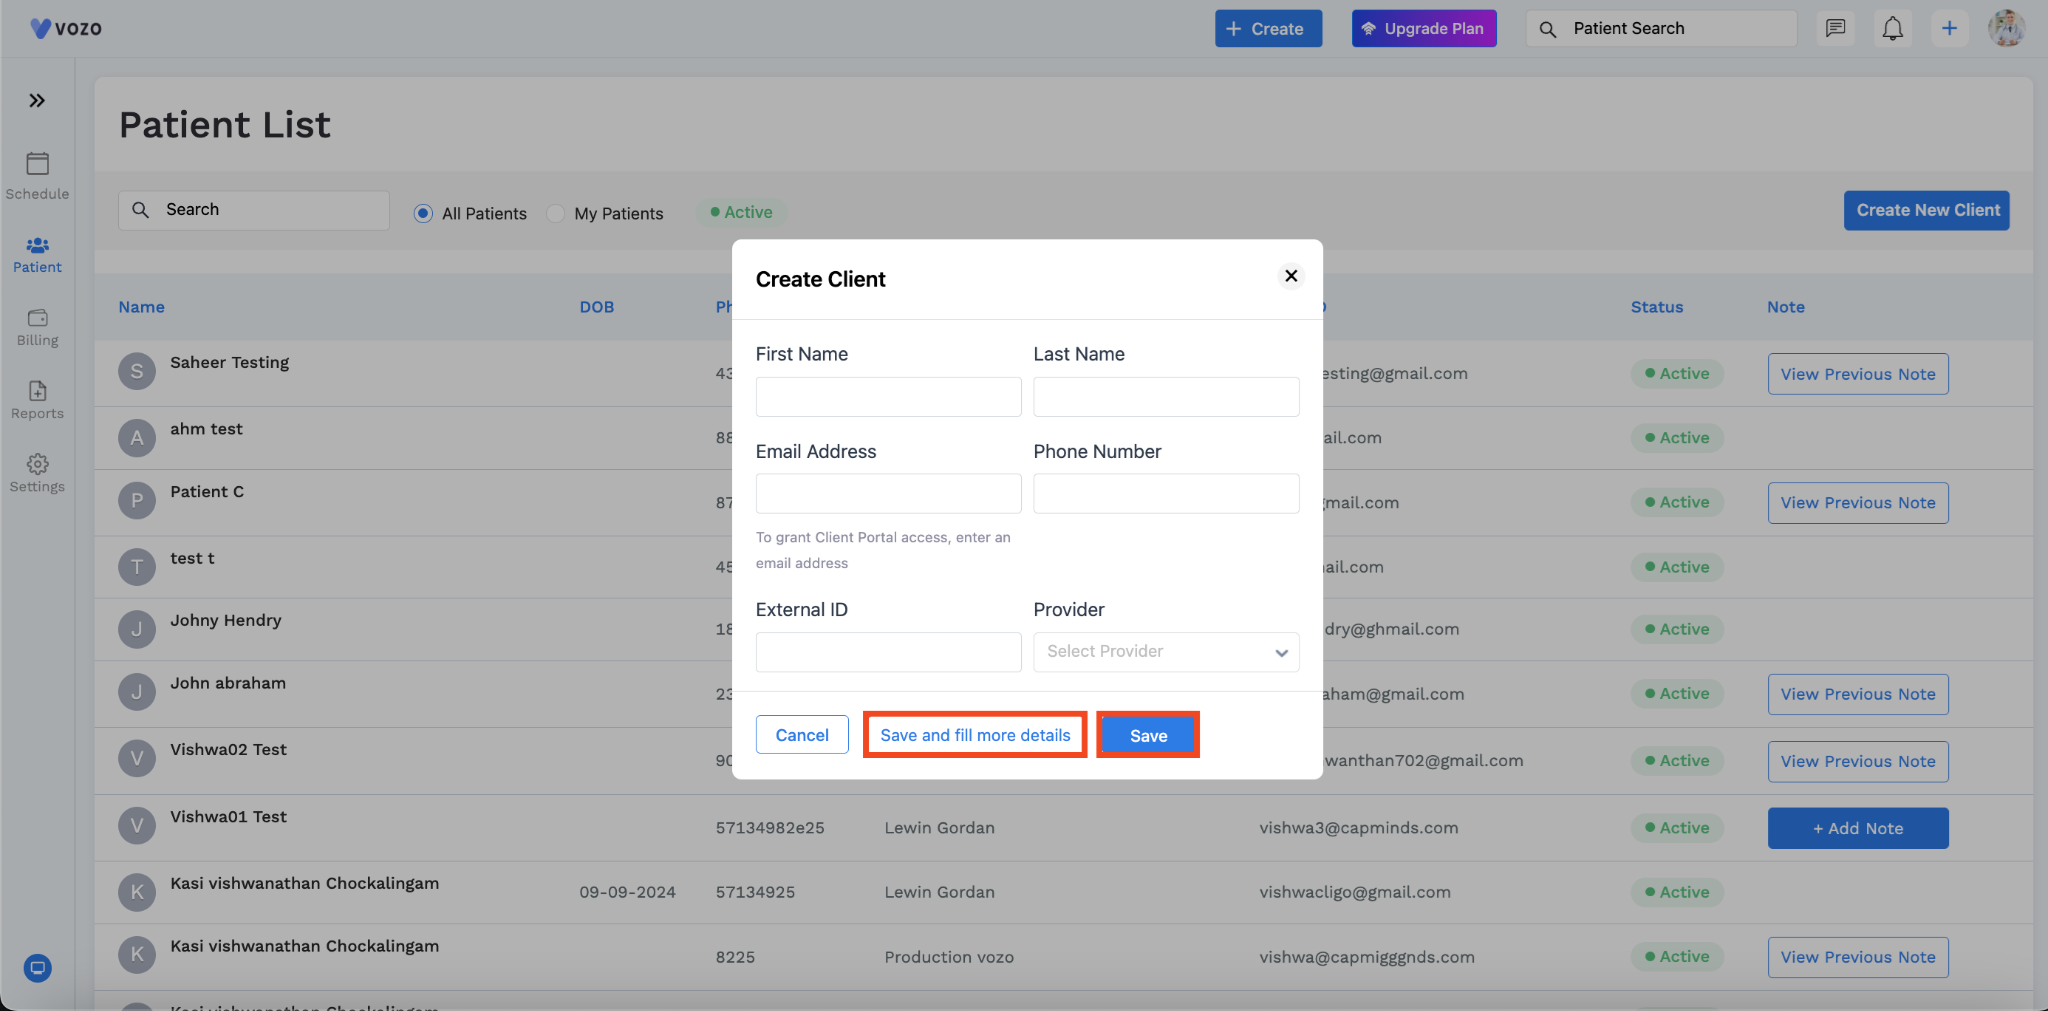
You will be redirected to “Patient List” page where you can see the “Create New Client” Button. By clicking on the “Create Client” button in both of these steps the “Create Client” pop-up will appear.
create appoinment
Save Information and Fill Patient Details

In that popup, you have to enter all the necessary information like:

  • First Name and Last Name of the Client
  • Enter your Email Address and Phone Number
  • External ID (Optional) for the Patient (If the Patient is an established patient in any other EHR platform, they will have a Patient ID which needs to be entered. If the patient is new and is a direct candidate for our EHR they will not have an External ID and it doesn’t need to be entered.)

You can click the Save Button to simply save the Client in the Client List. Or if you want to add additional information for the Client, you can Click “Save and Fill More Details”.

Updating Patient Demographics

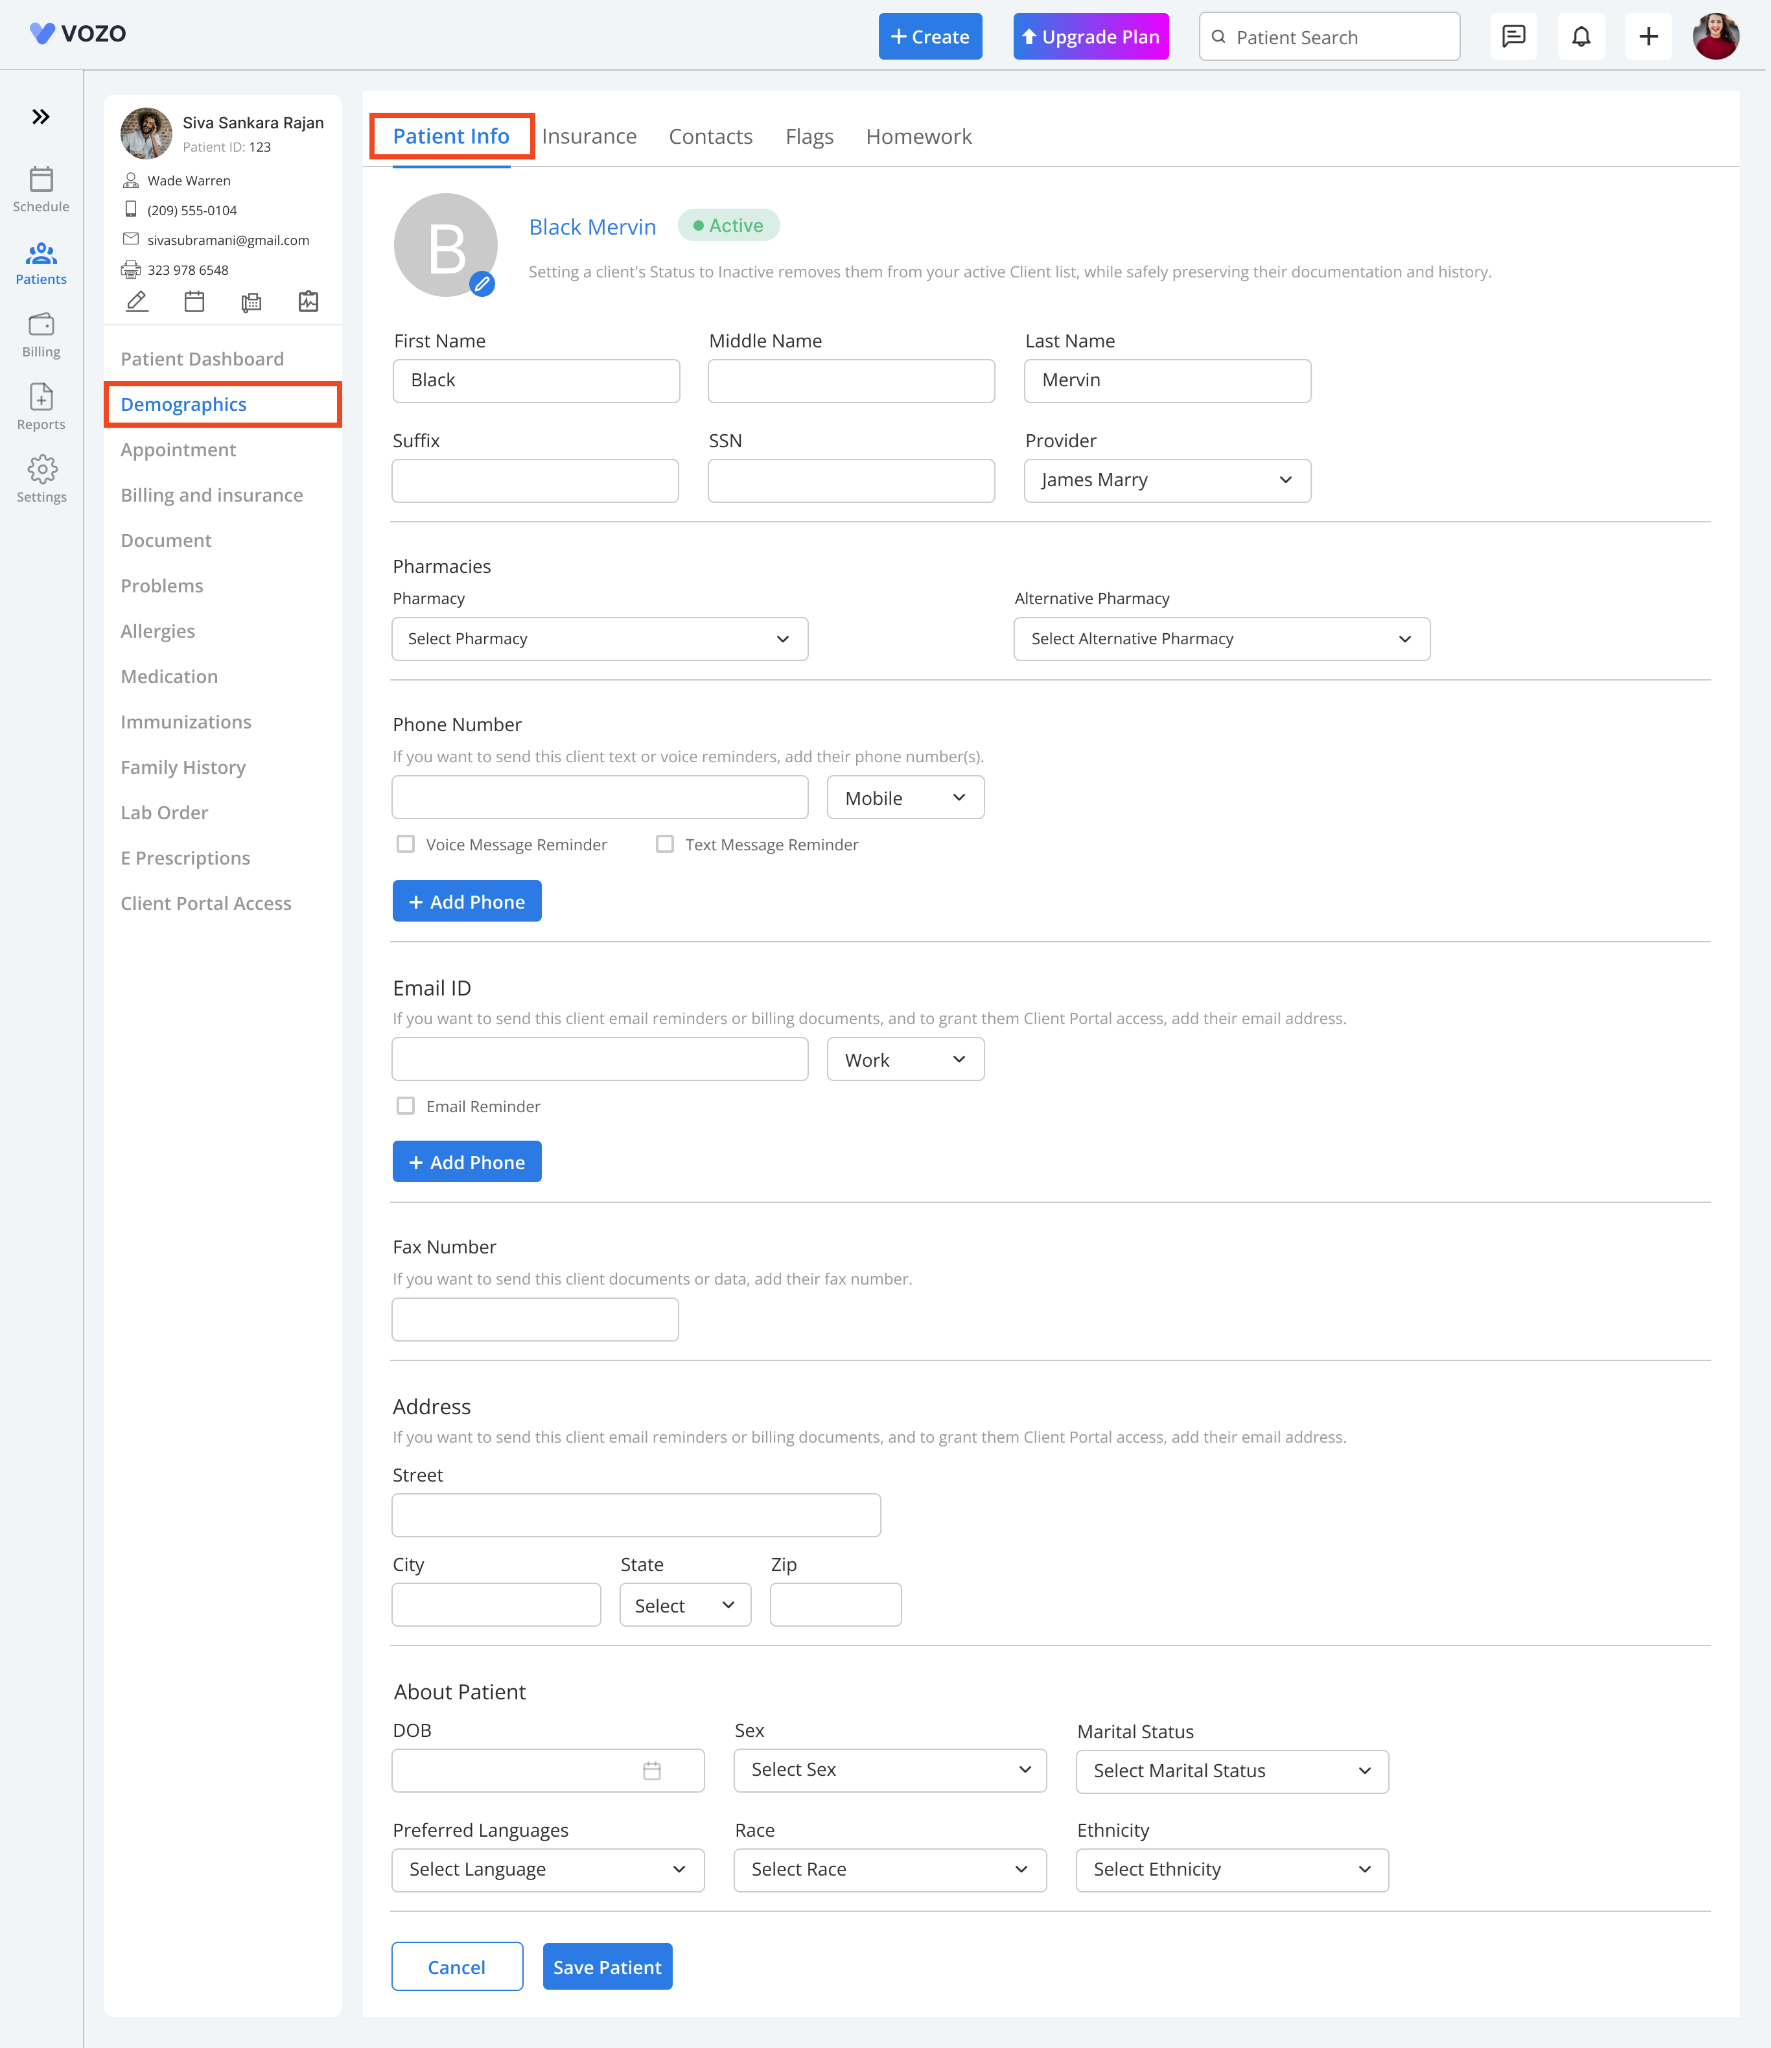
This action will redirect you to the Patient Demographics page.
create appoinment
Fill Patient Demographic Details

Where you can add necessary additional information for the patient like SSN, Client Address (which is required for insurance billing), DOB, Sex, Marital Status, Preferred Language, Race, and Ethnicity.

Then click the “Save Patient” button.

Related Articles

Setting Provider Availability
Editing Appointment Details

form

Need Help? We're Here!

Didn’t find what you were looking for? Submit your query below, and our support team will get back to you shortly.