Editing Appointment Details

Aravind
Aravind
Updated Recently

To edit the appointment details, click on the Scheduled Appointment.
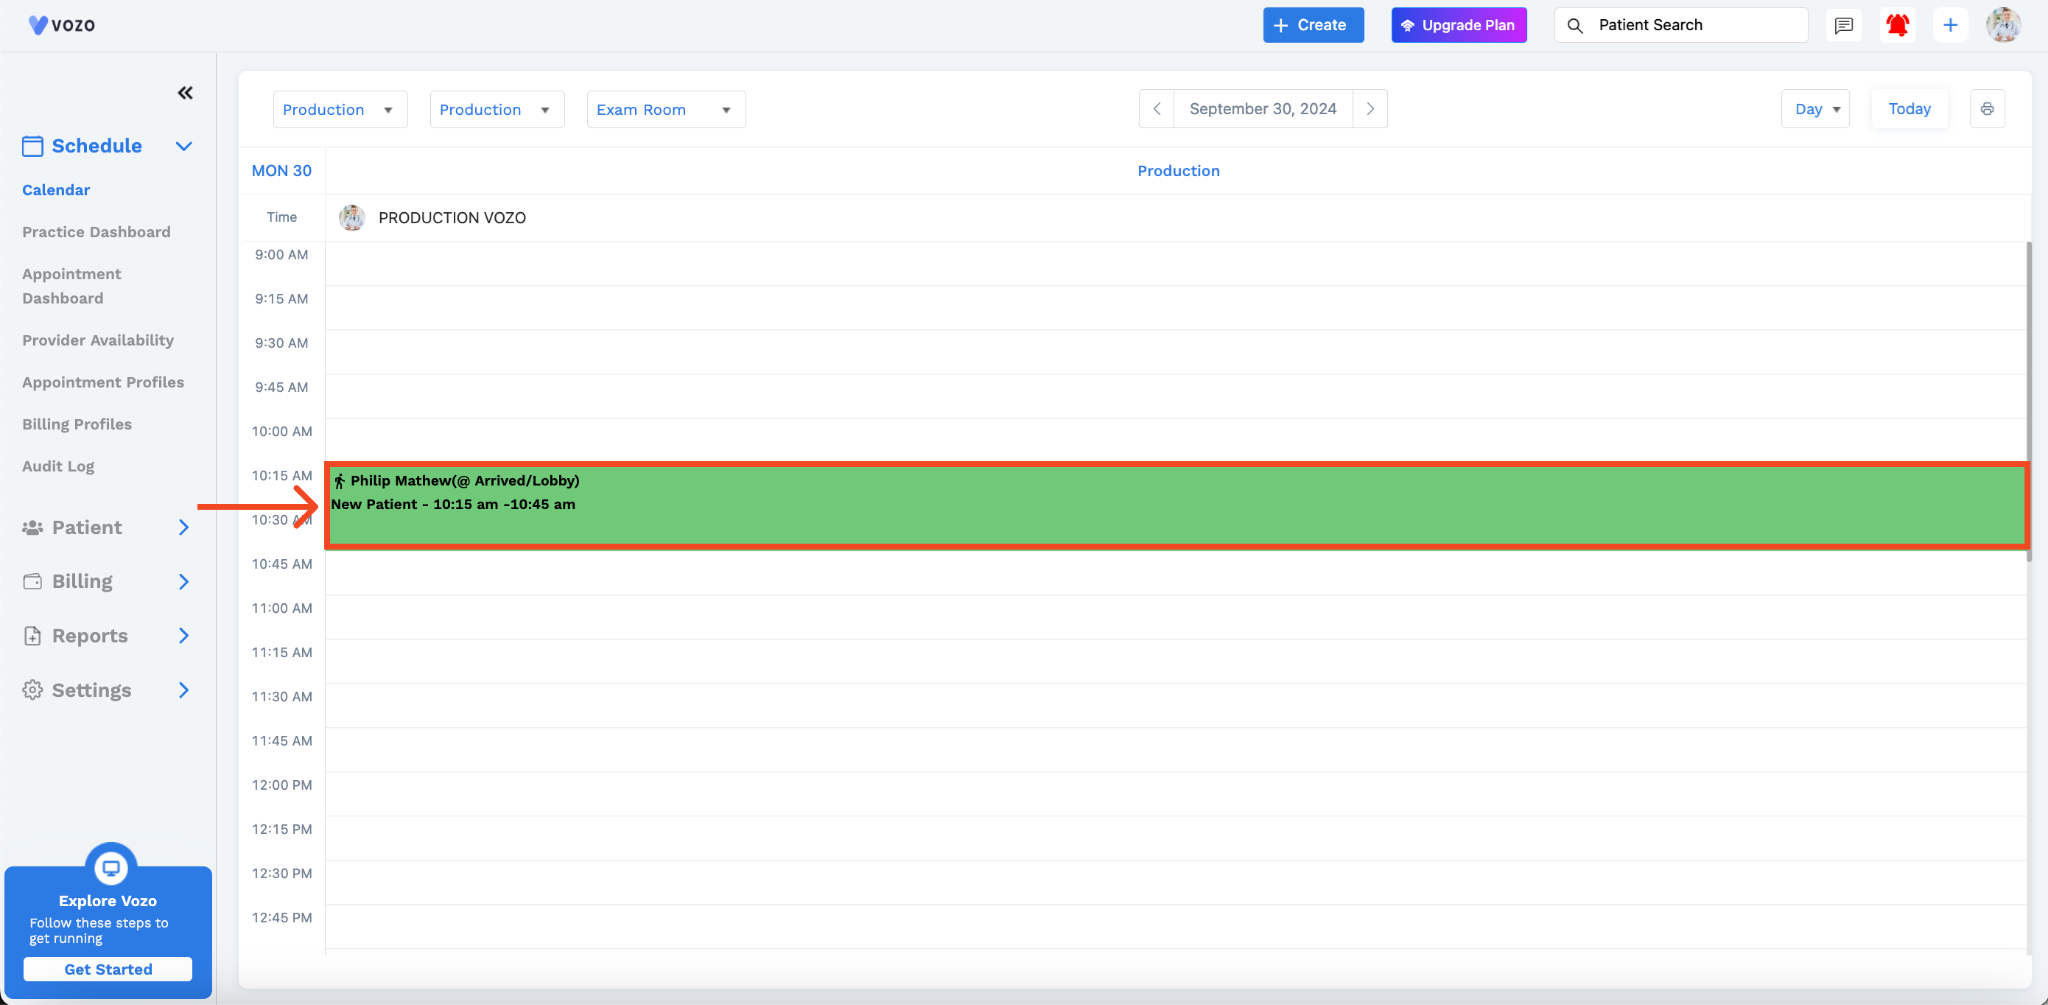
create appoinment
Edit Appointment Details

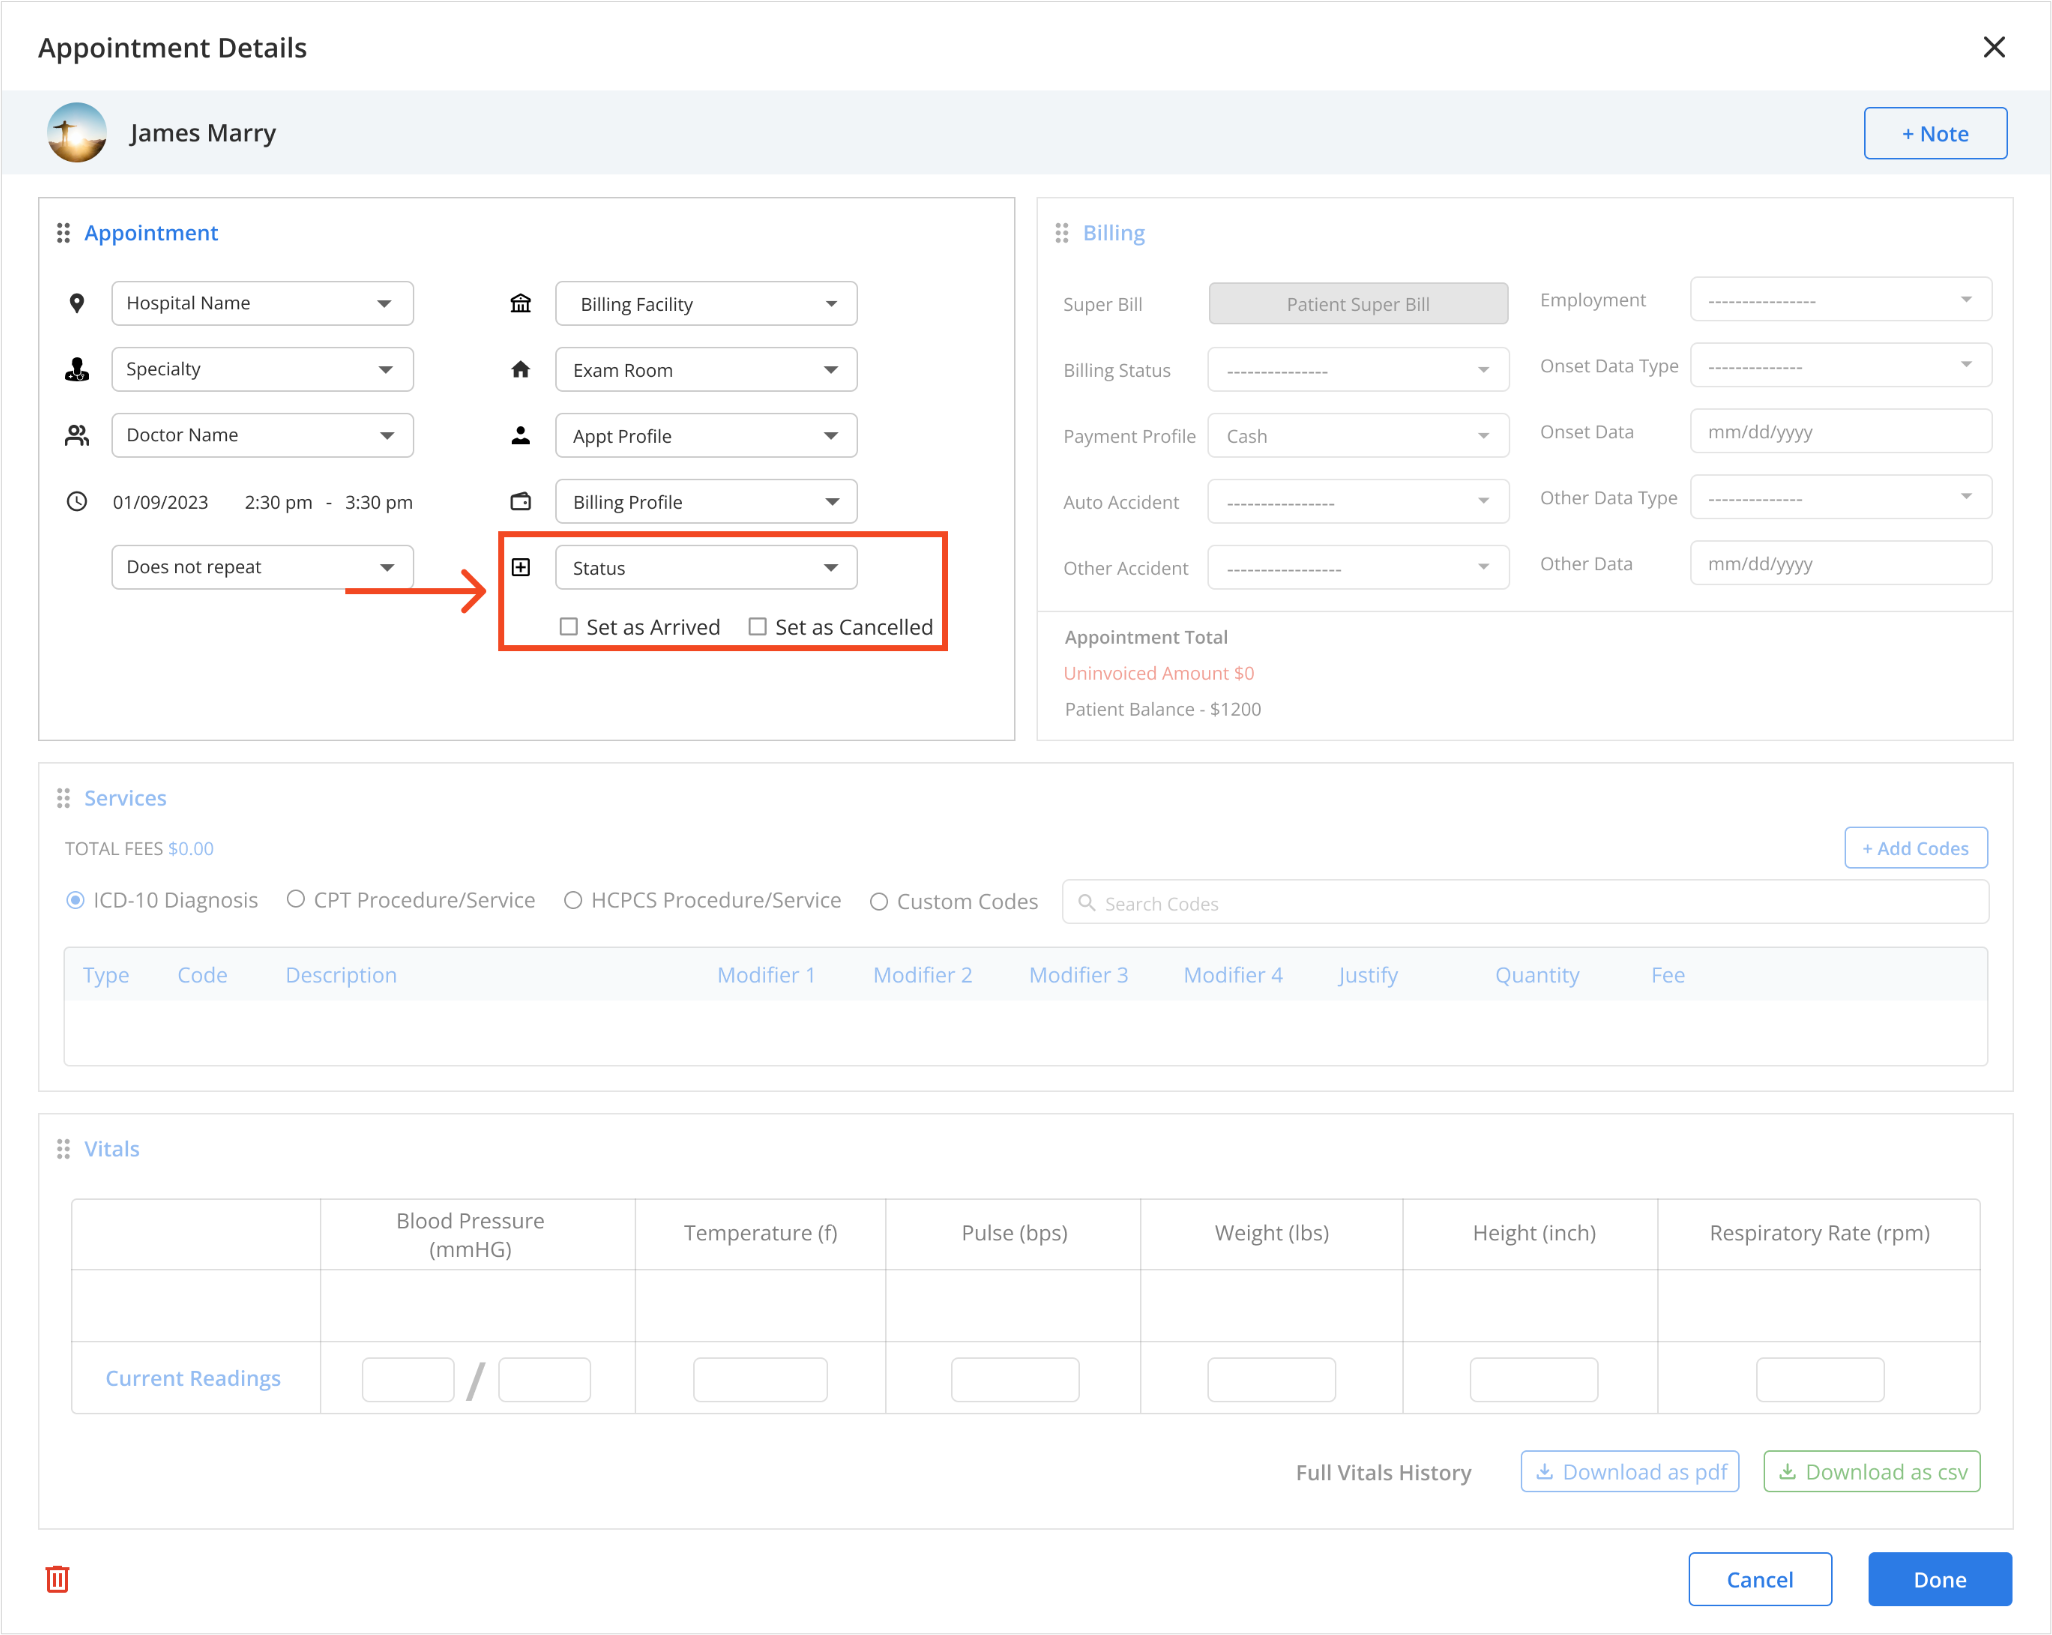
You will be redirected to the Appointment Details popup.
create appoinment
Edit Appointment Details
  • You can edit the appointment by rescheduling, canceling, or editing the session status or details of the appointment.
  • The Services, Billing & Vitals Section is disabled on the page.
  • Once you update the patient status to “Arrived/Lobby” the Billing, Services & Vitals Section will be enabled to edit.
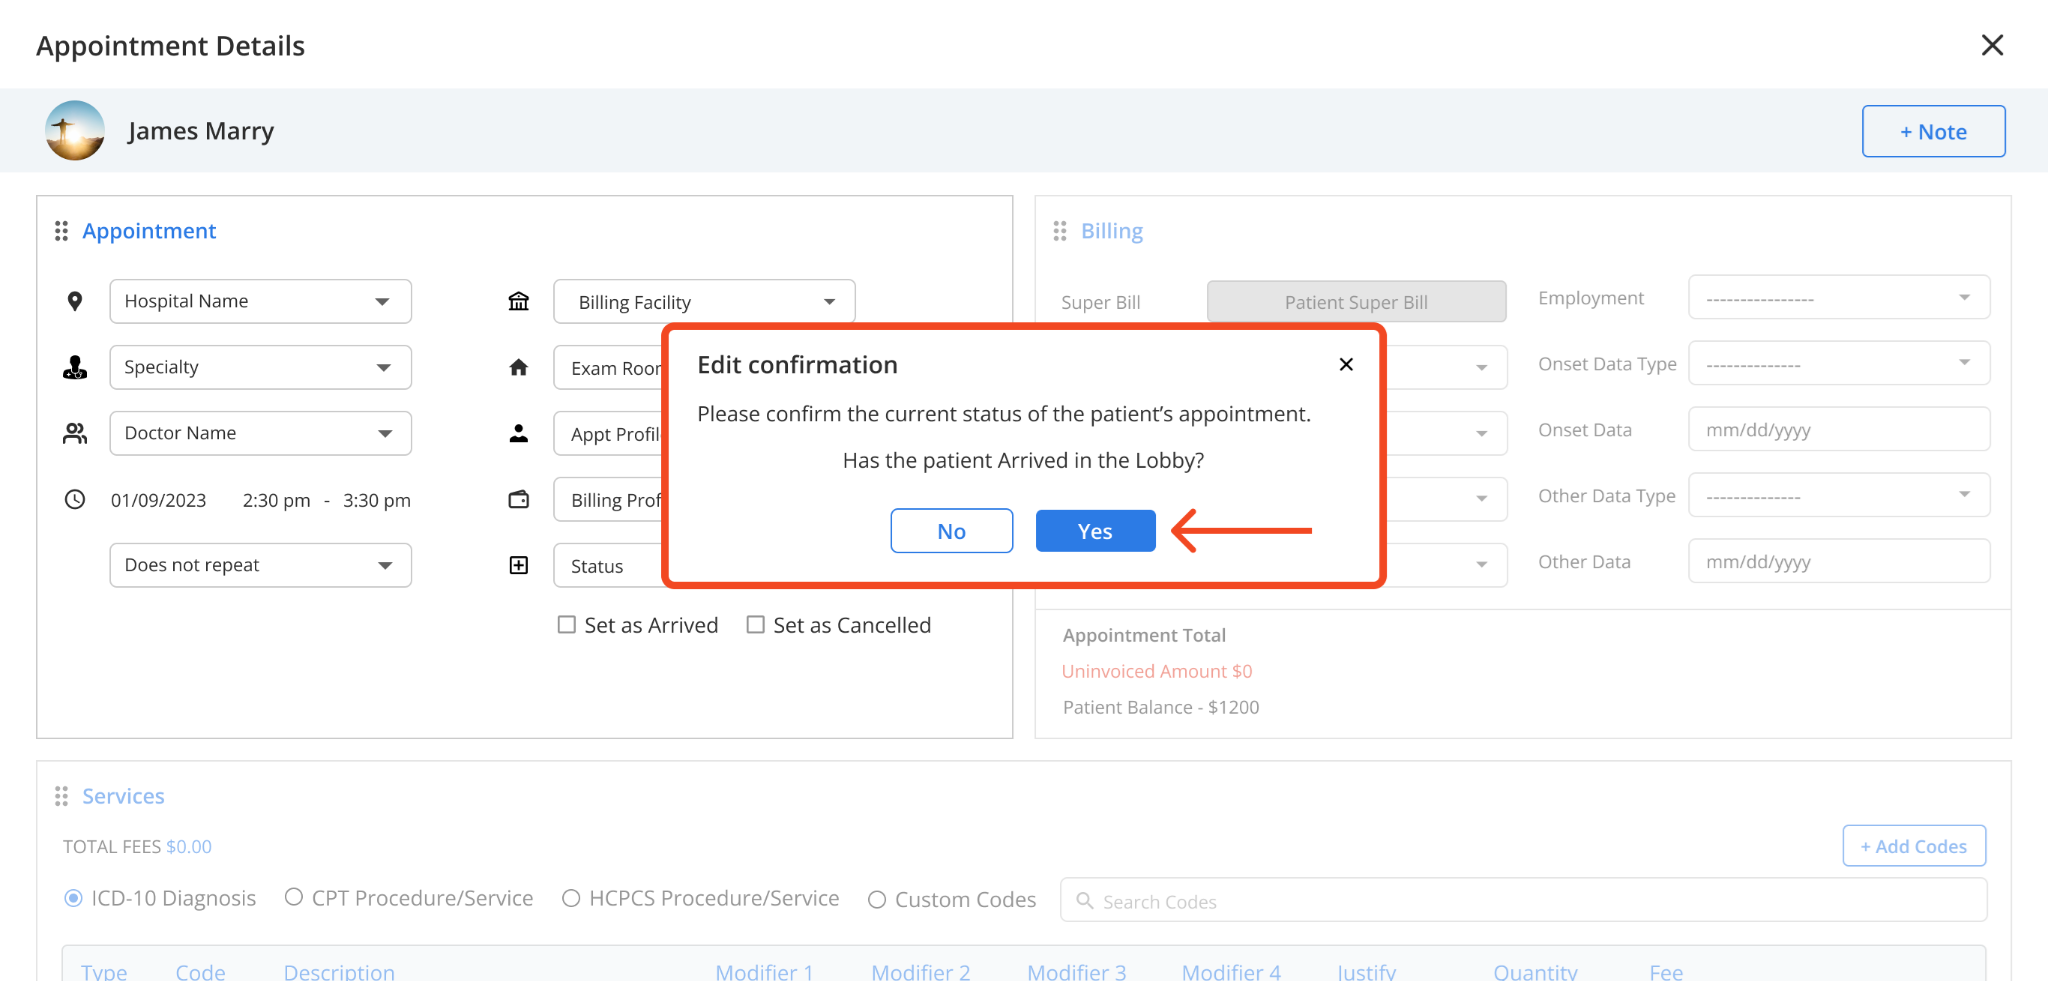
  • Change the Status to ‘@Arrived/Lobby’ in the Appointment Section or Click somewhere in the Billing, Service, or Vitals Section. A popup will appear asking “Whether the patient has arrived at Lobby or not”.
create appoinment
Edit Confirmation

  • Click “Yes”. The Status of the appointment will be automatically changed to Arrived/Lobby.
  • Once the Status is changed to “Arrived/Lobby”, you cannot change or edit the appointment again.
  • Now you can add diagnosis & procedural services for the patient based on the appointment.
  • You can now Bill for the services rendered.
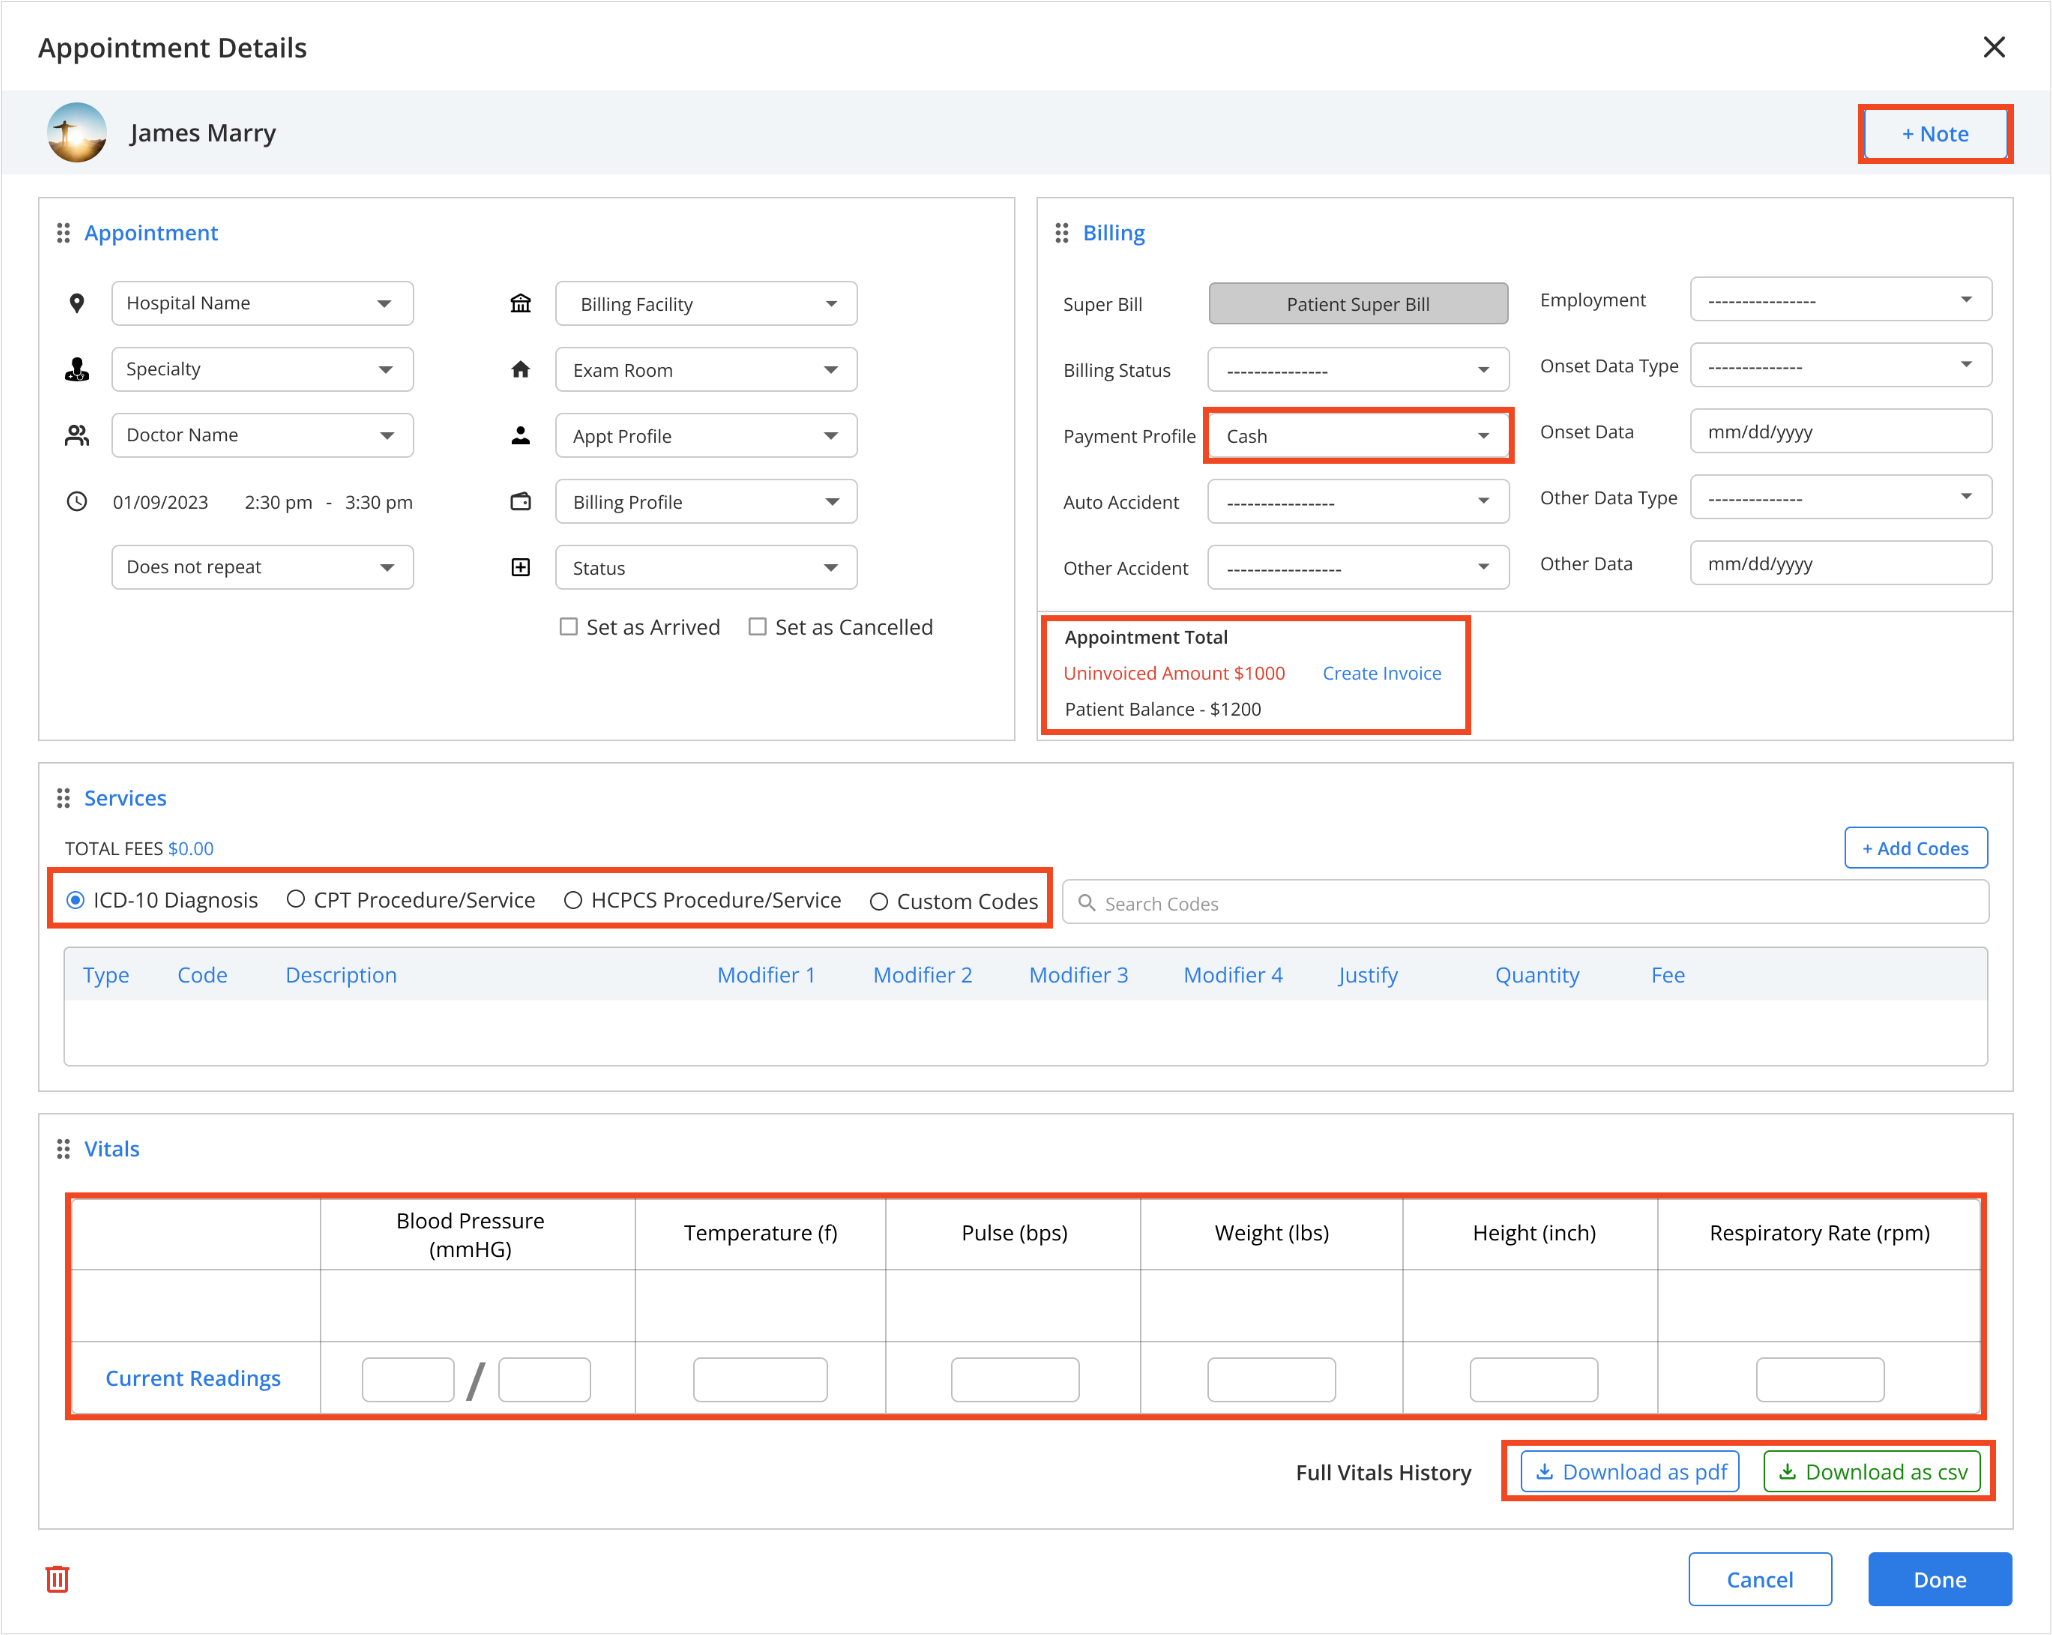
  • To do that, scroll down to the Service section.
create appoinment
Appointment Details
  • ICD-10 Diagnosis
  • CPT Procedure/Service
  • HCPCS Procedure/Service
  • Custom Codes

For ICD-10, CPT HCPCS & Custom code, click on the radio button to select the code.

Then on the right side, you can see the “Search Bar”

Click it and enter the diagnosis or procedural code for the service provided.

Then generate Billing for the provided services by selecting the “Payment Type” as ‘Cash’ or ‘ Insurance’.

If you have selected the ‘Cash’ payment then you can create an invoice for the said services and can pay the amount using cash, credit card, stripe, & cheque.

If you have selected the ‘Insurance’ payment then if a Co-pay is available you can create an invoice otherwise you can directly go to the “Insurance claims” page and generate a claim form for the said appointment.

In the Vitals section, you can add the Vitals info of the patients and view the last updated vital info too.

If needed, you can download the vitals as a PDF or CSV file by selecting the appropriate option.

After entering all the details click on the “Done” button to save the information.

Related Articles

Setting Provider Availability
Editing Appointment Details

form

Need Help? We're Here!

Didn’t find what you were looking for? Submit your query below, and our support team will get back to you shortly.