Electronic Remittance Advice (ERA) Processing
Updated Recently
Overview
How to process ERAOnce the submitted insurance has been claimed from the insurance payer side they will send an ERA file containing the claim payment and write off details of the patient’s.
So to allocate the payments from the ERA file to the application to close the appointment and its billing proceed with the following process.
The Insurance Payer will provide an ERA file which you have to upload to the EHR system.
Go to: Chevron Menu (<<) → Billing → ERA.
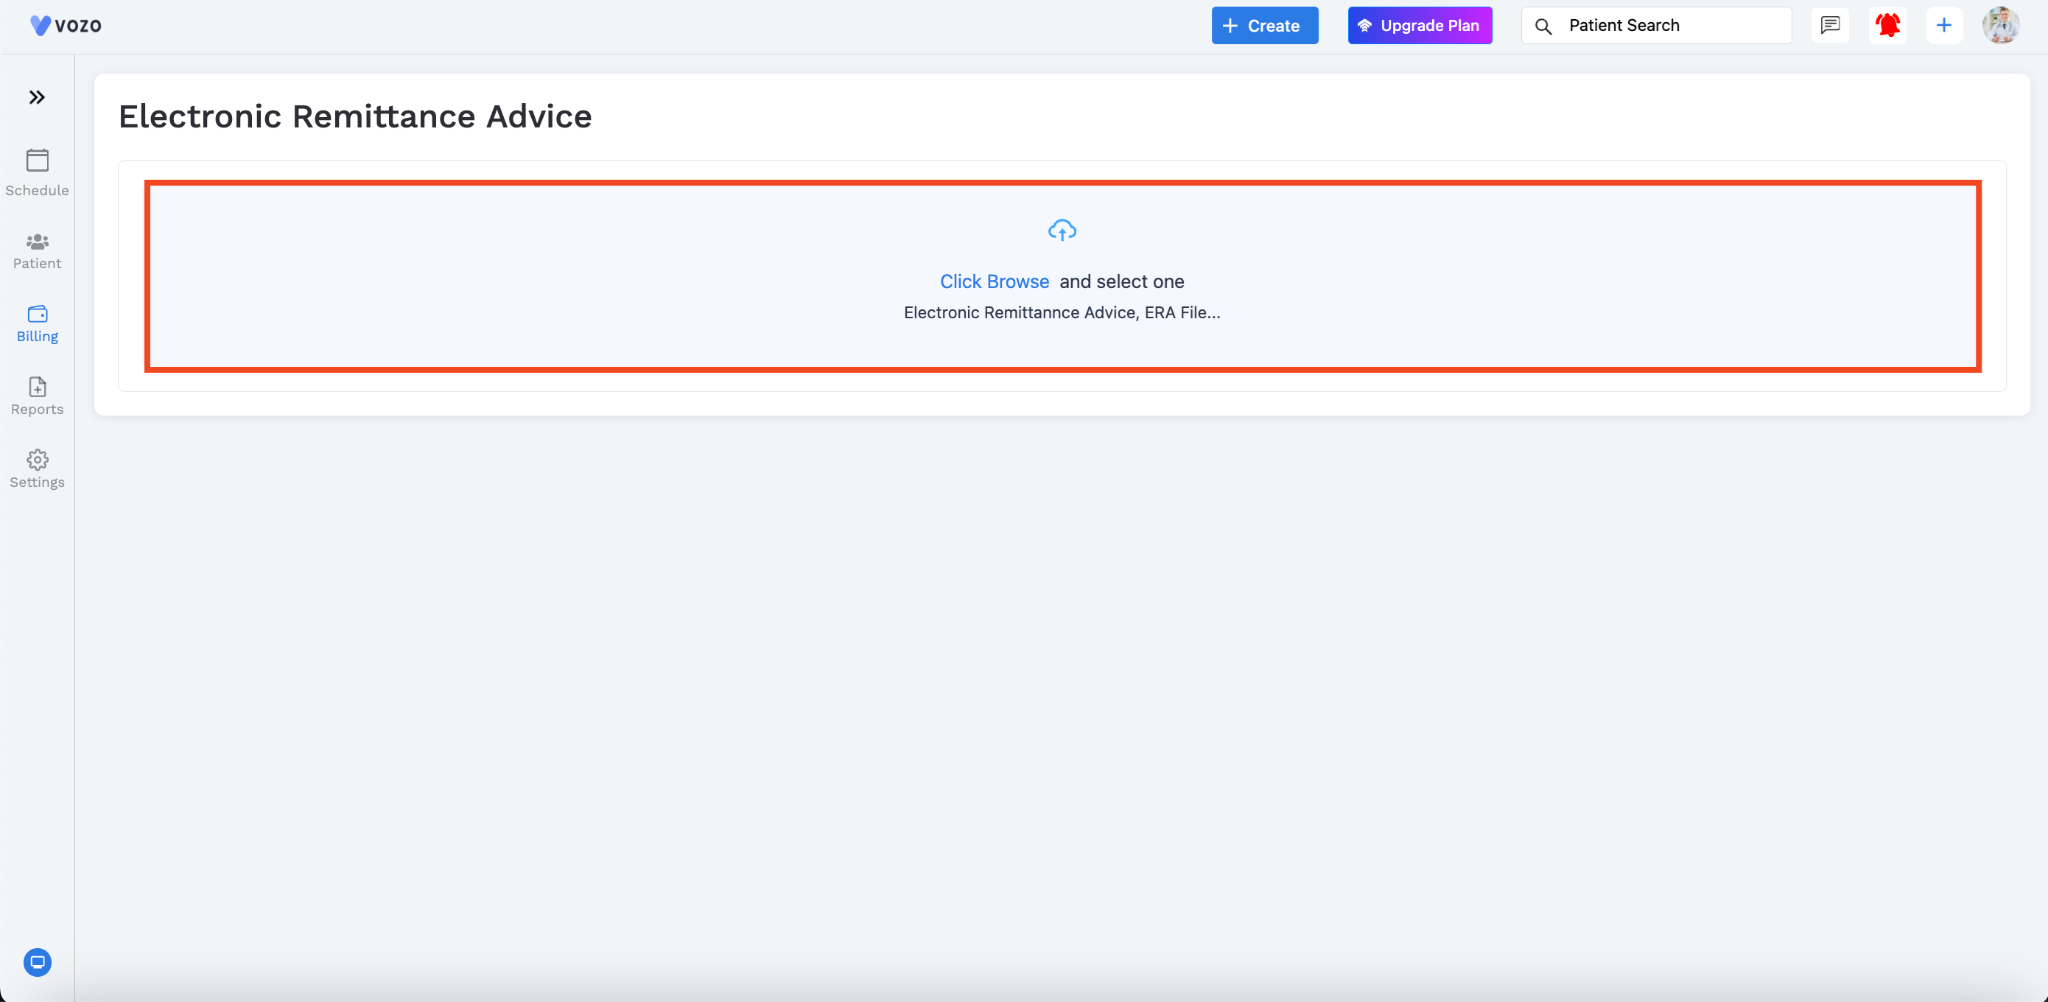
Upload the 835 ERA file which was provided by the insurance payer.
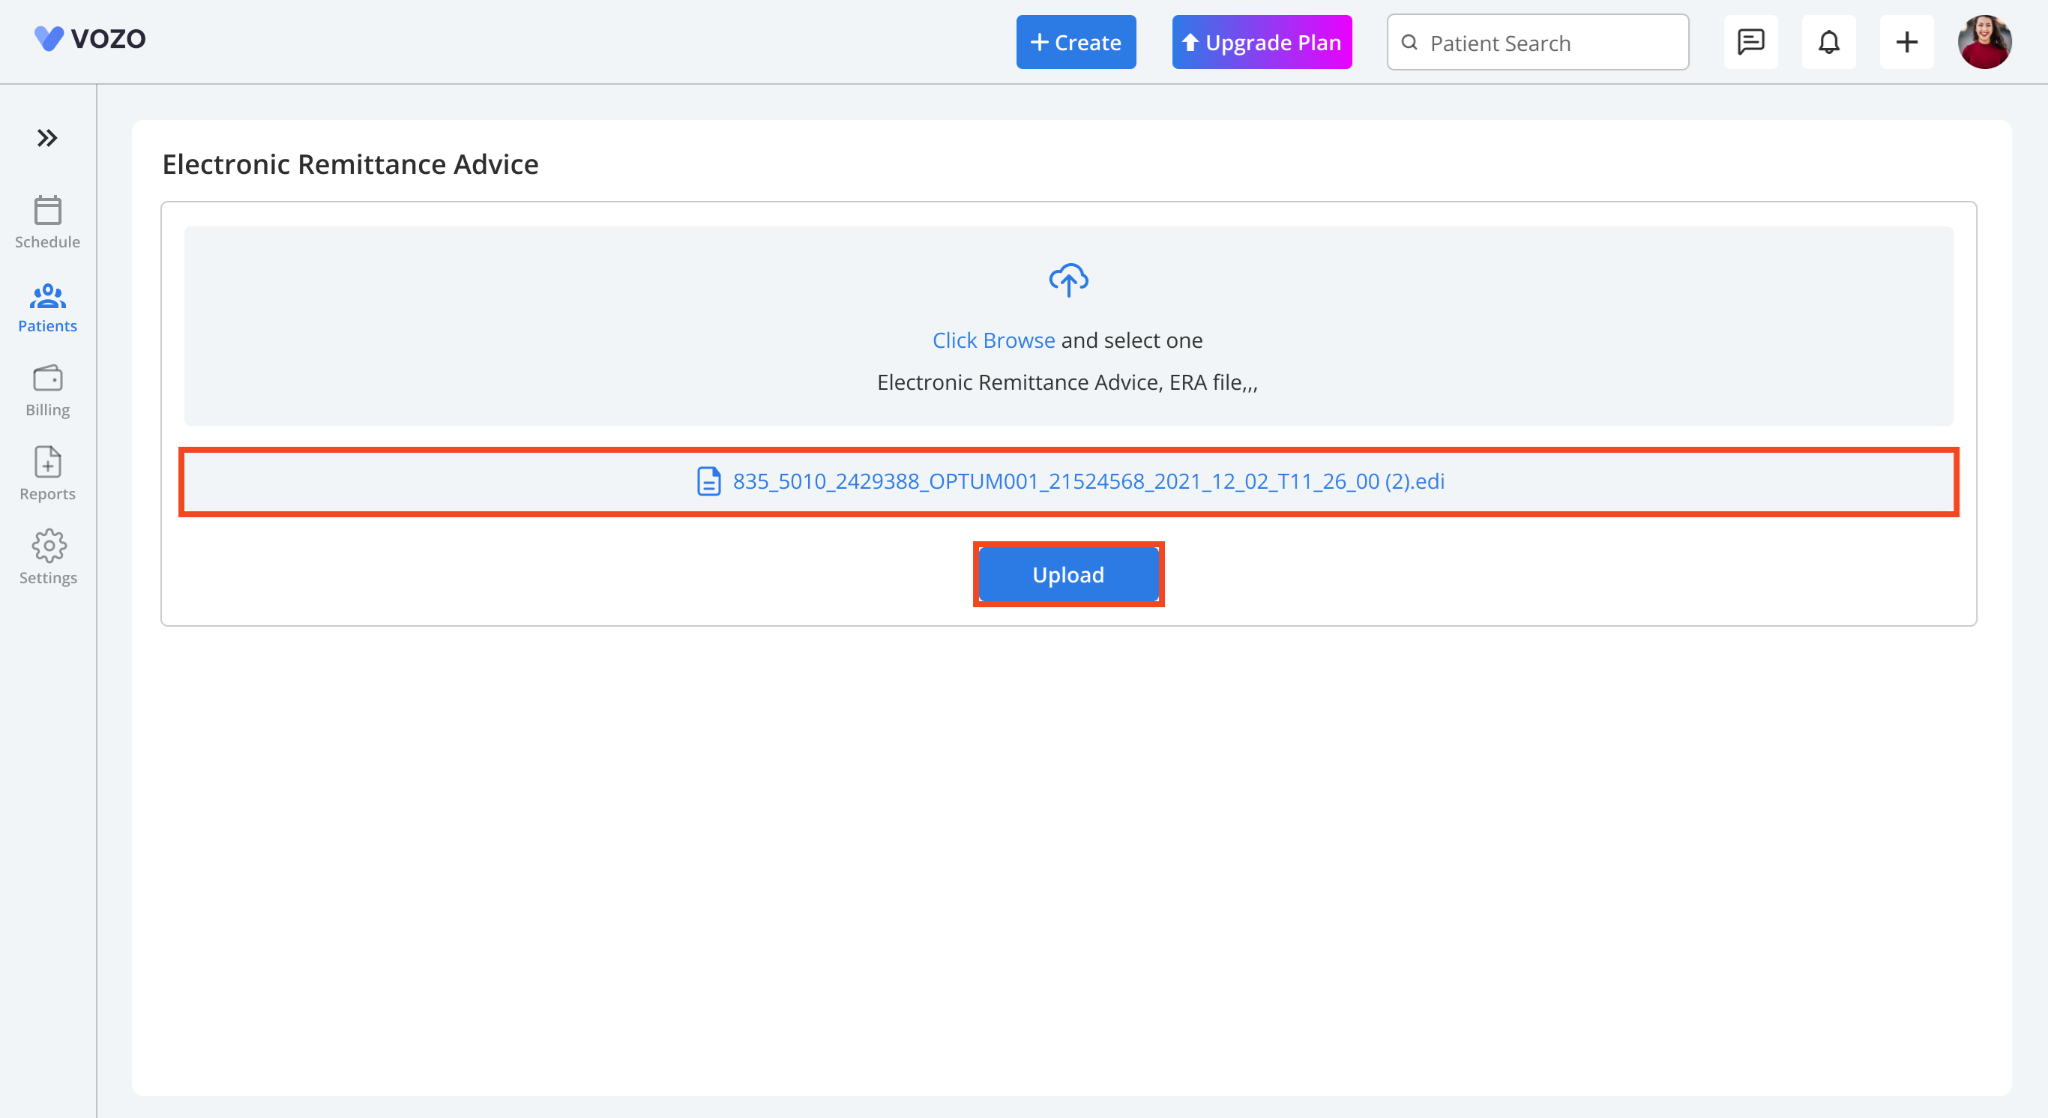
After uploading the file, the system will automatically process the file, extract details, and list down the following:
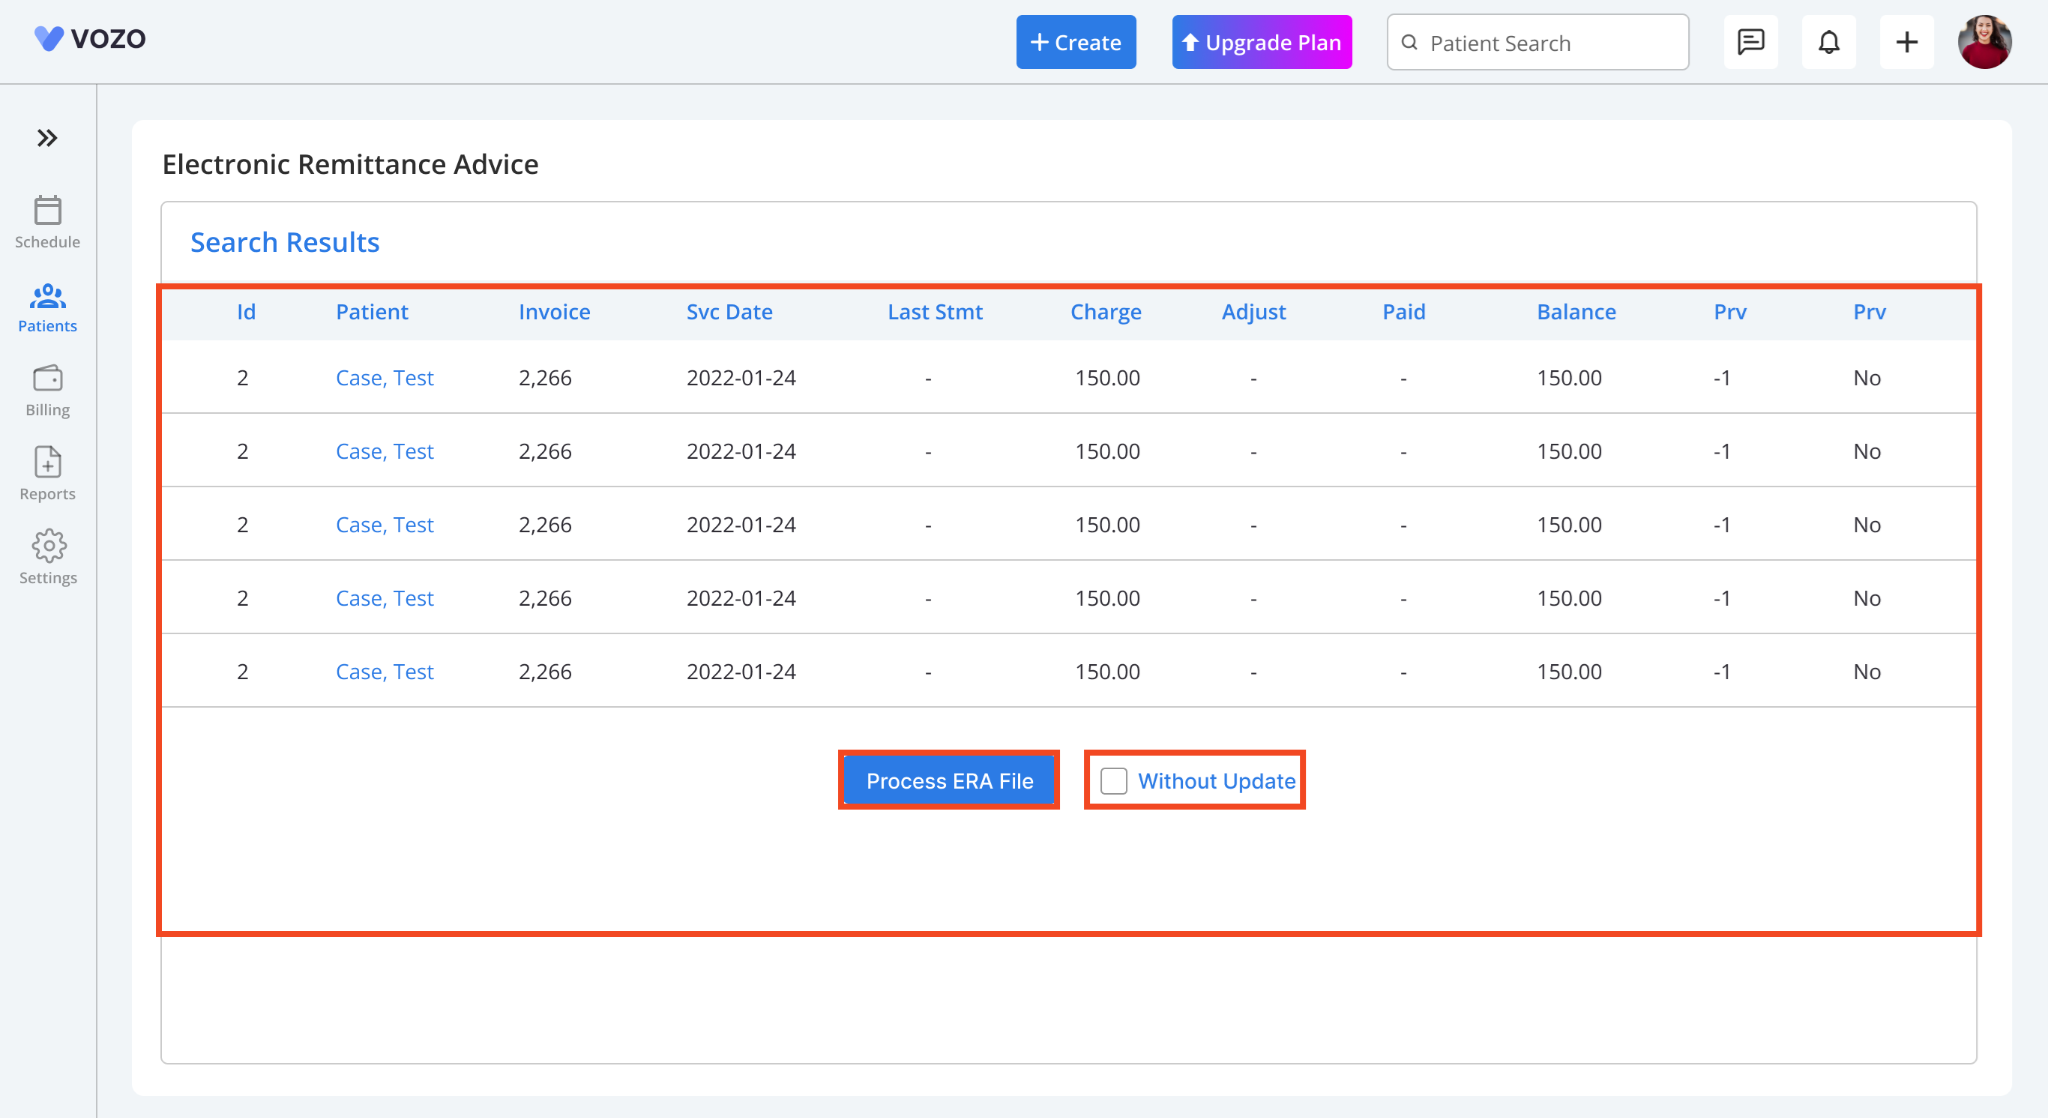
If you click on the “Process ERA file” button, a pop-up will appear displaying the multiple checks respective of their insurance payer with their check numbers and the check amount that can be paid.
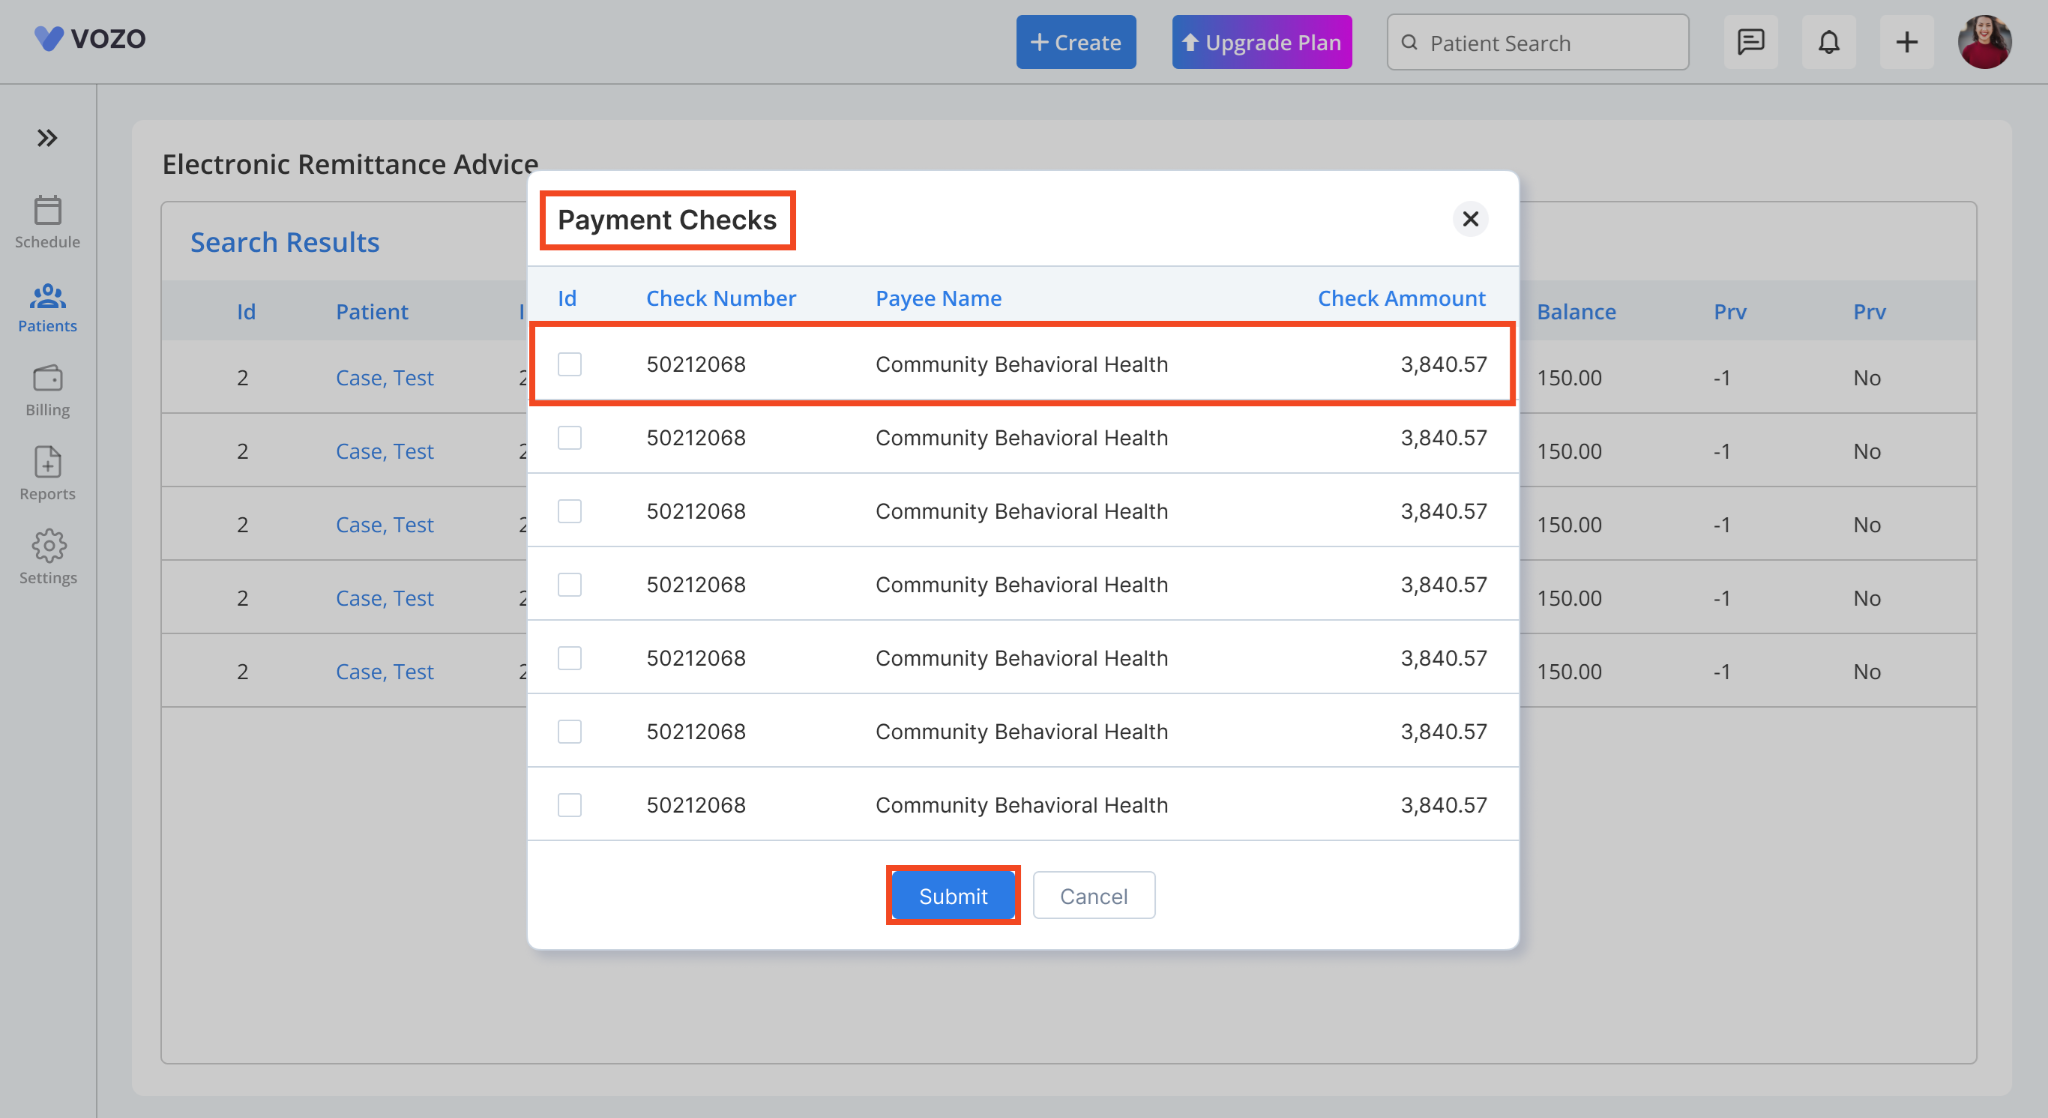
The provider can select any specific check number by ticking the “check box” and clicking on the “Submit” button to proceed with the payments with this check number for the respective appointments.
After clicking on the “Submit” button you will be redirected to the payment details page where you can view the payments made with the check from the insurance payers for the patients based on their appointments and services.
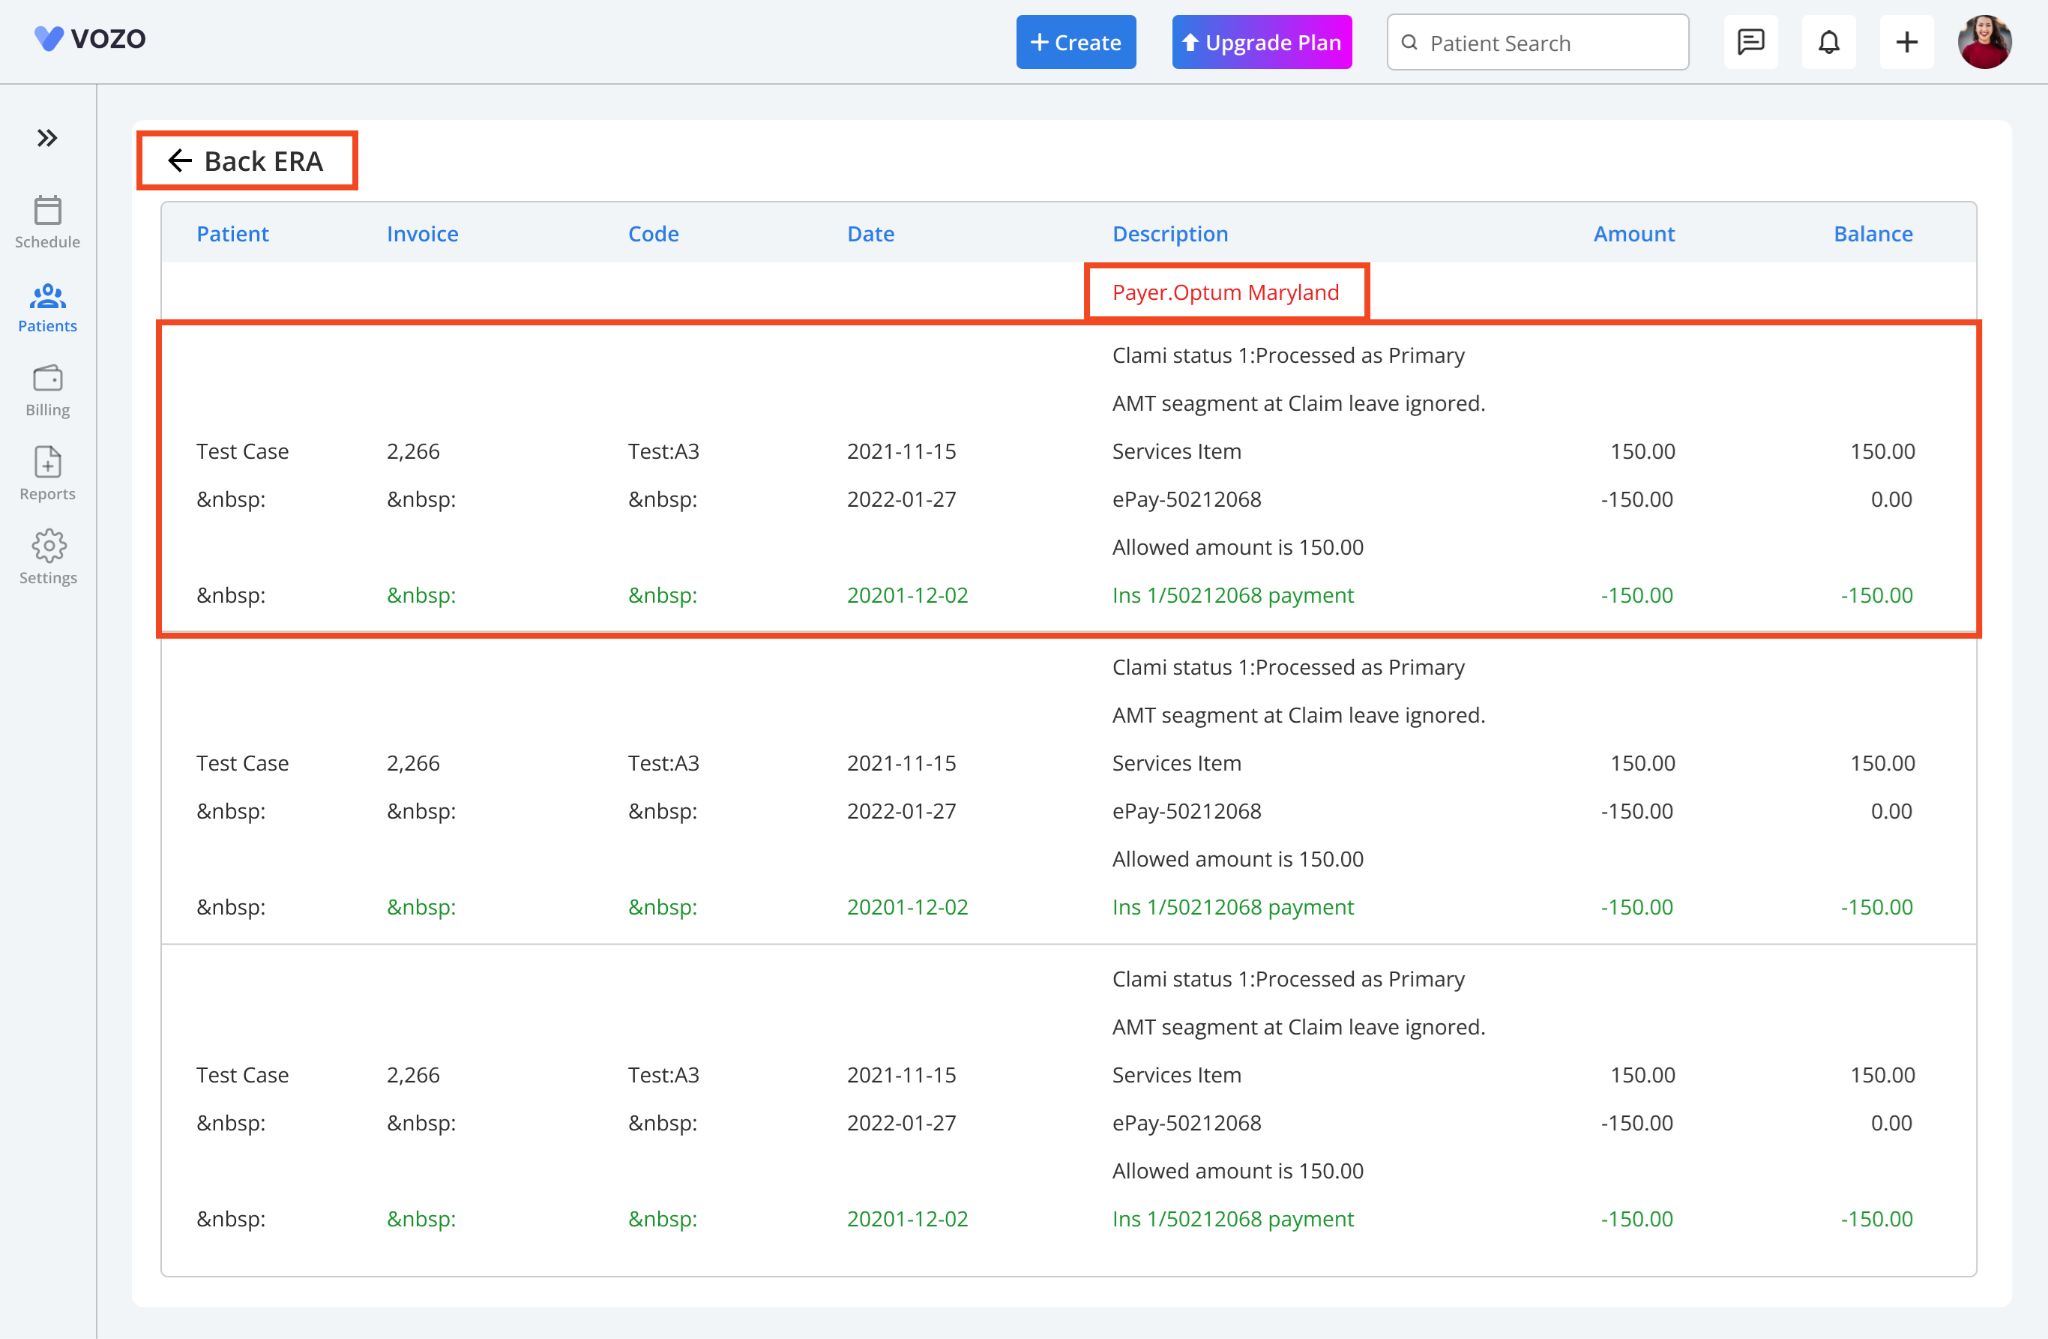
The paid amounts will be highlighted in green color displaying the paid amount and their balance.
This denotes the completion of the ERA payment process.
Once you click on the “Back ERA” button, you will be redirected to the ERA posting payment page where you can upload other ERA files to proceed with further payments for other appointments.
To view the overall claim payment from the ERA file which is done based on multiple checks you can view them in the Remittance report.
Go to: Chevron Menu (<<) → Reports → Remittance report
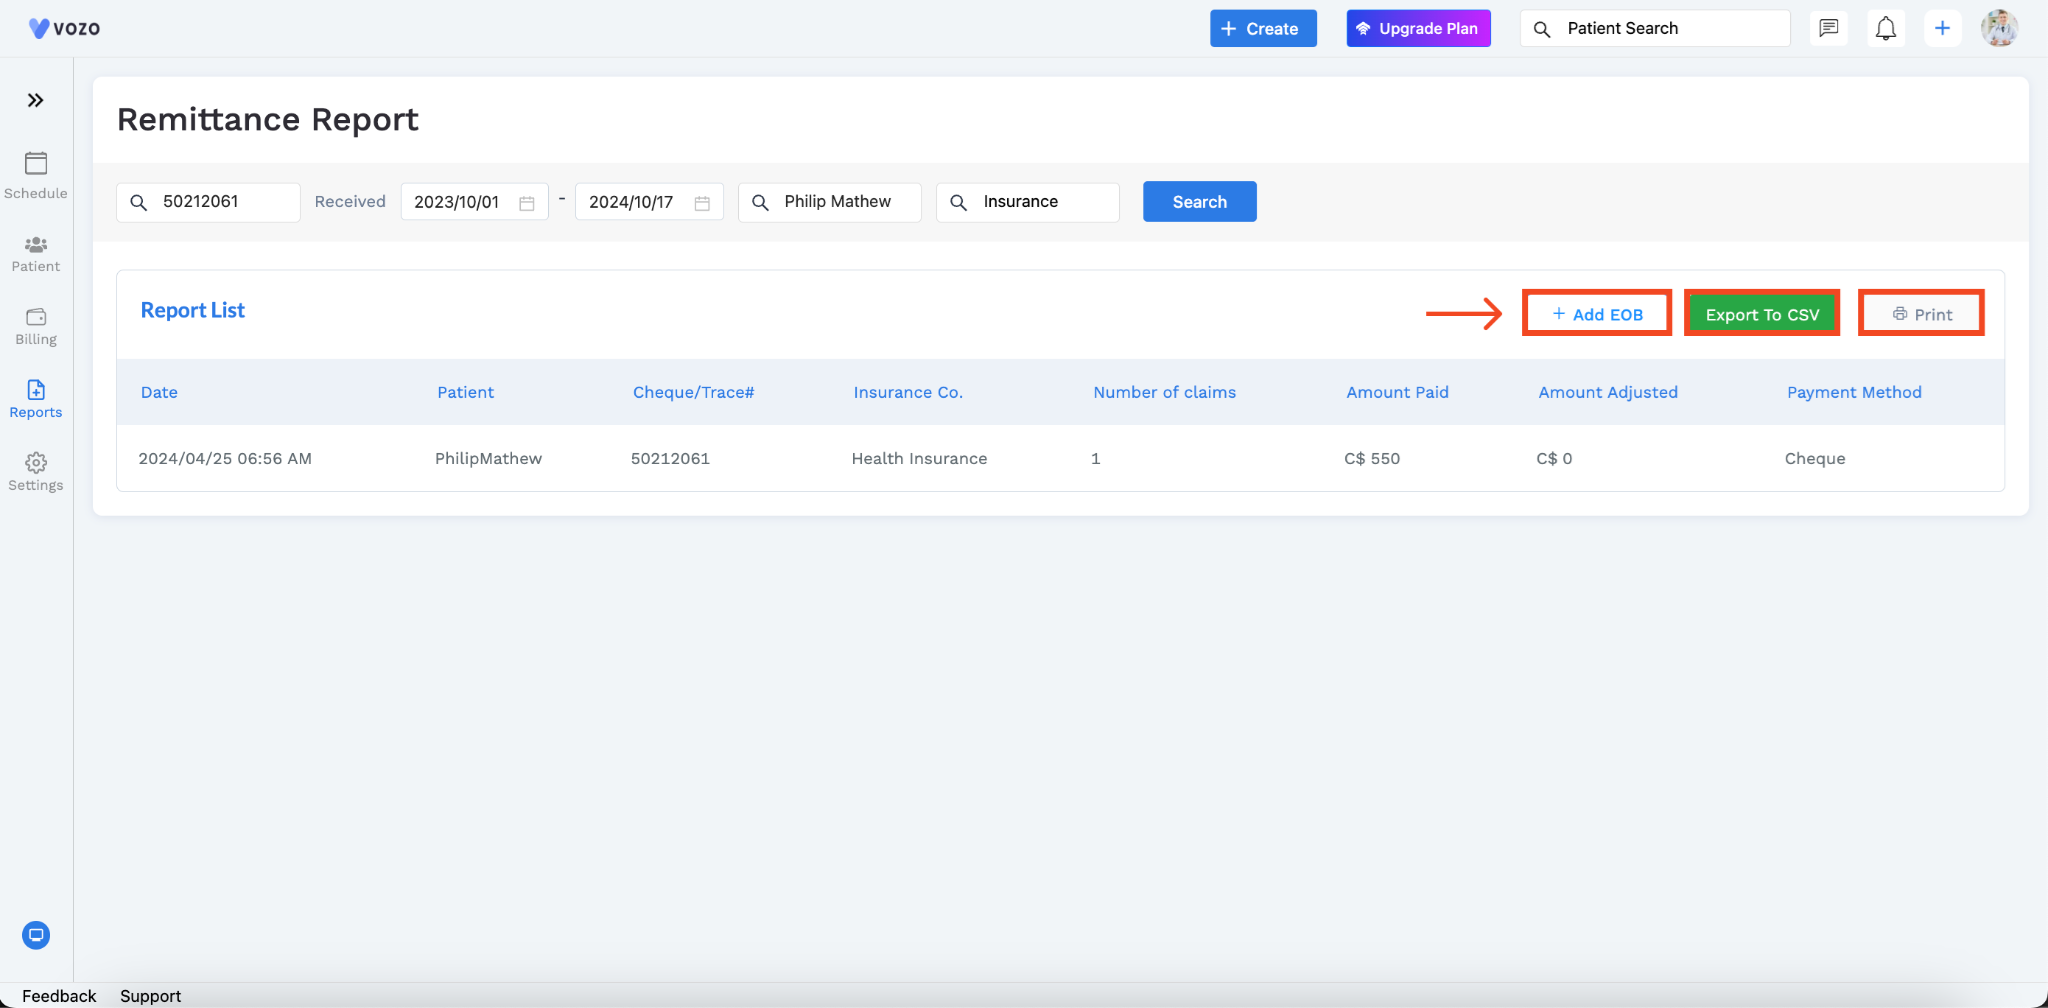
To view specific reports, you can filter based on the Check/Trace number, file received from date to date, patient name, and insurance payer name.
Then click the “Search” button.
The system will provide you with a customized remittance report.
In the report, you can view various details such as:
Click on the “Export to CSV” to download the remittance report in CSV format.