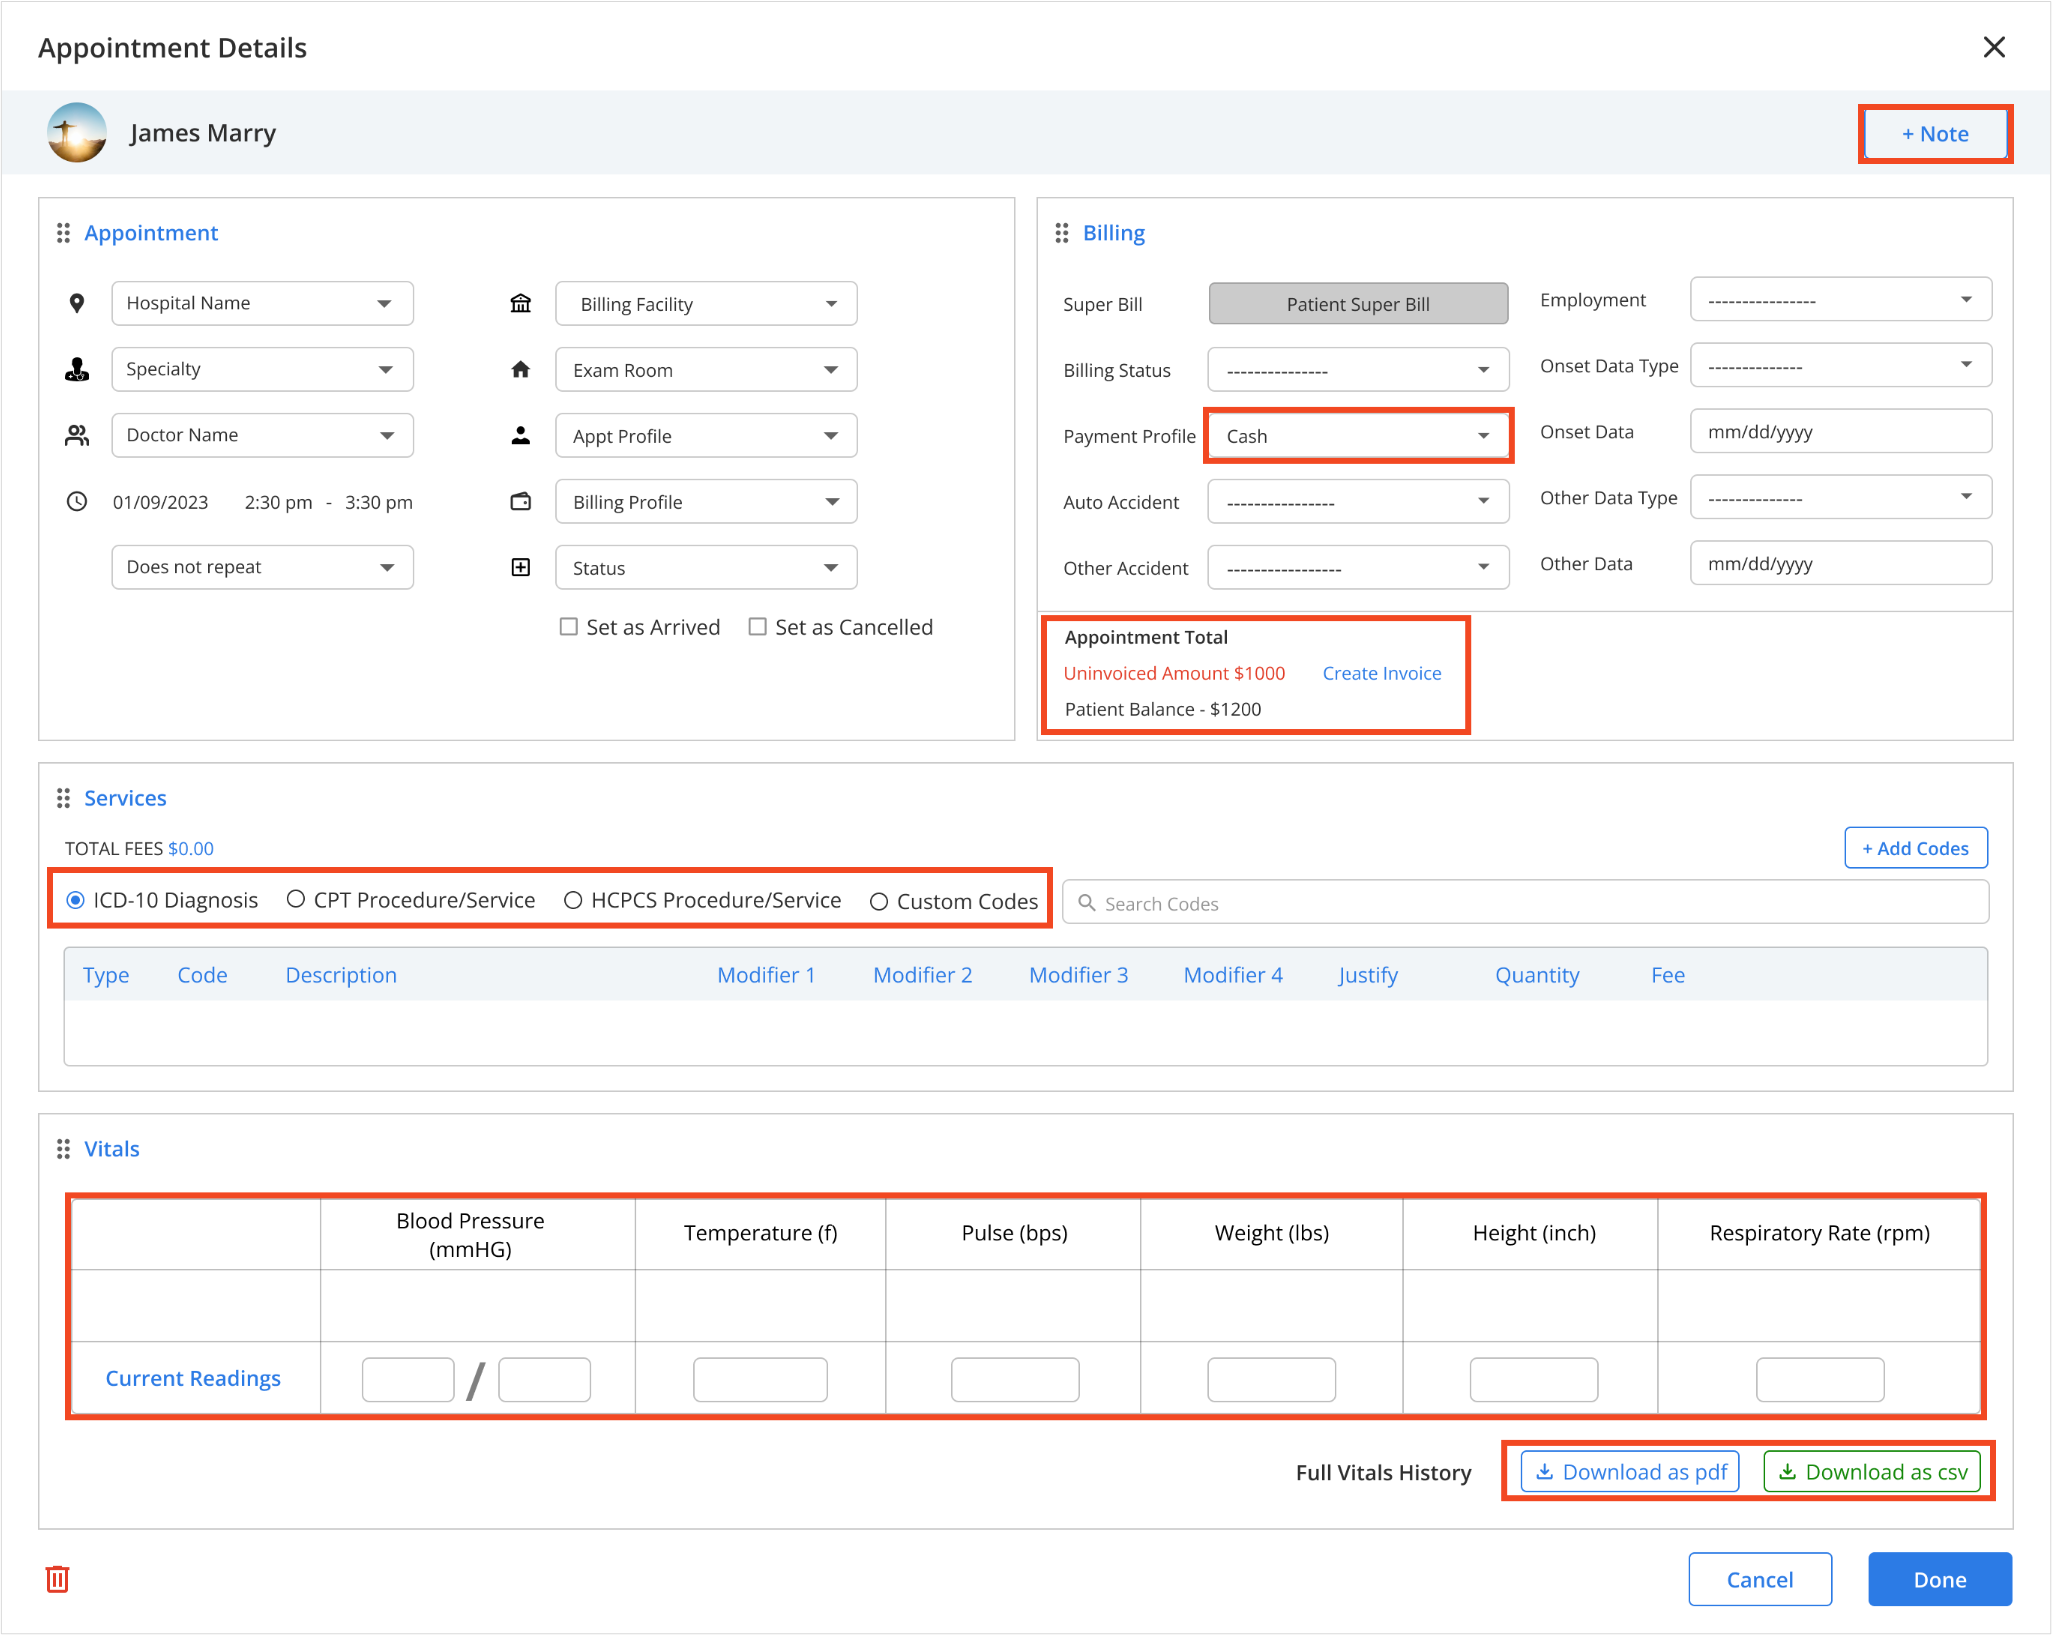
Selecting Payment Profile from Appointment
Updated Recently
For scheduled appointments, once the status of the appointment changes to Arrived/Lobby, we can add services and initiate billing for the services rendered.

After the services are provided and their service amount is calculated and shown in the billing section, the user can select the type of payment he would like to proceed with from the payment profile.
If the user selects the profile as Cash and Billing Status related to patient payment, they can create an invoice for this appointment.
The provider needs the patient's credit card details to process this invoice.
If the patient doesn’t have credit details on their profile, the user has to add the credit card details to the patient profile.
Follow the next step to add credit card details to the patient profile.
Add Credit Card Details to Patient Profile
Return to the Bill and Insurance menu to access the “My Cards” page.
Click Add Card to bring up the card entry popup.
Fill out the following fields:
Click on the “Save” button to save the information.
If you want to set this card as the default, toggle on the Default Card option.
Instead of Cash Payment, if the provider selects Insurance Payment, the user has to further enter insurance-based details in the billing section.
Here are the following insurance details that are mandatory to fill:
The insurance could be either a co-pay or a fully insurance-based payment.
To proceed with the insurance payment, the patient must have the patient’s insurance payer information saved in the patient's details. If not, follow the next procedure.