How can we help?
Submitting Insurance Claims
- Go to Billing > Insurance Claims
- By clicking on the “Dotted action” button for the appointments whose status is “Yet to Submit,” the user can view the “Generate Claim” option in the pop-up.
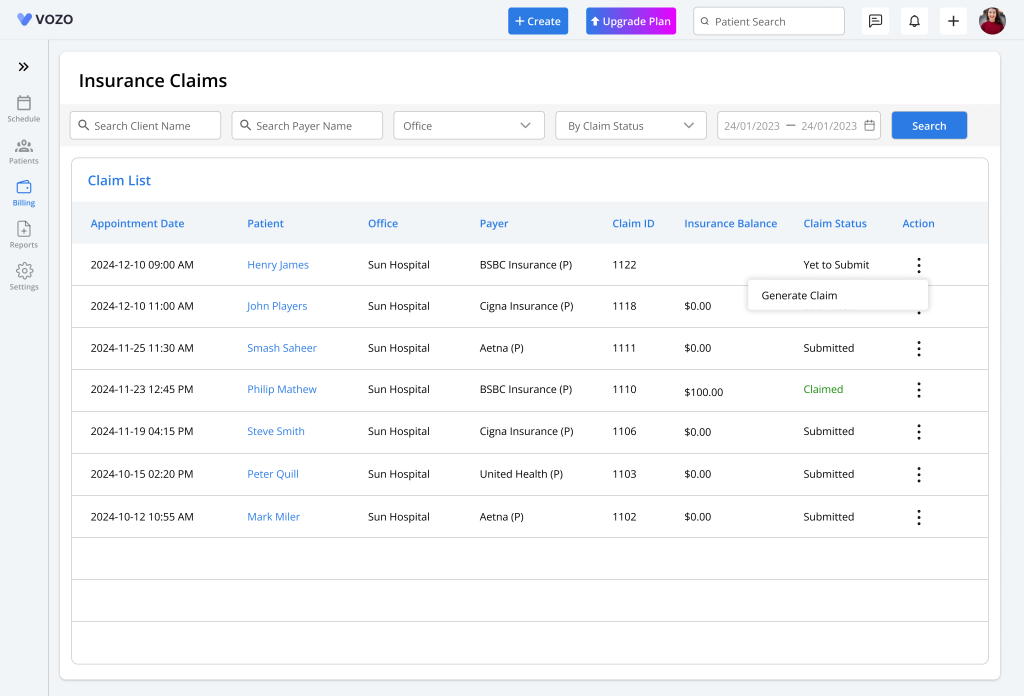
- By clicking on the Generate Claim button, the editable claim form will open with details auto-fetched throughout the application.
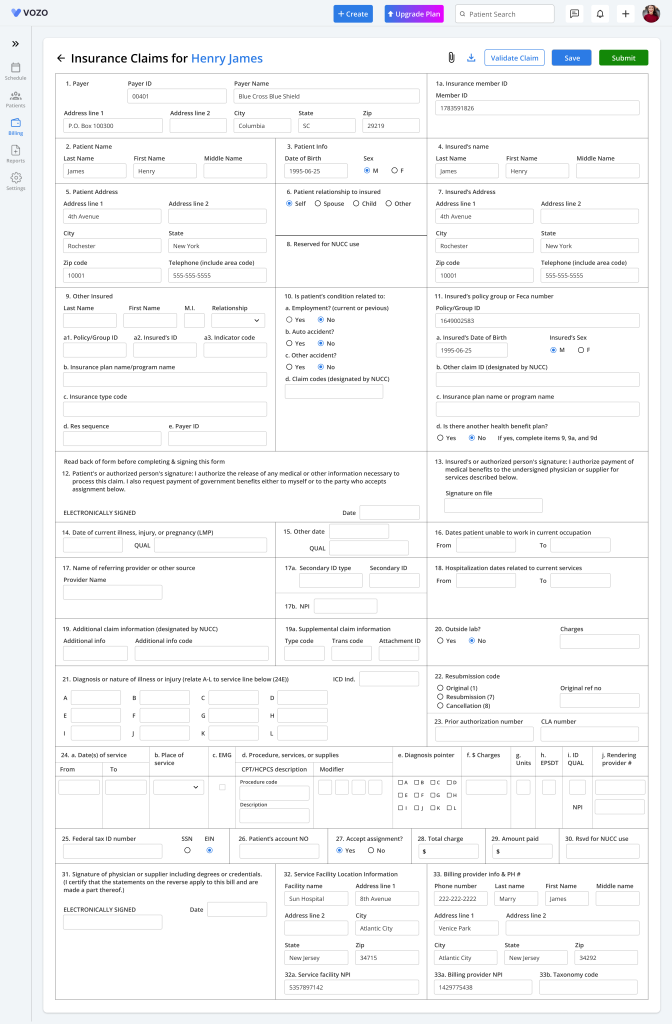
- The user can add or edit the claim information and can it by clicking on the “Save” button.
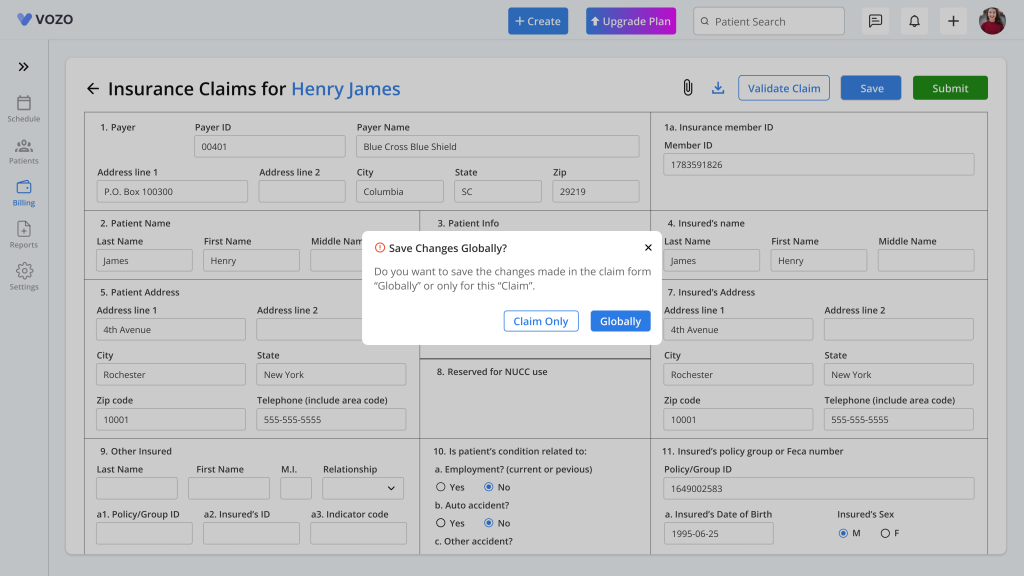
- When saving the claim informatio,n the user will be asked whether to save the changes “Globally” throughout the application or in “Claim Only”.
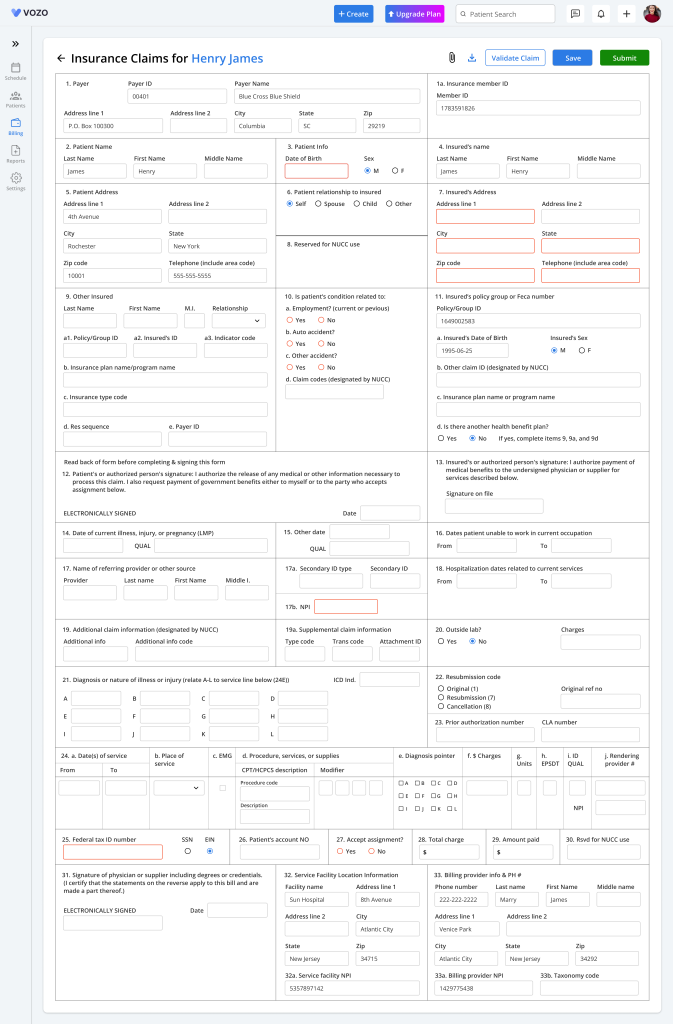
- The user can save based on their preference and can validate the claim form for missing or invalid information by clicking on the “Validate claim” button.
- When the claim is validated, the invalid information will be highlighted with a red border in the claim form.
- After the validation, the user clicks on the “Submit” button to submit the claim form to the clearinghouse.
- The user can also download the claim form by clicking on the “Download” icon in the claim form.
- The documents related to the claim can also be attached in the claim form by clicking on the “Clip” icon.
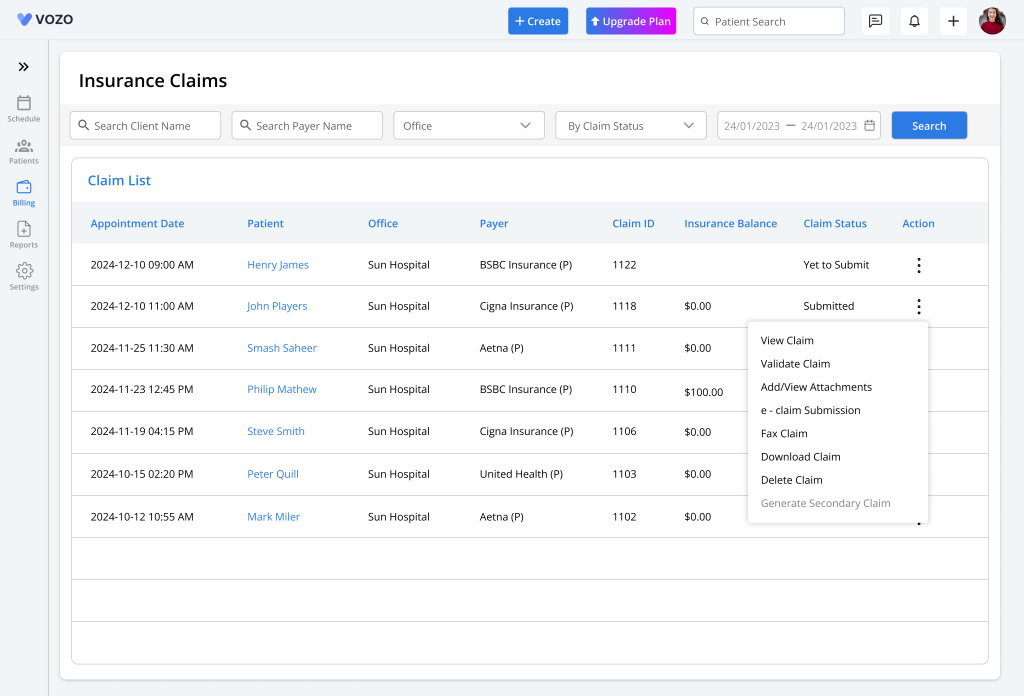
- Now that the claim has been generated, the Dotted Action options will be changed from “Generate claim” to other options such as:
- View claim
- Validate claim
- Add/View attachment
- E-claim submission
- Fax claim
- Download claim
- Delete claim
- Generate a secondary claim (Based on certain conditions)
- By clicking on the “View claim” button, the editable claim form will open, where the user can edit the information.
- The user can also validate the claim by clicking on the “Validate claim” button.
- By clicking the “Add/View attachment” button, the user can add documents related to the appointment for reference when submitting the claim form for payment processing.
- By clicking on the “e-claim submission” button also the user can also submit the claim form to the insurance payer.
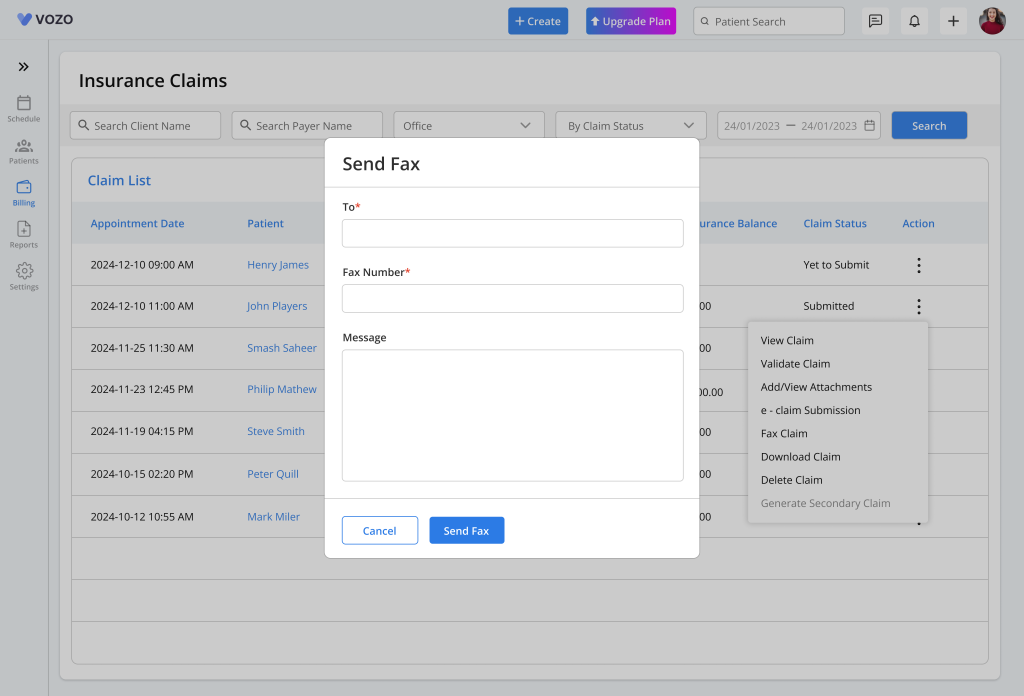
- The user can fax the claim to other providers or patients by clicking on the “Fax claim” button and entering the receiver’s name will automatically get the fax number and send it.
- By clicking on the “Download” button, the user can download the original CMS 1500 claim form with details.
- After the generation of the claim, by clicking on the “Delete claim” button, the user can delete the generated claim. Various scenarios apply in the claim deletion process.
Note:
- The user can delete the claim before submitting the claim to the clearinghouse. Only the generated claim (i.e. the editable claim form) will be deleted, and the appointment related to the insurance payment method will not be deleted from the insurance claim list.
- The user can also delete the claim after submitting the claim to the clearinghouse. By doing so, only the generated editable claim form will be deleted from our system, and the submitted claim will also be deleted from the clearinghouse end.
- After the payment is processed in the EOB or ERA for the submitted claim, the user won’t be able to delete the claim.
- After the secondary claim is generated, the user can also delete it. By doing so, the generated secondary claim in the insurance claim list itself will be deleted, and the user will have to click on the generate secondary claim button again to generate the secondary claim.