Lab Orders & Reports
Lab Configuration
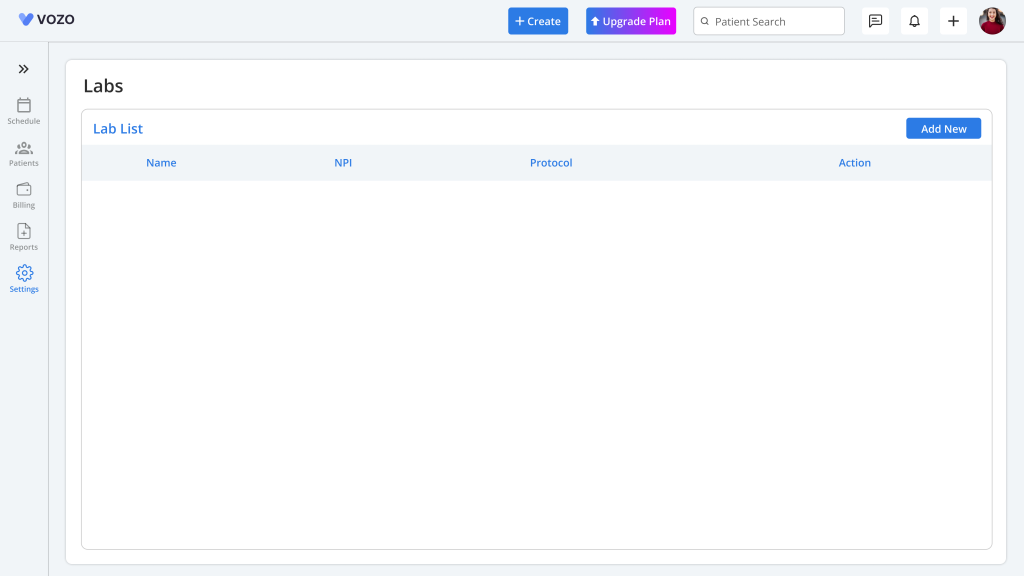
- Click on Settings > Billing & Services > Lab menu.
- Add and manage both integrated and manual lab configuration.
- To add new manual labs, click on the “Add New” button
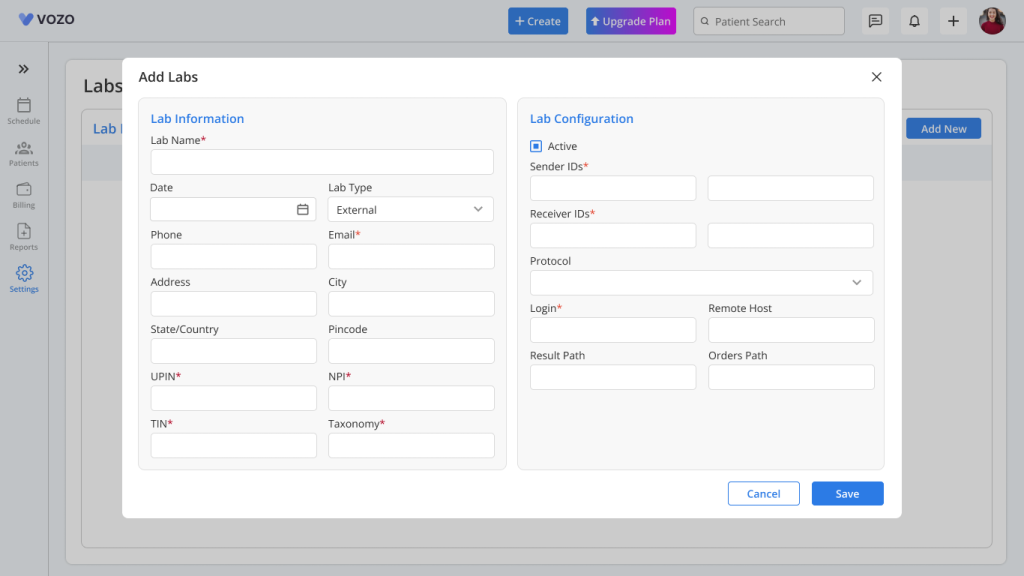
- In the Add Lab pop-up, enter the required lab information and configuration details including:
Lab Information
- Organization Name
- Phone
- Address
- UPIN
- NPI
- TIN
- Taxonomy
Lab Configuration
- Sender ID
- Receiver ID
- Protocol
- Login User ID
- Remote Host
- Result Path
- Order Path
- Click “Save” to save the configuration of the lab information.
Note: If you’re unsure about the technical information, contact your lab provider’s support for help.
- For third-party lab configuration, Vozo will assist in setting up lab integrations as per user request.
Lab Orders
- Once the lab configuration is done you can start setting up your lab orders for the patients.
- Go to Patient list > Select a Patient > Lab Order menu, to add a new lab order.
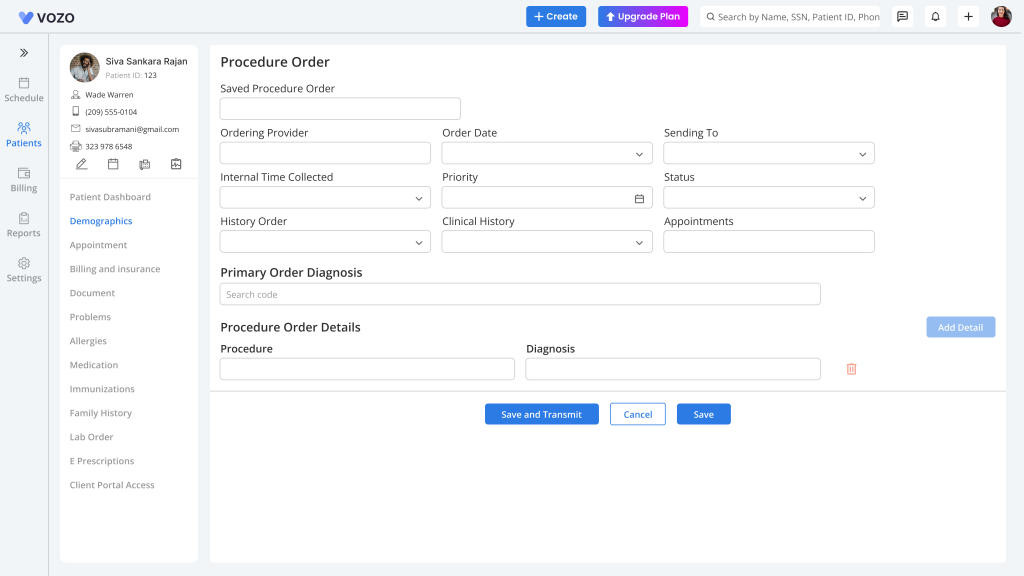
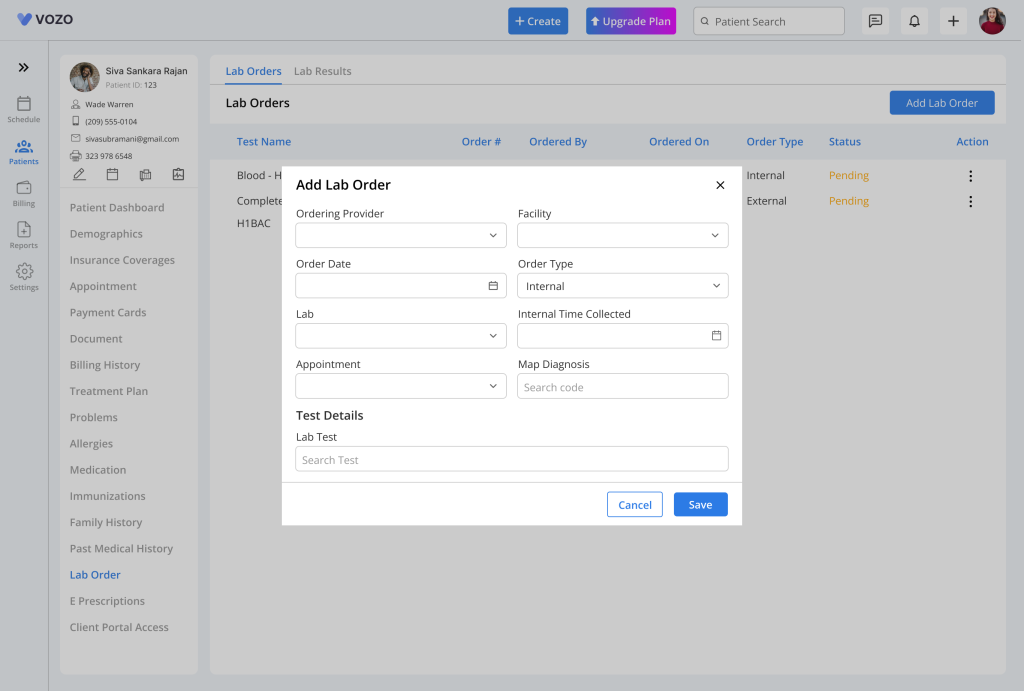
- In the “Procedure Order” page, enter the following details required for lab orders:
- Ordering Provider
- Order Date
- Sending To
- Internal Time Collected
- Status
- Appointment
- Primary Order Diagnosis
- Procedure Order Details (Procedure & Diagnosis)
- After entering all the details click on the “Save” button to just save the order or “Save & Transmit” button to directly send the order to lab.
- If you want to delete the order click on the “Delete” button to remove the lab order.
- To Preview the sent lab order, click the “Saved Procedure Order” dropdown it list the orders, select an order to view the details.
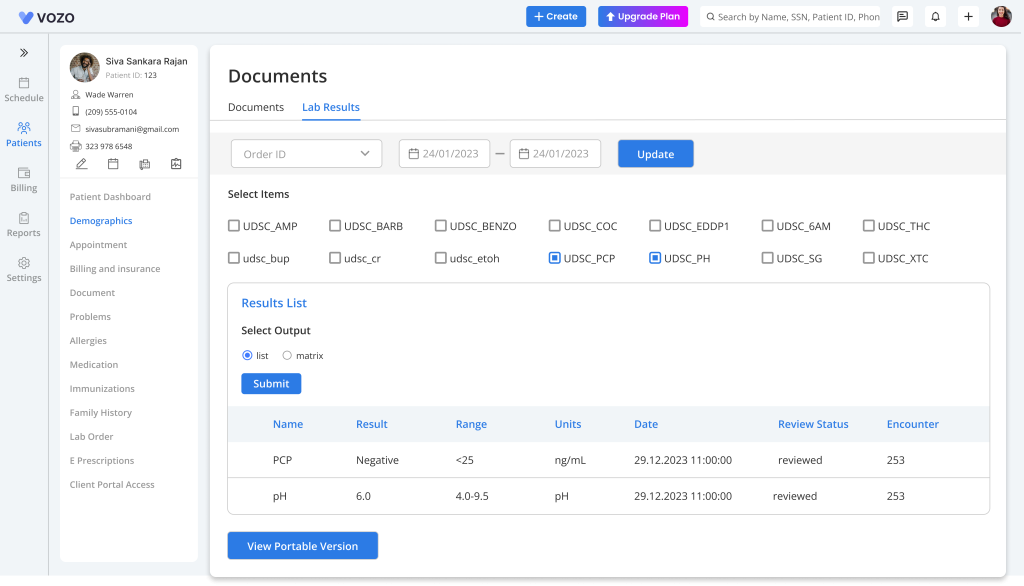
Lab Reports
- Go to Patient > Lab Reports menu to view the lab records.
- Track the lab orders sent either internally or through the third-party lab integration and their status.
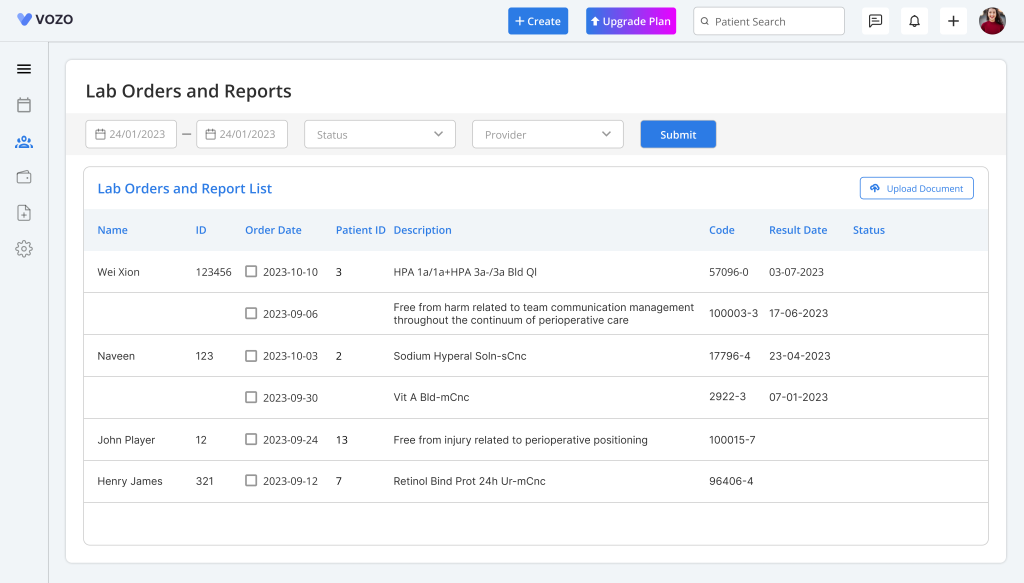
- If an order has already been transmitted, it cannot be selected from the list. Instead, a disabled symbol will be displayed when attempting to click on it.
- Select the checkboxes of the lab orders that are selectable and click on the “Transmit” button to send the orders to the lab.
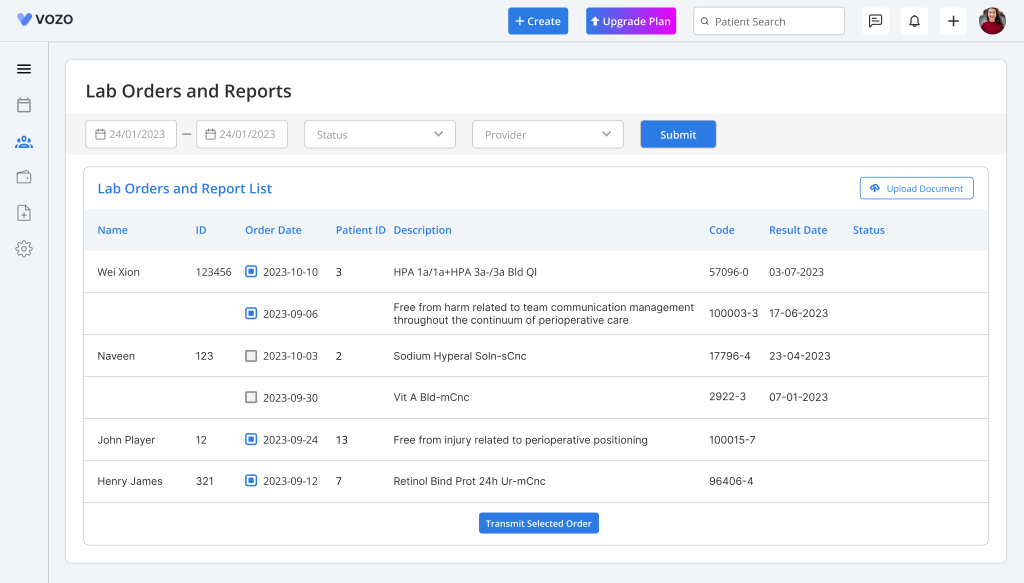
- Click on the order date of the internally sent lab order to view the preview of the results.
- Click on the “Sign” button to check and sign the lab result, which will then be saved in the “Lab Result” tab of the Patient Document menu.
- Go to Patient > Document – lab result tab.
- Click on the “Upload Document” button to upload the lab result received from either the configured lab or from a third-party Integrated lab.
- Filter lab reports by Order Date, Provider, or by Report status.
Lab Orders & Lab Results
Create Lab Orders, Manage Lab Setup, and Review Lab Results
The Lab Order feature helps users create and manage internal and external labs, place lab orders from the patient detail page, import results, and review completed reports.
Lab Setup
Lab configuration is available inside Settings.
Users can create and manage:
- Internal Labs
- External Labs
Access Lab Setup
- Open Settings.
- Click Lab Setup.
- The lab list page will open.
Add New Lab
- Click Add New.
- A popup window opens.
- Select lab type.
Available options:
- Internal
- External
Create Internal Lab
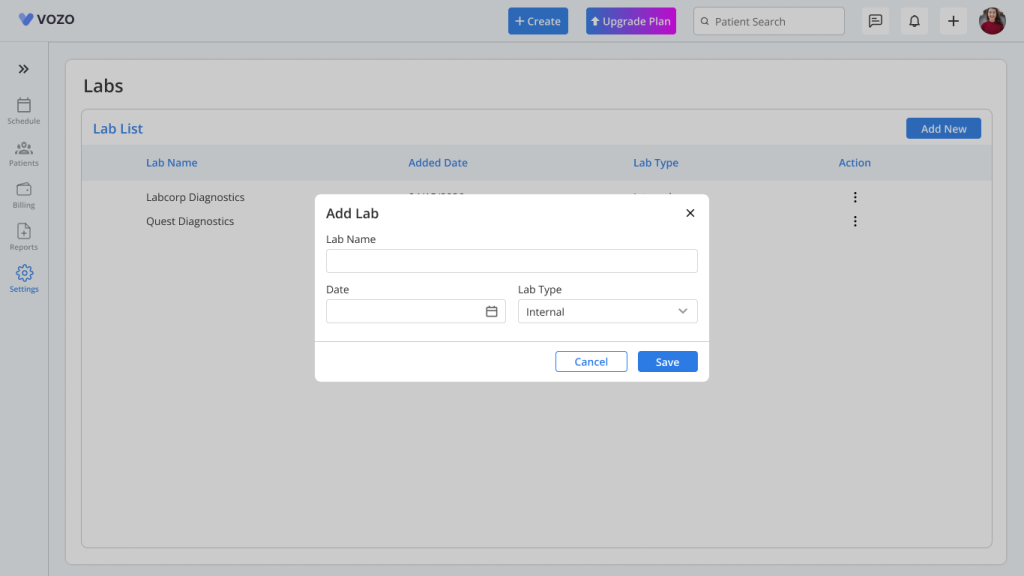
Choose Internal.
Enter the following:
Lab Name
Example:
- Main Lab
- In-House Diagnostic Lab
Date
Select the lab created date.
Save Internal Lab
Click Save.
After saving:
- Lab appears in the Lab list
Available actions:
- Lab Test
- Edit
- Delete
Manage Lab Tests
For internal labs:
- Click Lab Test.
A new page opens.
Add Lab Test
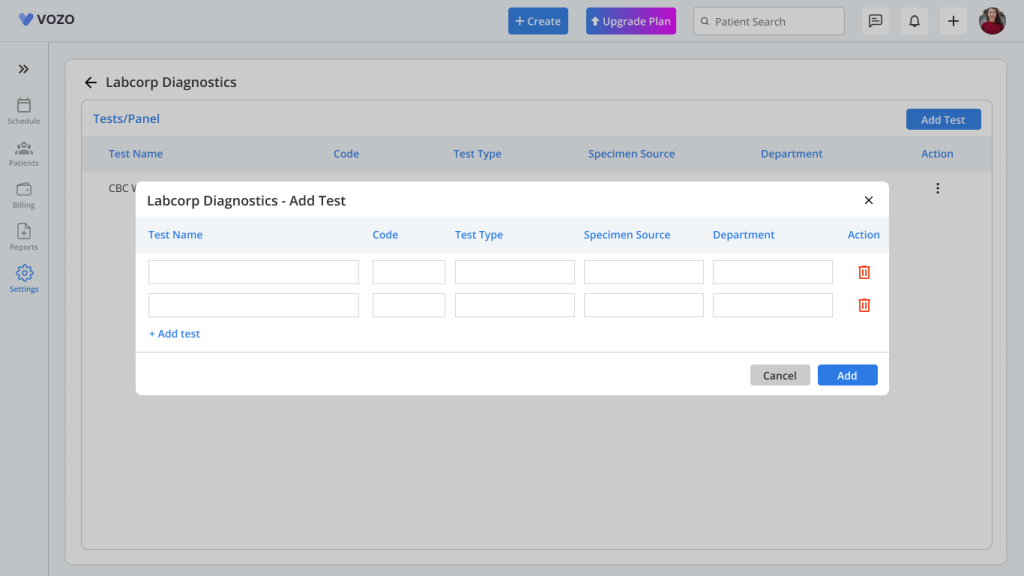
- Click Add Test.
- Popup opens.
- Add one or multiple tests.
Example:
- CBC
- Lipid Panel
- Blood Sugar
Test Actions
Each test includes:
- Edit
- Parameters
Add Parameters
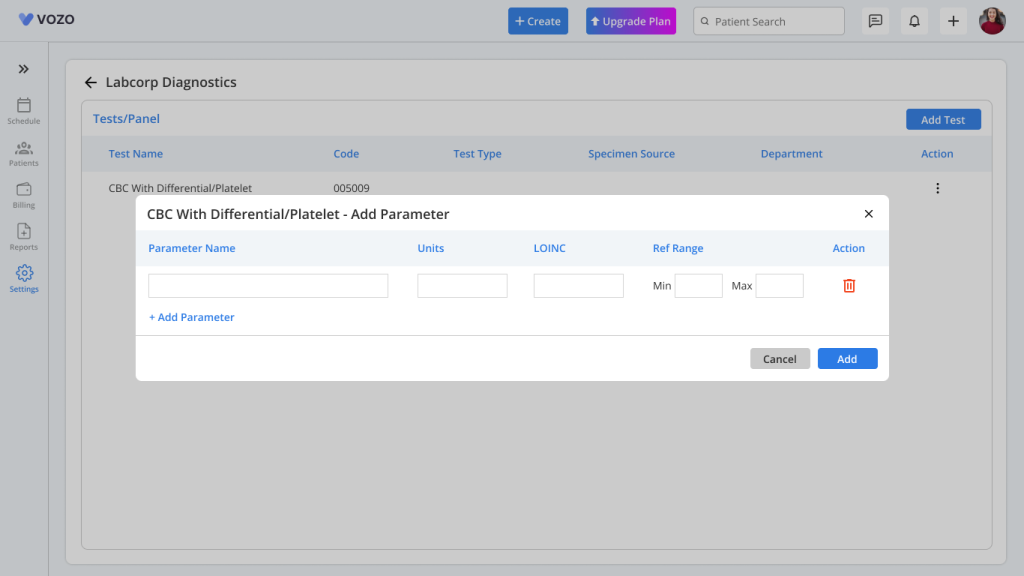
- Click Parameters.
- Add test-specific parameters.
Example:
CBC:
- Hemoglobin
- RBC
- WBC
Each parameter is linked to the selected test.
Create External Lab
Choose External.
Enter required lab details.
After saving:
- External lab appears in lab list
- Lab type displays as External
Available actions:
- Edit
- Delete
Important Note
External labs will not show the Lab Test option.
Lab Orders – Patient Detail Page
Open patient details.
The Lab section contains:
- Lab Orders
- Lab Results
Create Lab Order
- Open Lab Orders.
- Click Add Lab Order.
A popup window opens.
Enter Lab Order Details
Users can:
- Fill required details
- Select one or more diagnosis codes
- Select one or more lab tests
External Lab Selection
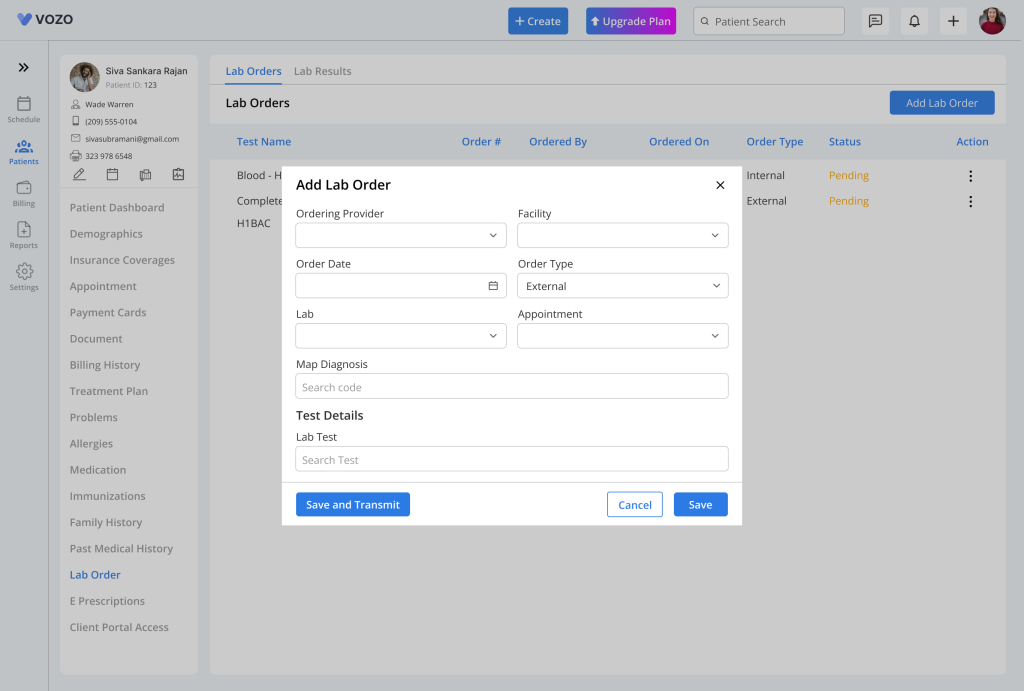
If an external lab is selected:
- Same popup opens
- One field may be hidden based on design
Save Lab Order
Click Save.
After saving:
Lab order appears in the list.
Display rules:
- One test → show test name
- Multiple tests → show Multiple Tests
Lab Order Status
Status updates automatically.
Pending
No result imported.
Partial
Multiple tests exist and only some results are uploaded.
Completed
All ordered test results are uploaded.
Import Lab Result
- Open Lab Orders.
- Click Actions.
- Select Import Result.
A new page opens.
Available Options
Users can:
Upload PDF
Upload lab report as PDF.
Enter Parameters
Enter values manually.
Upload + Enter Parameters
Both options can be used together.
Additional Options
Users can:
- Add comments
- Provider can sign the result
Result Movement Logic
Single Test
If one test exists and result is imported:
- Order moves to Lab Results
Multiple Tests
If multiple tests exist and only some are uploaded:
- Order remains in Lab Orders
- Status becomes Partial
Individual Test Comments
Each lab test supports separate comments.
Example:
CBC → comment added
Lipid Panel → different comment added
External Lab Transmission
When ordering through an external lab:
The order is shown in:
- Lab Orders on Patient Detail page
- Labs & Reports section
External Lab Status
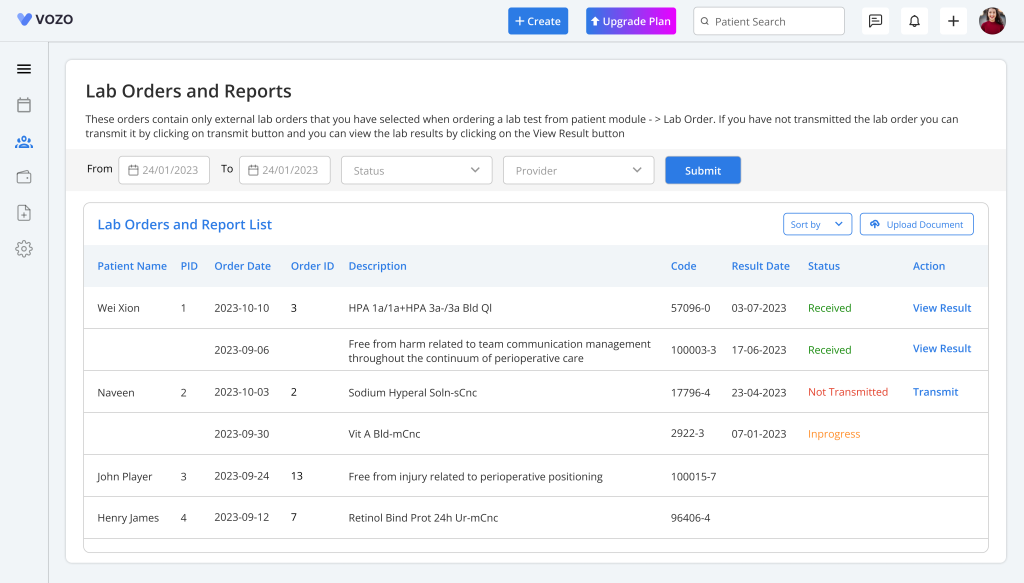
Available statuses:
- Not Transmitted
- In Progress
- Received
Save Only
Click Save
Result:
- Order saved
- Not sent to external lab
Status: Not Transmitted
Save and Transmit
Click Save and Transmit
Result:
- Order sent to external lab
Status:
In Progress
Meaning: Lab result is pending.
Received
When external lab sends the result:
Status changes to: Received
Users can review the result.
Lab Order Actions
Each lab order includes:
Import Result
Upload or enter results.
Edit Lab Order
Update order details.
Print Lab Order
Print order.
Export as PDF
Download order as PDF.
Print Specimen Label
Click Print Specimen Label
The label shows:
- Patient details
- Collection date & time
- Number of prints
Delete Lab Order
Click Delete. Order is removed from the system.
Lab Results
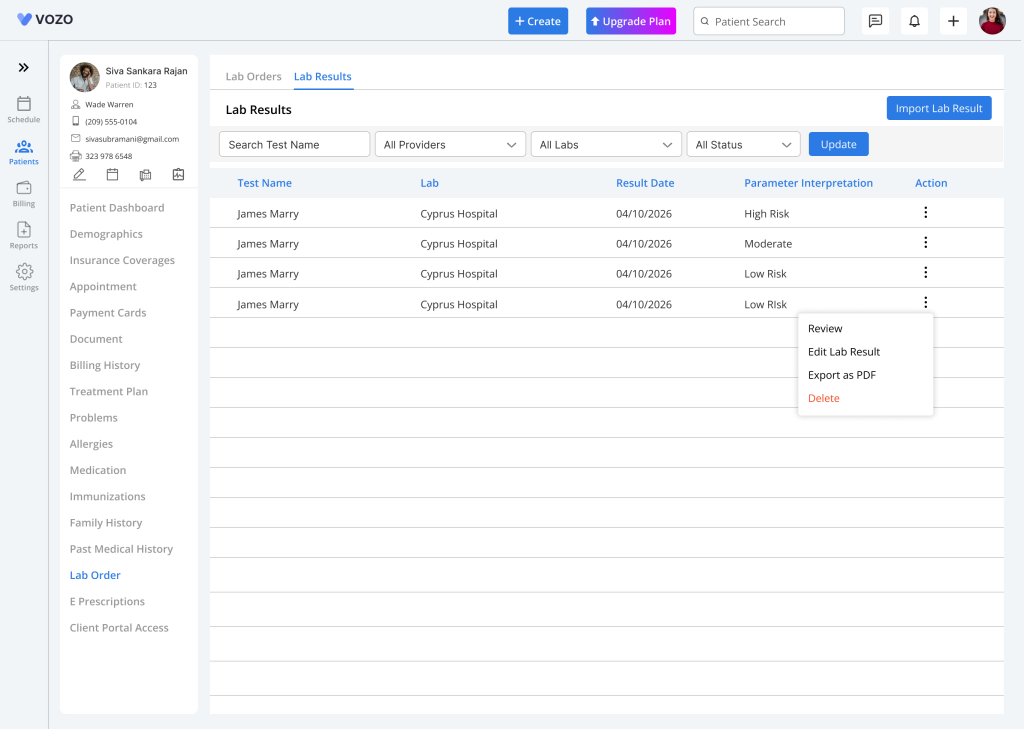
Once results are imported:
- Record moves to Lab Results tab
Users can:
- Review result
- View uploaded reports
- Check entered parameters
- View provider signature
- Review comments
Workflow Overview
Typical workflow:
- Open Settings
- Add Internal or External Lab
- Add lab tests
- Add parameters
- Open patient details
- Create lab order
- Select diagnosis and tests
- Save or transmit order
- Import results
- Add comments
- Provider signs
- Status updates automatically
- Result moves to Lab Results