How can we help?
-
Sign Up Your Account
-
Get Started
-
Appointments
-
Reporting & Analytics
-
Patient Management
- Patient Dashboard
- Patient Demographics
- Adding Patient Insurance
- Prior Authorization
- Insurance Eligibility Verification
- Additional Info
- Manage Patient's Contacts
- Flags
- Manage Patient Homework
- Patient Appointments
- Managing Credit Cards
- Documents
- Problems
- Allergies
- Medications
- Immunizations
- Family History
- Past Medical History
- Client Portal Access
- Creating New Patient
- Treatment Plan
- Sending Form to Patient
- Good Faith Estimate
- Patient Care Summary
- Patient care checklist
- Outcome Measures
- Imaging
- Patient Group & Group Appointment
- Assigning Membership plan
- Lifestyle and Diet Recommendation
- Show Remaining Articles (5) Collapse Articles
-
E-prescriptions
-
Lab Orders & Results
-
Task Management
-
Messaging
-
Feedback & Support
-
Insurance Billing
-
Practice Dashboard
-
Appointments Dashboard
-
Provider Availability
-
Appointment Profile
-
Billing Profile
-
Audit Log
-
Patient Payments
-
Patient Statements
-
Patient Ledger
-
Fee Schedule
-
Manual Insurance Payment Posting (EOB)
-
Card Transactions
-
Automatic Insurance Payment Posting (ERA - Electronic Remittance Advice)
-
Patient Flag
-
Note Taking
-
Macro Buttons
-
Patient Education
-
Incoming & Outgoing Fax
-
Referral Management
-
Account Settings
-
Billing & Services
-
Scheduling Settings
-
Administration Settings
-
Clinical Notes
-
Add-Ons
-
Explore Vozo
-
Patient Portal
-
Calendar Dashboard
-
Patient List
-
Integrations
-
Account cancellation
-
Dashboard
-
Batch eligibility
-
Patient Superbill
-
Membership Plan
-
Diet Recommendation Library
Home >
Track Appointment Status
Views27
- Go to Schedule > Appointment Dashboard.
- View the appointments based on the type of appointments, like “Walk-in” or “Telehealth”, “Group Appointments”, and “Appointment Waitlist”.
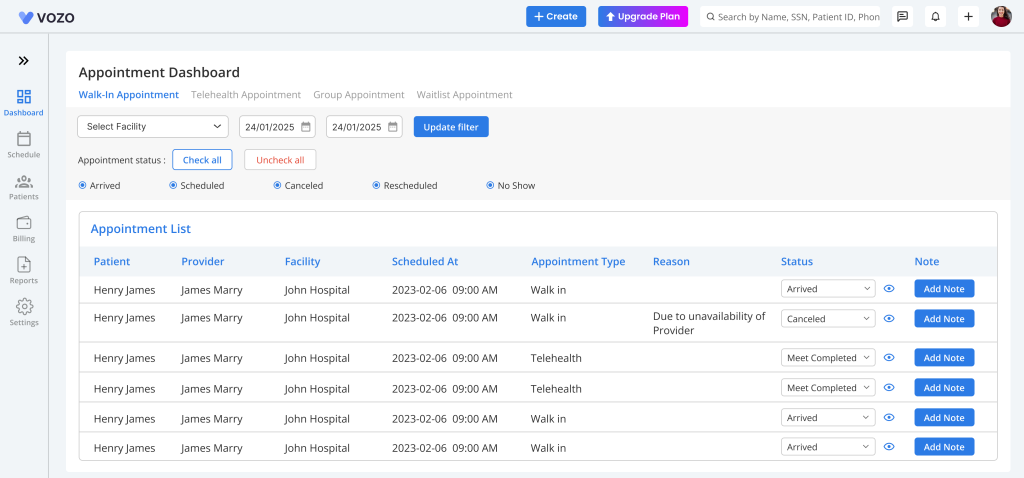
- At the top of the dashboard, filtering options are available to help quickly locate appointments.
- Users can filter appointments using:
- Search Patient → Search by patient name
- Select Facility → Filter by facility location
- Start Date / End Date → Filter appointments within a date range
- Once filters are applied, the appointment list updates automatically based on the selected criteria.
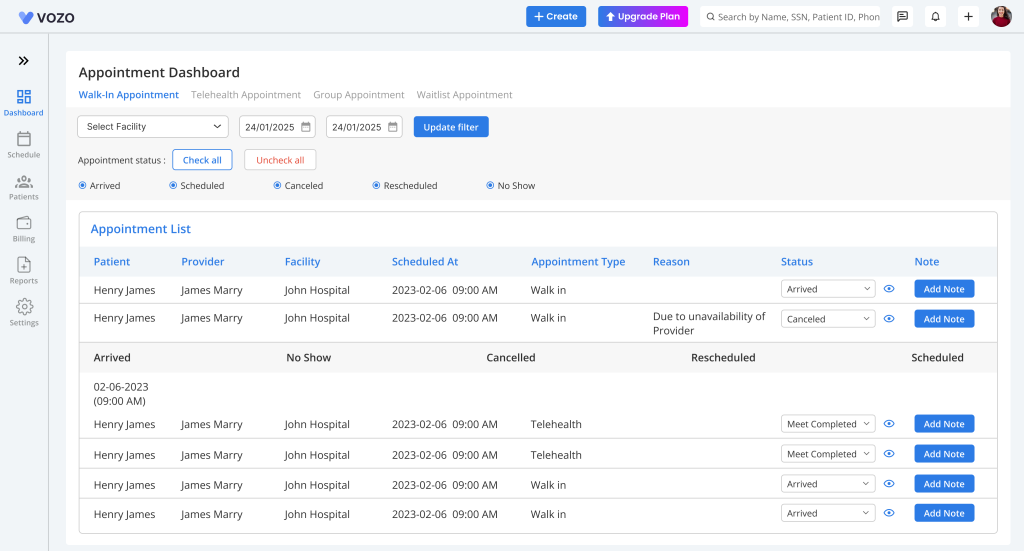
- Click on the “Eye” icon form the list to view statuses based on the timeline in which the status has been changed
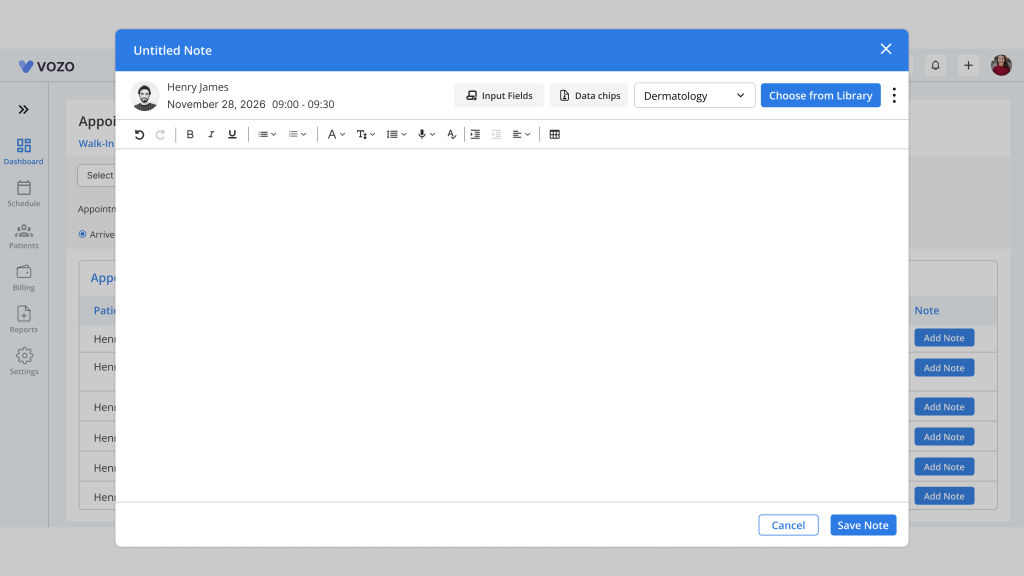
- When an appointment status is marked as Arrived, the “Add Note” button becomes available in the Note column.
- Click “Add Note” to open the notes window and begin documentation for the appointment.
- As for filtering with Appointment Status, you can check and uncheck all status in a single go by clicking on the “Check” and “Uncheck” button or you can just check and uncheck individual status based on your preference.
Table of Contents