How can we help?
-
Sign Up Your Account
-
Get Started
-
Appointments
-
Reporting & Analytics
-
Patient Management
- Patient Dashboard
- Patient Demographics
- Adding Patient Insurance
- Prior Authorization
- Insurance Eligibility Verification
- Additional Info
- Manage Patient's Contacts
- Flags
- Manage Patient Homework
- Patient Appointments
- Managing Credit Cards
- Documents
- Problems
- Allergies
- Medications
- Immunizations
- Family History
- Past Medical History
- Client Portal Access
- Creating New Patient
- Treatment Plan
- Sending Form to Patient
- Good Faith Estimate
- Patient Care Summary
- Patient care checklist
- Outcome Measures
- Imaging
- Patient Group & Group Appointment
- Show Remaining Articles (3) Collapse Articles
-
E-prescriptions
-
Lab Orders & Results
-
Task Management
-
Messaging
-
Feedback & Support
-
Insurance Billing
-
Practice Dashboard
-
Appointments Dashboard
-
Provider Availability
-
Appointment Profile
-
Billing Profile
-
Audit Log
-
Patient Payments
-
Patient Statements
-
Patient Ledger
-
Fee Schedule
-
Manual Insurance Payment Posting (EOB)
-
Card Transactions
-
Automatic Insurance Payment Posting (ERA - Electronic Remittance Advice)
-
Patient Flag
-
Note Taking
-
Macro Buttons
-
Patient Education
-
Incoming & Outgoing Fax
-
Referral Management
-
Account Settings
-
Billing & Services
-
Scheduling Settings
-
Administration Settings
-
Clinical Notes
-
Add-Ons
-
Explore Vozo
-
Patient Portal
-
Calendar Dashboard
-
Patient List
-
Integrations
-
Account cancellation
-
Dashboard
-
Batch eligibility
-
Patient Superbill
Home >
Resubmitting Rejected/Denied Insurance Claims
Views23
- To view the rejected or denied insurance claim, go to Billing > Insurance Claim.
- After the claim submission, if the claim gets rejected or denied, the insurance status will be changed from “Submitted” to “Rejected” or “Denied” status.
- If you hover on the rejected or denied status, a pop-up will appear displaying the rejection or denial reason.
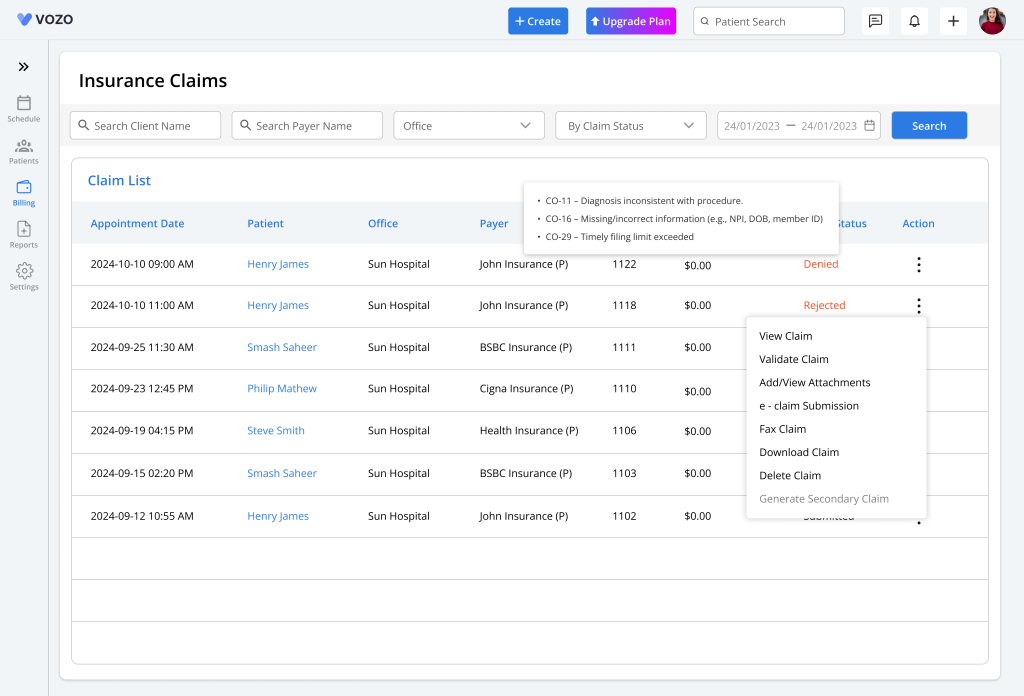
- The user can view the reasons for rejection or denial and correct the information and resubmit it.
- View the claim form by clicking on the “View Claim” button from the dotted action menu.

- In the claim form, edit the invalid or missed claim information based on the rejected or denied reason.
- Once the changes have been made, click on the “Save” button to save the changes “Globally” or “Claim Only” based on the user preference.

- After saving the claim, the user can again validate the claim by clicking on the “Validate Claim” button.
- Once the claim has been validated, click on the “Re-submit” button in the claim form.

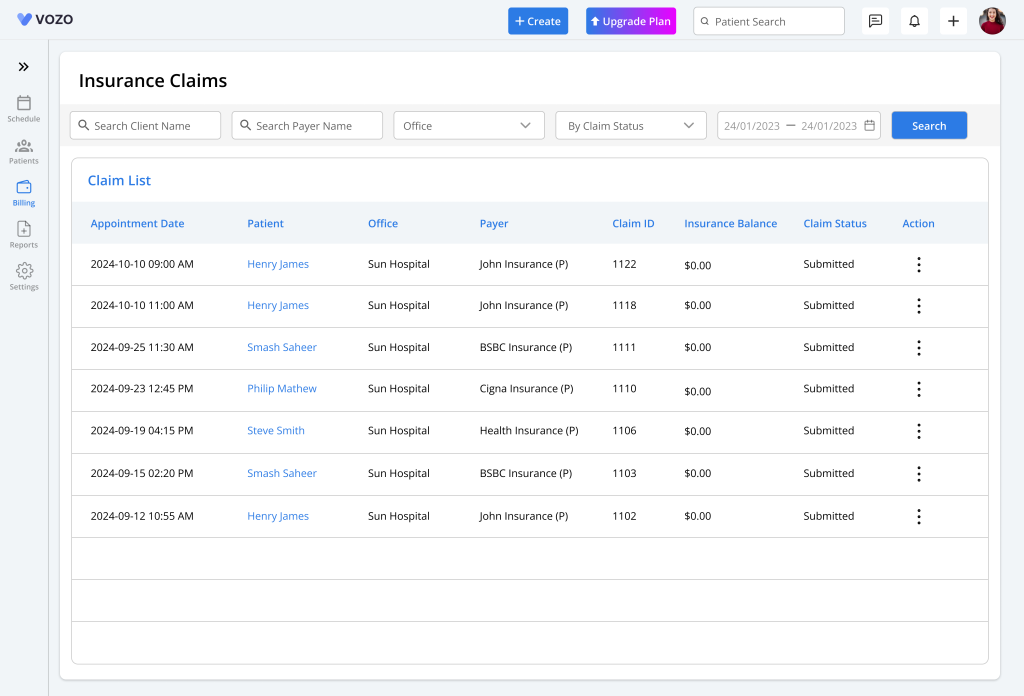
- The payment processing will be the same as what we have done for the primary, secondary, and tertiary insurances.
Table of Contents