How can we help?
-
Sign Up Your Account
-
Get Started
-
Appointments
-
Reporting & Analytics
-
Patient Management
- Patient Dashboard
- Patient Demographics
- Adding Patient Insurance
- Prior Authorization
- Insurance Eligibility Verification
- Additional Info
- Manage Patient's Contacts
- Flags
- Manage Patient Homework
- Patient Appointments
- Managing Credit Cards
- Documents
- Problems
- Allergies
- Medications
- Immunizations
- Family History
- Past Medical History
- Client Portal Access
- Creating New Patient
-
E-prescriptions
-
Lab Orders & Results
-
Task Management
-
Messaging
-
Feedback & Support
-
Insurance Billing
-
Practice Dashboard
-
Appointments Dashboard
-
Provider Availability
-
Appointment Profile
-
Billing Profile
-
Audit Log
-
Patient Payments
-
Patient Statements
-
Patient Ledger
-
Fee Schedule
-
Manual Insurance Payment Posting (EOB)
-
Card Transactions
-
Automatic Insurance Payment Posting (ERA - Electronic Remittance Advice)
-
Patient Flag
-
Note Taking
-
Macro Buttons
-
Patient Education
-
Incoming & Outgoing Fax
-
Referral Management
-
Account Settings
-
Billing & Services
-
Scheduling Settings
-
Administration Settings
-
Clinical Notes
-
Add-Ons
-
Explore Vozo
-
Patient Portal
-
Calendar Dashboard
-
Patient List
Home >
EOB Payment Posting
Views12
- Go to Billing > EOB.
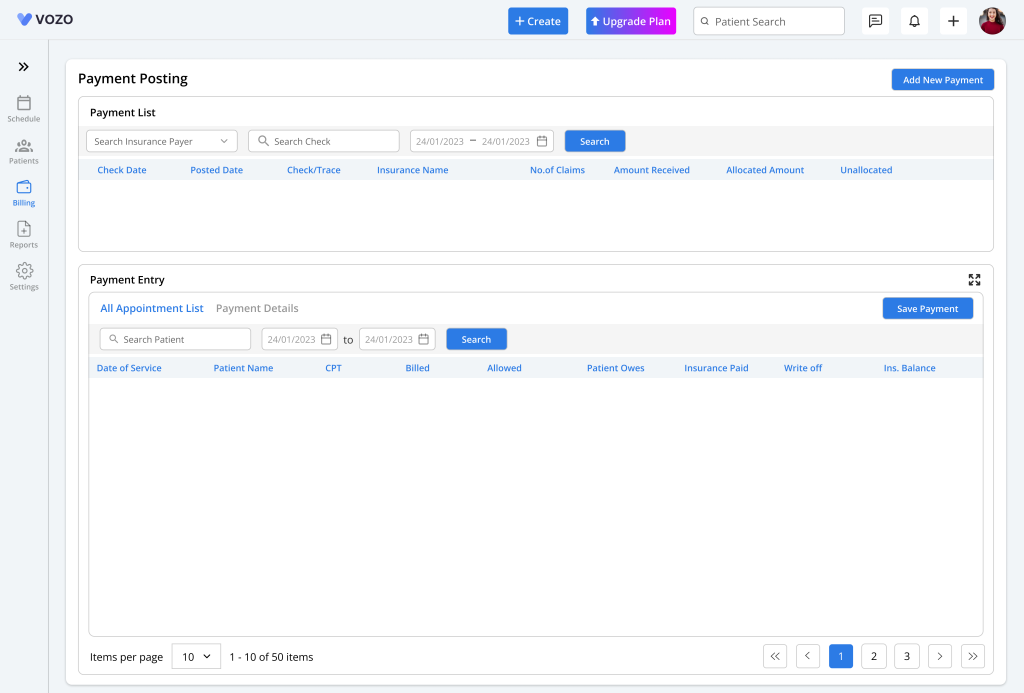
- Manually post insurance payments by adding the payment details and allocating payments to the respective patients based on their appointments and services.
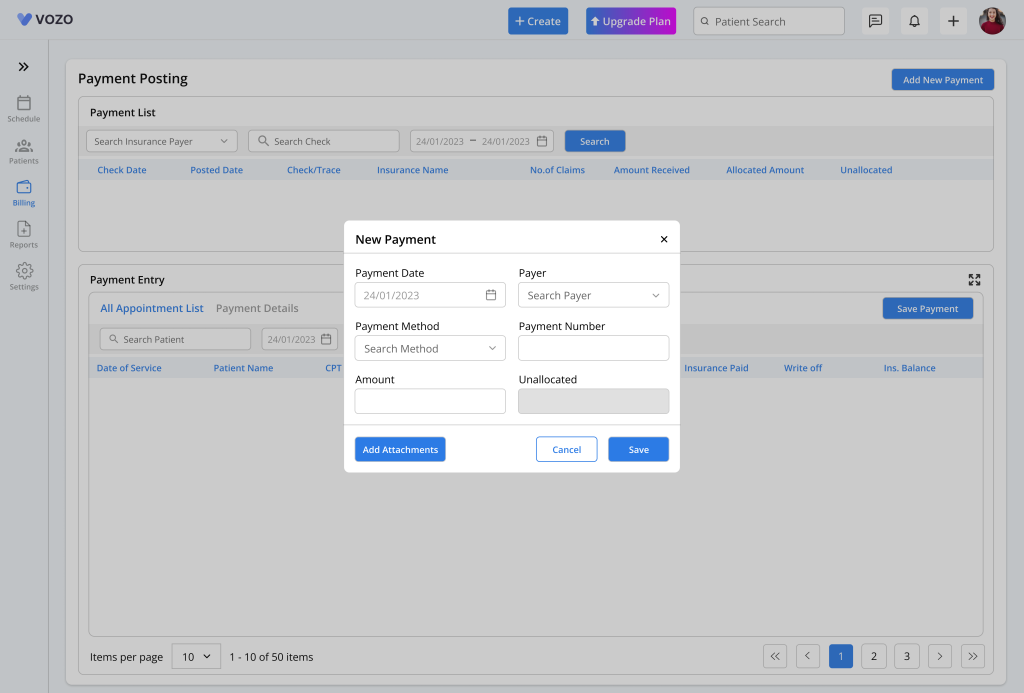
- To add a payment, click on the “Add New Payment” button and enter the payment details like:
- Payment Date
- Insurance payer
- Payment Method
- Payment Number
- Allocated Amount
- And click the Save button.
- Click the “Add Attachment” button to add the EOB document in the pop-up, which will get displayed in the payment list with a green “EOB” button.
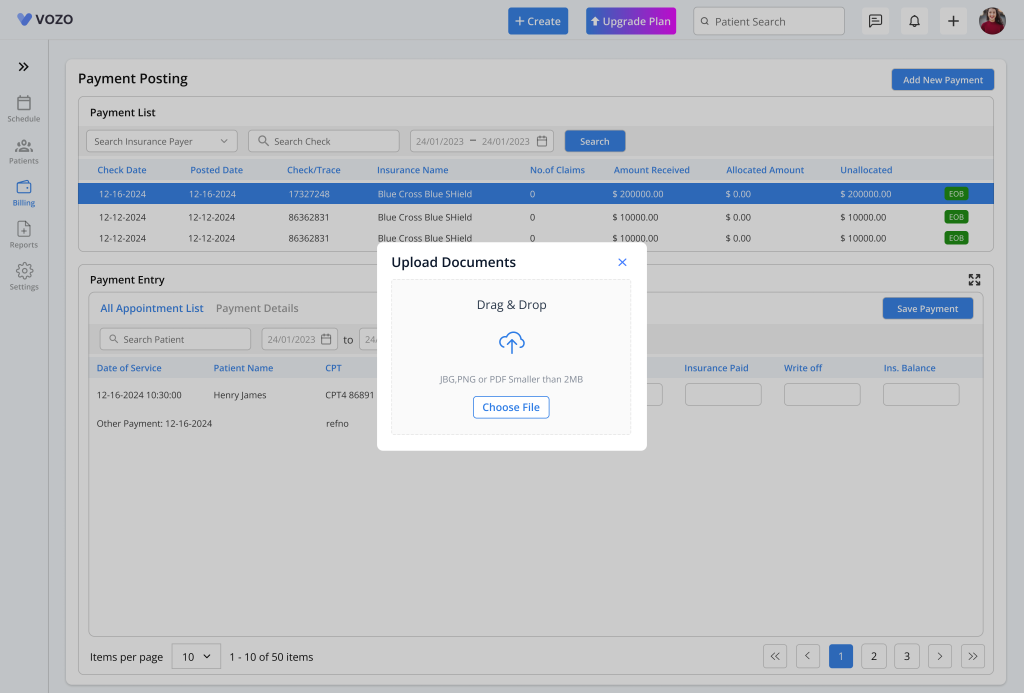
- Select the added payment detail from the list, and the appointments associated with the patients based on their service codes related to the insurance payer will get populated in the “Payment Entry” section.
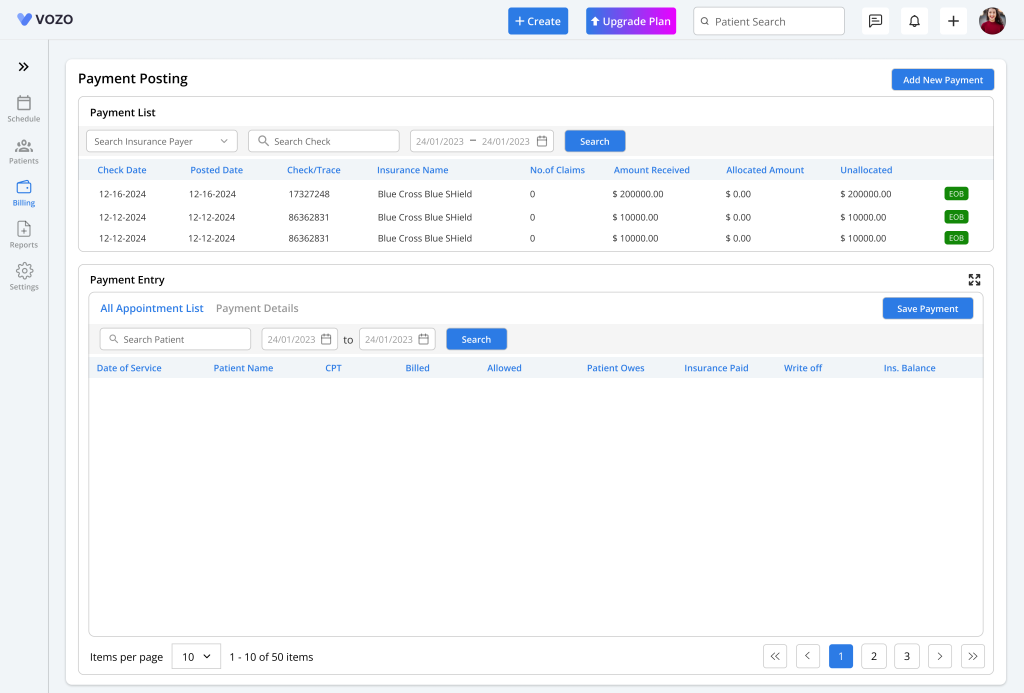
- Filter the payment list based on “Insurance Payer”, “Cheque Number”, and “Posted Date”.
- Enter the payment amounts in the “Allowed”, “Patient Owes”, “Insurance Paid”, “Write Off”, and “Insurance Balance” fields based on the appointments.
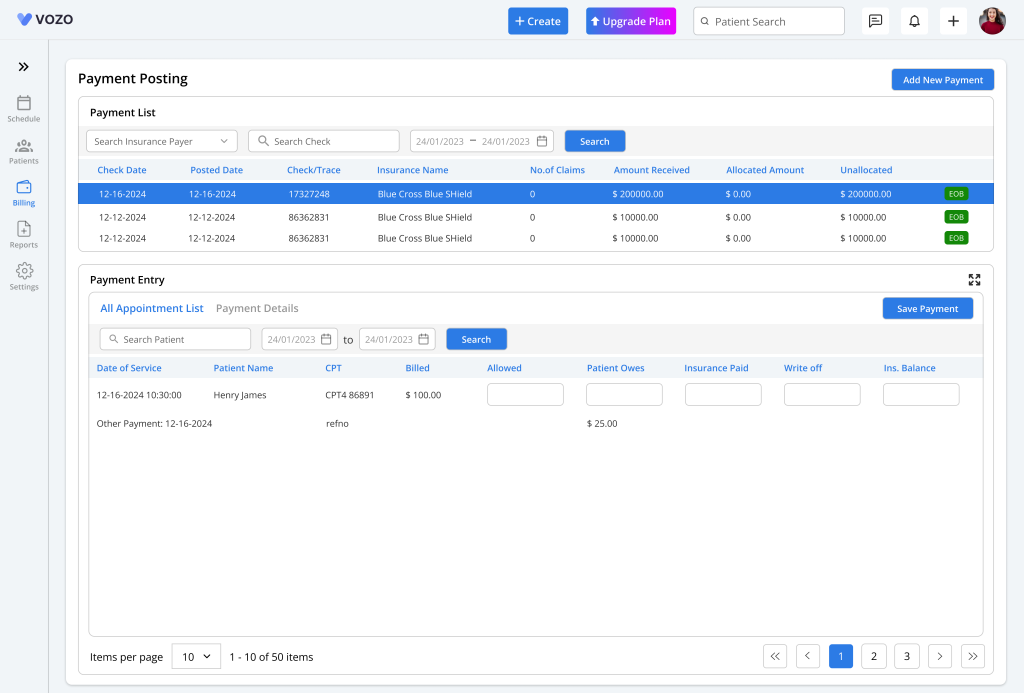
- If there were any Patient Owes in the payment, then the balance will be assigned to the patient who will be paid by the patient.
- As for “Insurance Balance”, the balance amount will be paid by generating and submitting a secondary claim.
- Click on the “Save Payment” button to save the payment. By doing so, you can post the insurance payments manually.
- Filter the payment entry based on “Patient” and “Appointment Date”.
Table of Contents
