How can we help?
-
Sign Up Your Account
-
Get Started
-
Appointments
-
Reporting & Analytics
-
Patient Management
- Patient Dashboard
- Patient Demographics
- Adding Patient Insurance
- Prior Authorization
- Insurance Eligibility Verification
- Additional Info
- Manage Patient's Contacts
- Flags
- Manage Patient Homework
- Patient Appointments
- Managing Credit Cards
- Documents
- Problems
- Allergies
- Medications
- Immunizations
- Family History
- Past Medical History
- Client Portal Access
- Creating New Patient
- Treatment Plan
- Sending Form to Patient
- Good Faith Estimate
- Patient Care Summary
- Patient care checklist
- Outcome Measures
- Imaging
- Patient Group & Group Appointment
- Assigning Membership plan
- Lifestyle and Diet Recommendation
- Show Remaining Articles (5) Collapse Articles
-
E-prescriptions
-
Lab Orders & Results
-
Task Management
-
Messaging
-
Feedback & Support
-
Insurance Billing
-
Practice Dashboard
-
Appointments Dashboard
-
Provider Availability
-
Appointment Profile
-
Billing Profile
-
Audit Log
-
Patient Payments
-
Patient Statements
-
Patient Ledger
-
Fee Schedule
-
Manual Insurance Payment Posting (EOB)
-
Card Transactions
-
Automatic Insurance Payment Posting (ERA - Electronic Remittance Advice)
-
Patient Flag
-
Note Taking
-
Macro Buttons
-
Patient Education
-
Incoming & Outgoing Fax
-
Referral Management
-
Account Settings
-
Billing & Services
-
Scheduling Settings
-
Administration Settings
-
Clinical Notes
-
Add-Ons
-
Explore Vozo
-
Patient Portal
-
Calendar Dashboard
-
Patient List
-
Integrations
-
Account cancellation
-
Dashboard
-
Batch eligibility
-
Patient Superbill
-
Membership Plan
-
Diet Recommendation Library
Home >
Patient Portal Settings
Views72
- Go to Settings > Scheduling > Patient portal settings menu.
- Configure your patient portal settings to let patients request appointments online, and review demographics changes done by patients & documents uploaded.
- The “Patient portal settings” details can be configured in three tabs as “Settings”, “Email”, and “Patient Activities”.
- In the “Settings” tab, you can enable whether your practice wants to use portal access or not, plus you can also view the portal link, which will be sent to the patients.
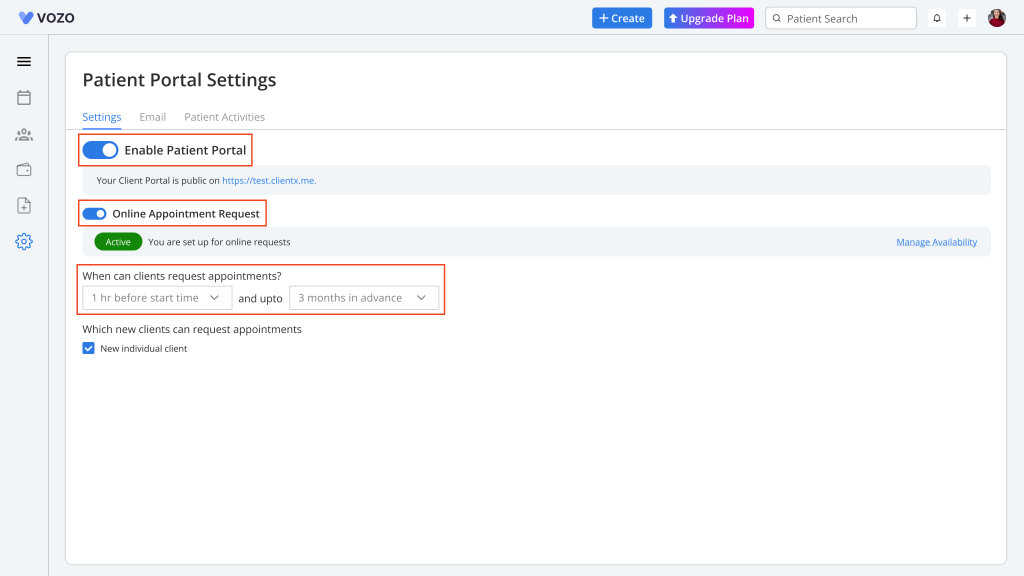
- Enable the “Online Appointment Request” toggle so that patients can schedule an appointment from the patient portal.
- Set up a time limit on when the patient can schedule an appointment by selecting from the “When can Client request appointments” drop-down.
- In the “Email” tab, you can enter the email template message that will be sent to patients when they receive the patient portal link.
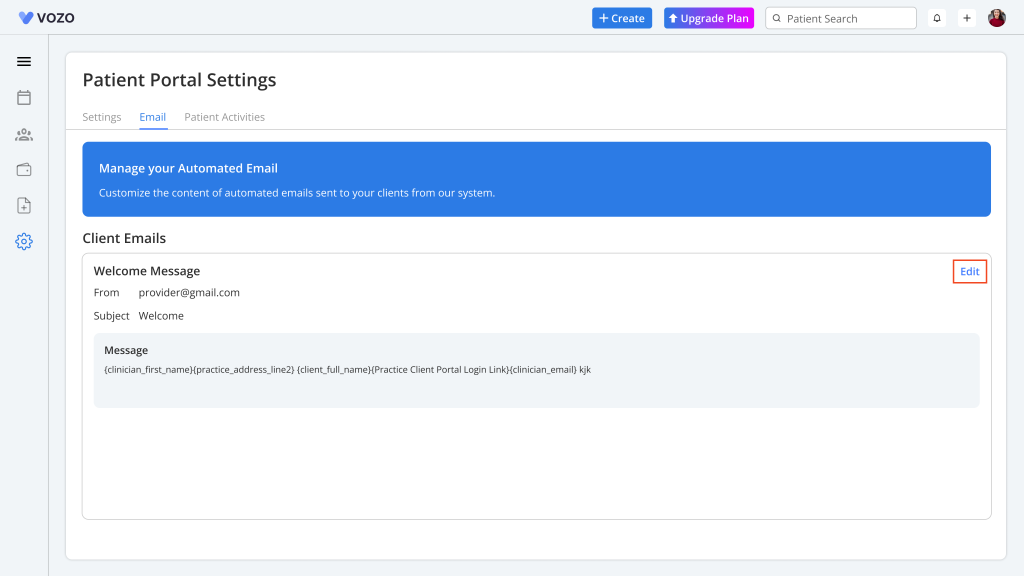
- Click on the Edit button, which opens a pop-up, set your email template, and click “Save” to save the email template.

- In the “Patient Activities” tab, the provider can view the activities done by the patients like updating their profile, uploading new documents & signing consent forms.
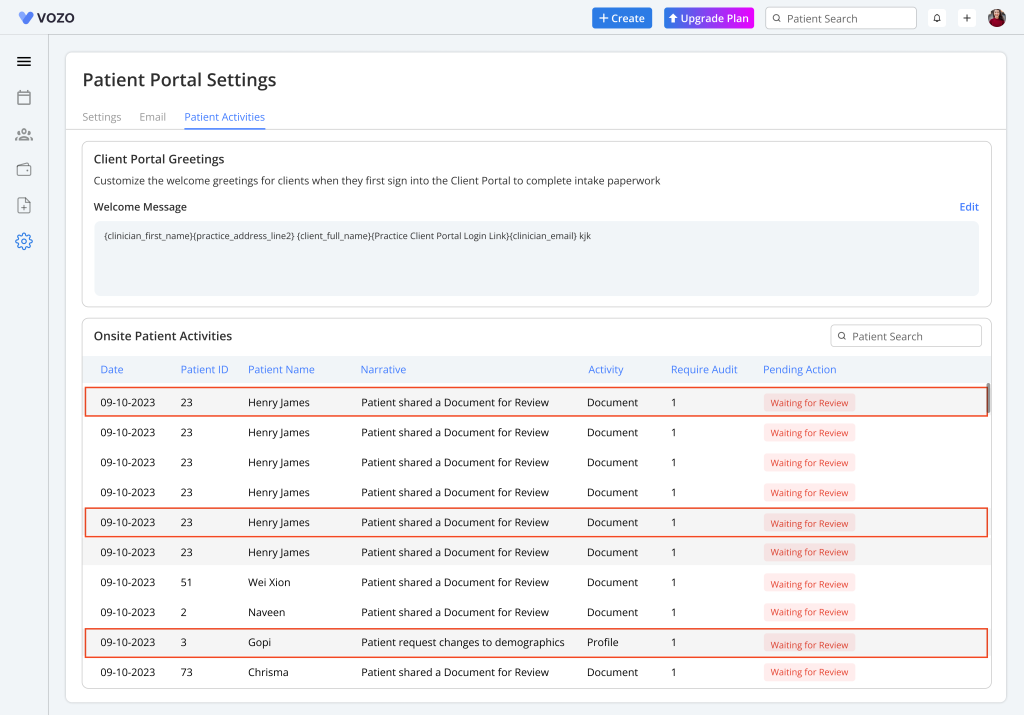
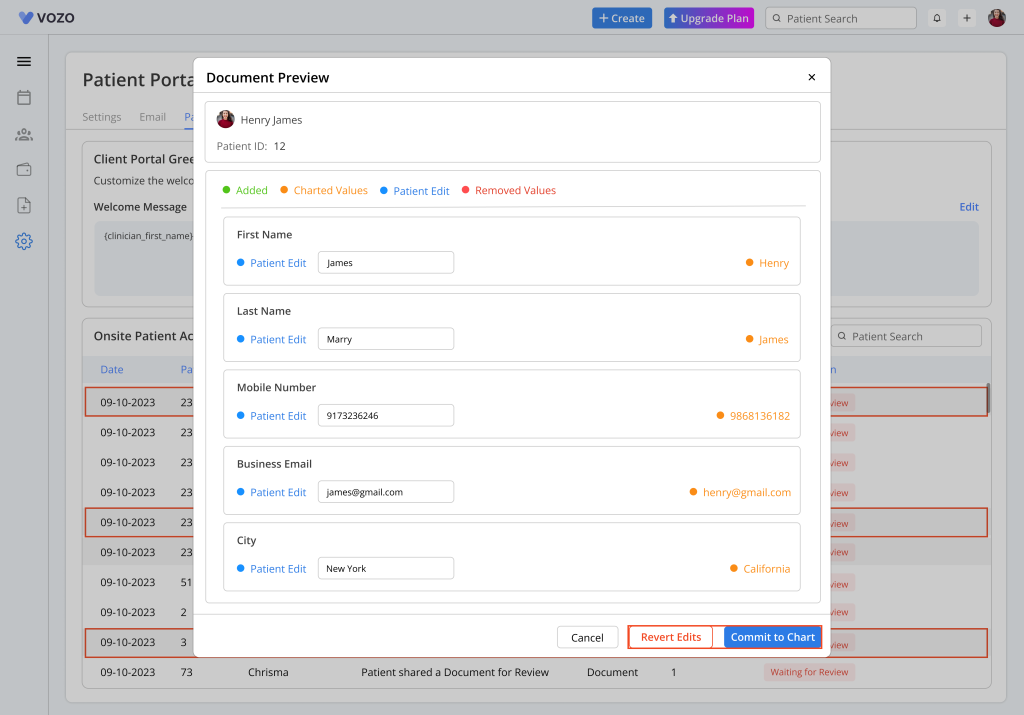
- To view the detailed info of the activity, click on any particular gray highlighted activity, which brings up a pop-up displaying the changes made in their profile.
- The updates are categorised as:
- Changes in demographics
- Uploaded new Documents
- Signed Content forms.
- If the provider is ok with the changes, they can click on the “Commit to chart” button, or if not ok, they can click on the “Revert Edits” button.
- As for the activity based on the documents, if the user is ok, they can click on the “Save to Patient Document” button and click the “Done” button.
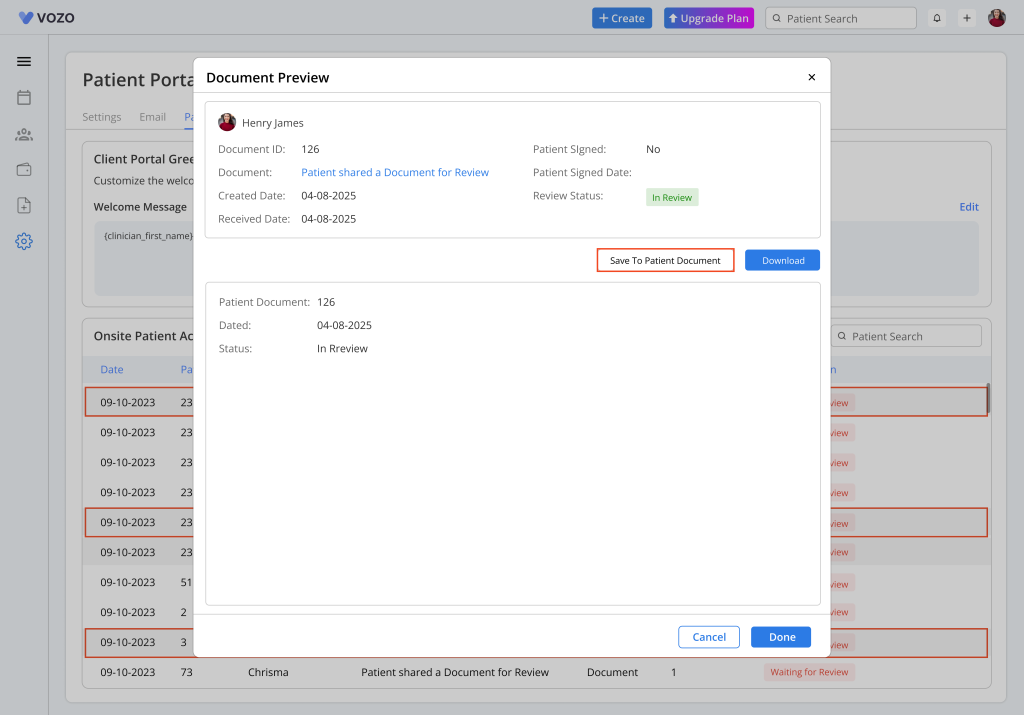
Table of Contents