How can we help?
-
Sign Up Your Account
-
Get Started
-
Appointments
-
Reporting & Analytics
-
Patient Management
- Patient Dashboard
- Patient Demographics
- Adding Patient Insurance
- Prior Authorization
- Insurance Eligibility Verification
- Additional Info
- Manage Patient's Contacts
- Flags
- Manage Patient Homework
- Patient Appointments
- Managing Credit Cards
- Documents
- Problems
- Allergies
- Medications
- Immunizations
- Family History
- Past Medical History
- Client Portal Access
- Creating New Patient
- Treatment Plan
- Sending Form to Patient
- Good Faith Estimate
- Patient Care Summary
- Patient care checklist
- Outcome Measures
- Imaging
- Patient Group & Group Appointment
- Show Remaining Articles (3) Collapse Articles
-
E-prescriptions
-
Lab Orders & Results
-
Task Management
-
Messaging
-
Feedback & Support
-
Insurance Billing
-
Practice Dashboard
-
Appointments Dashboard
-
Provider Availability
-
Appointment Profile
-
Billing Profile
-
Audit Log
-
Patient Payments
-
Patient Statements
-
Patient Ledger
-
Fee Schedule
-
Manual Insurance Payment Posting (EOB)
-
Card Transactions
-
Automatic Insurance Payment Posting (ERA - Electronic Remittance Advice)
-
Patient Flag
-
Note Taking
-
Macro Buttons
-
Patient Education
-
Incoming & Outgoing Fax
-
Referral Management
-
Account Settings
-
Billing & Services
-
Scheduling Settings
-
Administration Settings
-
Clinical Notes
-
Add-Ons
-
Explore Vozo
-
Patient Portal
-
Calendar Dashboard
-
Patient List
-
Integrations
-
Account cancellation
-
Dashboard
-
Batch eligibility
-
Patient Superbill
Home >
Product Tour
Views24
- The Get Started feature provides users with a quick overview of the basic workflow and functionality of the application, helping them become familiar with the system.
- To use the Get Started Feature, click on the “Get Started” button at the bottom left section of the application.
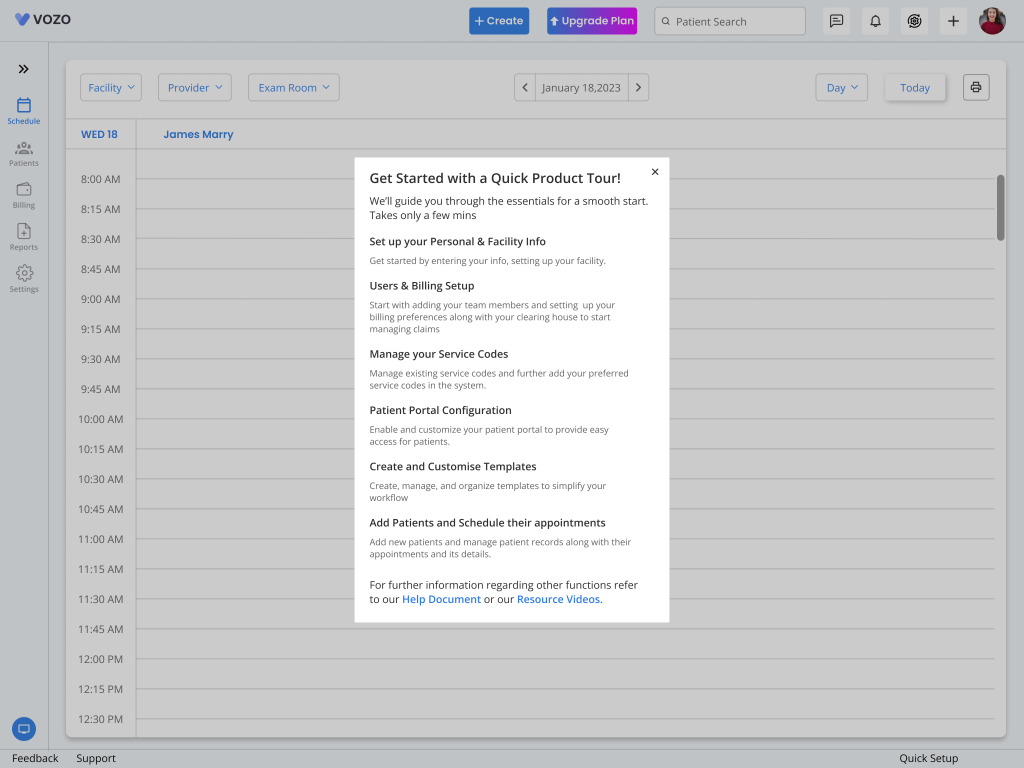
- By clicking on it, the provider can access an introductory guide that walks them through the essential features and workflows of the application.
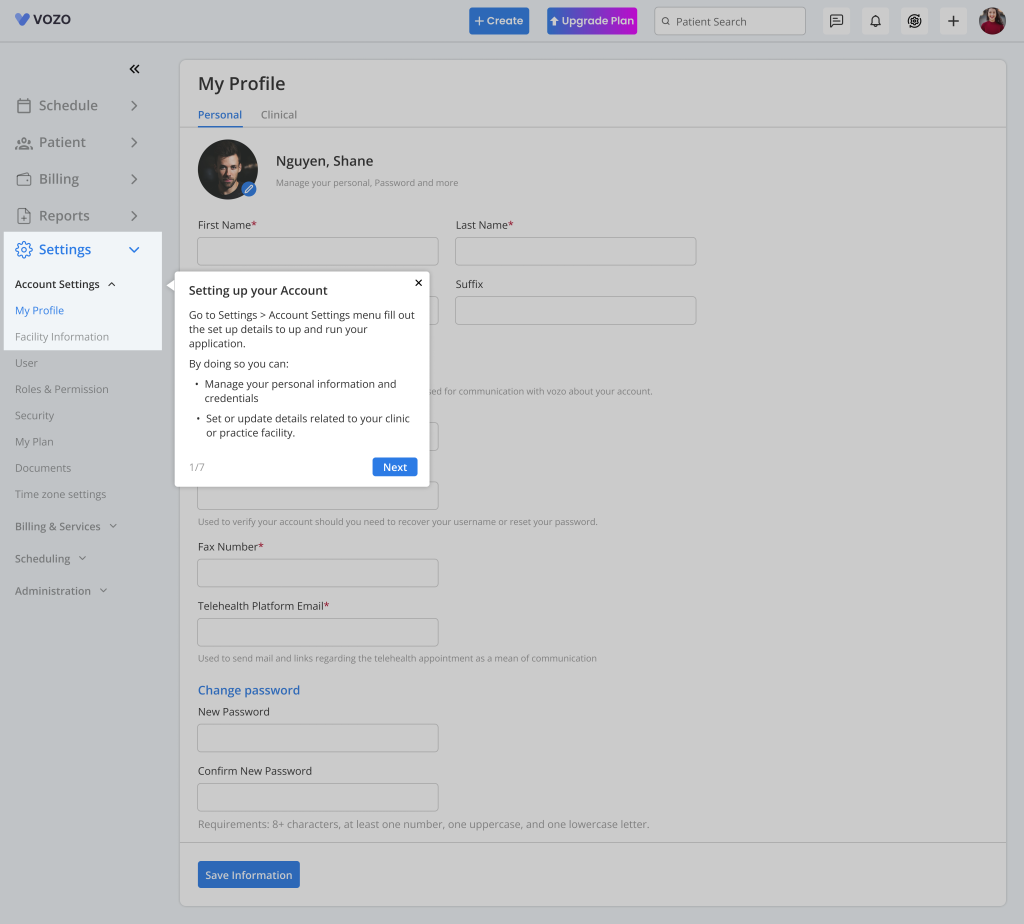
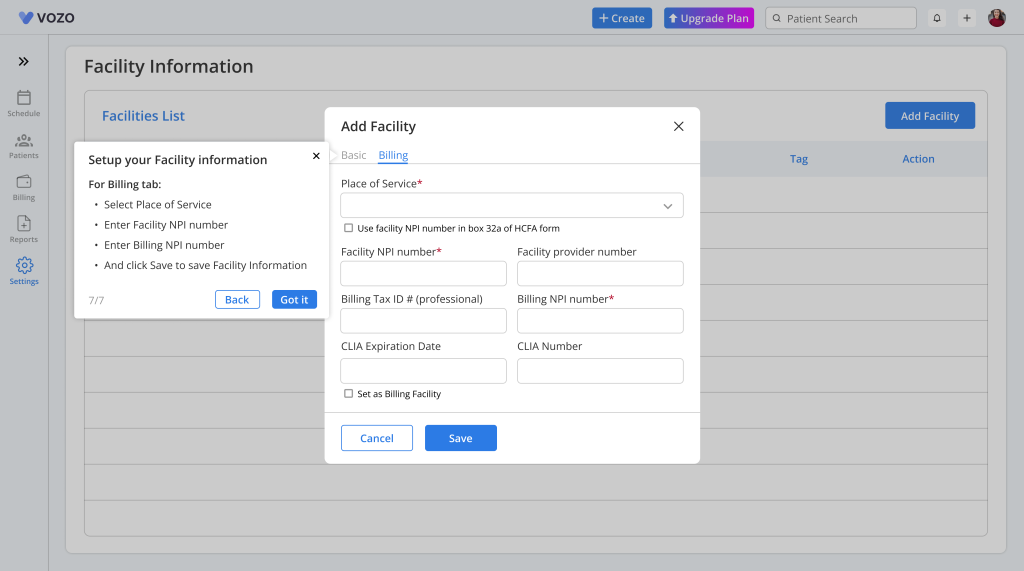
- This feature is designed to help new users understand the core functions and get up to speed with using Vozo EHR effectively.
- By using this feature, users can quickly learn how to navigate the system and begin using it efficiently.
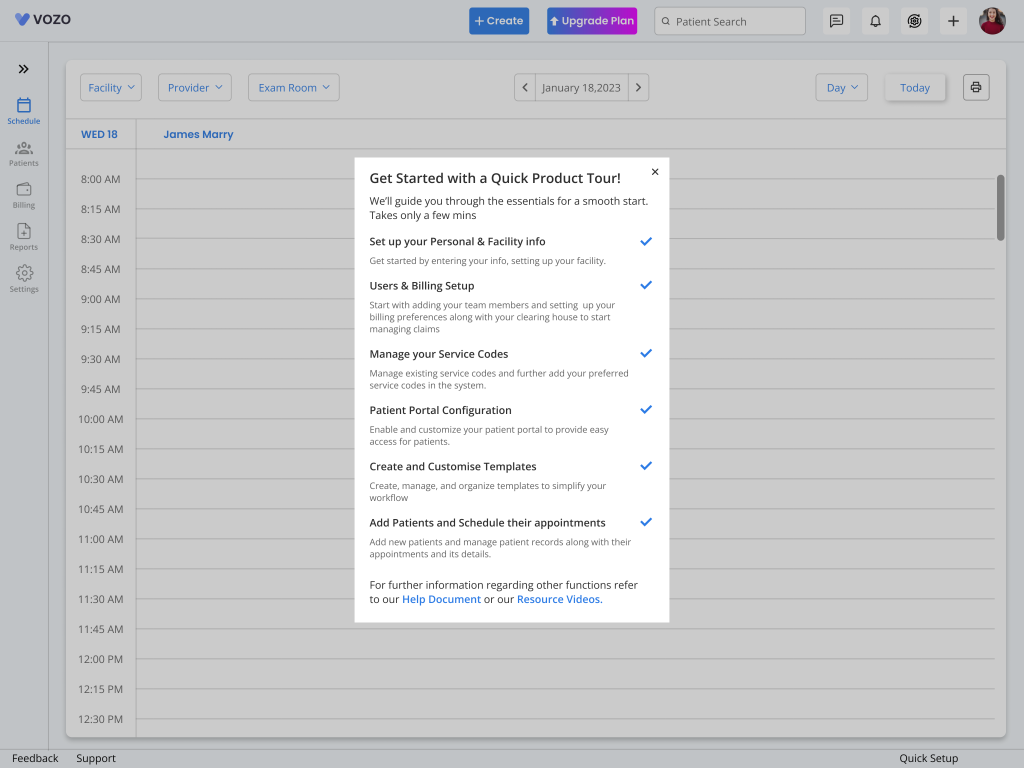
6. Once you complete the tour guide this mark as blue tick mark.
Table of Contents