How can we help?
-
Sign Up Your Account
-
Get Started
-
Appointments
-
Reporting & Analytics
-
Patient Management
- Patient Dashboard
- Patient Demographics
- Adding Patient Insurance
- Prior Authorization
- Insurance Eligibility Verification
- Additional Info
- Manage Patient's Contacts
- Flags
- Manage Patient Homework
- Patient Appointments
- Managing Credit Cards
- Documents
- Problems
- Allergies
- Medications
- Immunizations
- Family History
- Past Medical History
- Client Portal Access
- Creating New Patient
-
E-prescriptions
-
Lab Orders & Results
-
Task Management
-
Messaging
-
Feedback & Support
-
Insurance Billing
-
Practice Dashboard
-
Appointments Dashboard
-
Provider Availability
-
Appointment Profile
-
Billing Profile
-
Audit Log
-
Patient Payments
-
Patient Statements
-
Patient Ledger
-
Fee Schedule
-
Manual Insurance Payment Posting (EOB)
-
Card Transactions
-
Automatic Insurance Payment Posting (ERA - Electronic Remittance Advice)
-
Patient Flag
-
Note Taking
-
Macro Buttons
-
Patient Education
-
Incoming & Outgoing Fax
-
Referral Management
-
Account Settings
-
Billing & Services
-
Scheduling Settings
-
Administration Settings
-
Clinical Notes
-
Add-Ons
-
Explore Vozo
-
Patient Portal
-
Calendar Dashboard
-
Patient List
Home >
ERA Payment Posting
Views16
- Go to Billing > ERA.
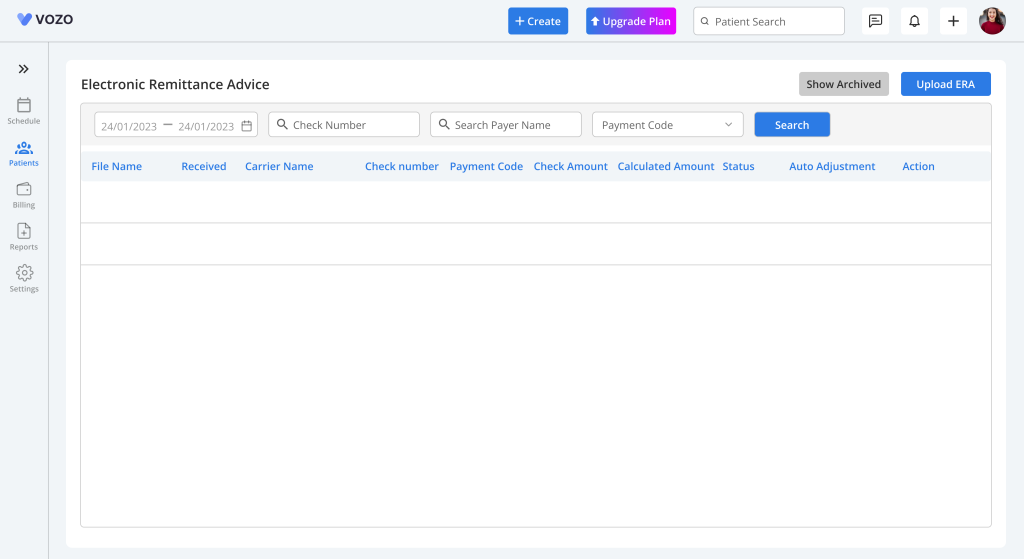
- Automatically post insurance payments by either uploading the .835 ERA file or automatically listing the ERA file directly from the clearing house by processing it.
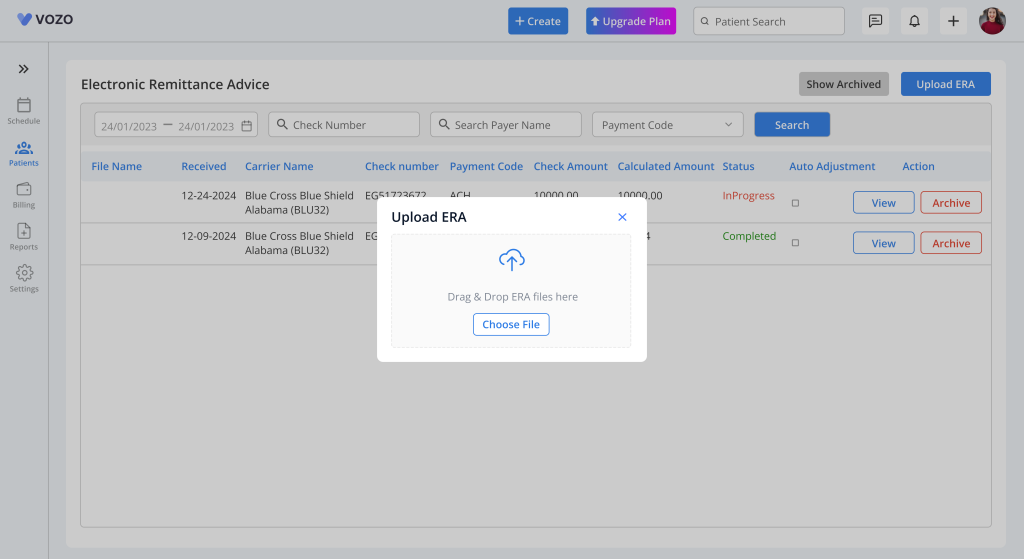
- To post payment, click Upload ERA and select and upload your file.
- The uploaded ERA will get processed, and the checks in the ERA will get listed with information of:
- File Name
- Insurance Payer
- Cheque Number
- Payment Code
- Cheque Amount
- Calculated Amount
- Payment Status
- By enabling the “Auto Adjustment” checkbox, when processing the ERA file, if there where any balance amount, it will get adjusted automatically.
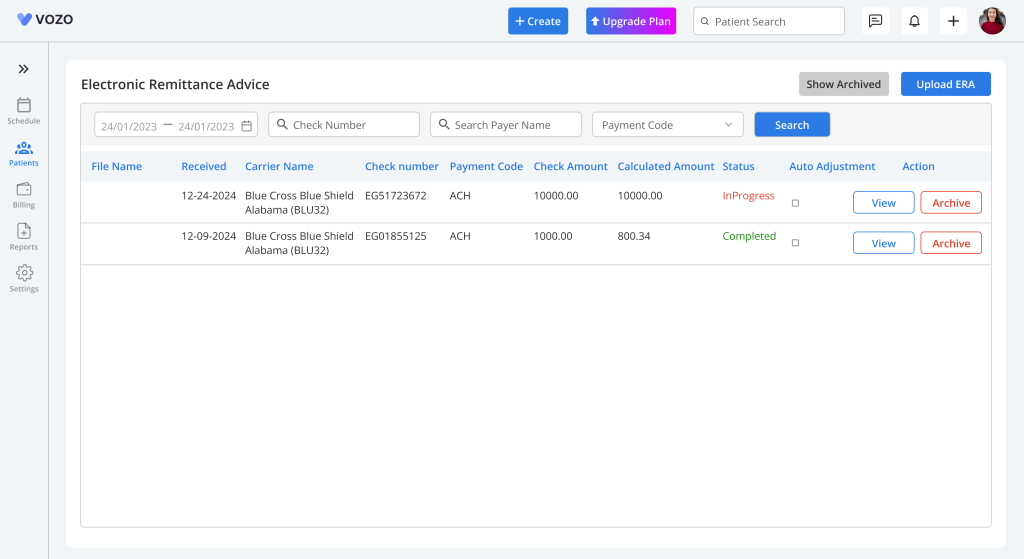
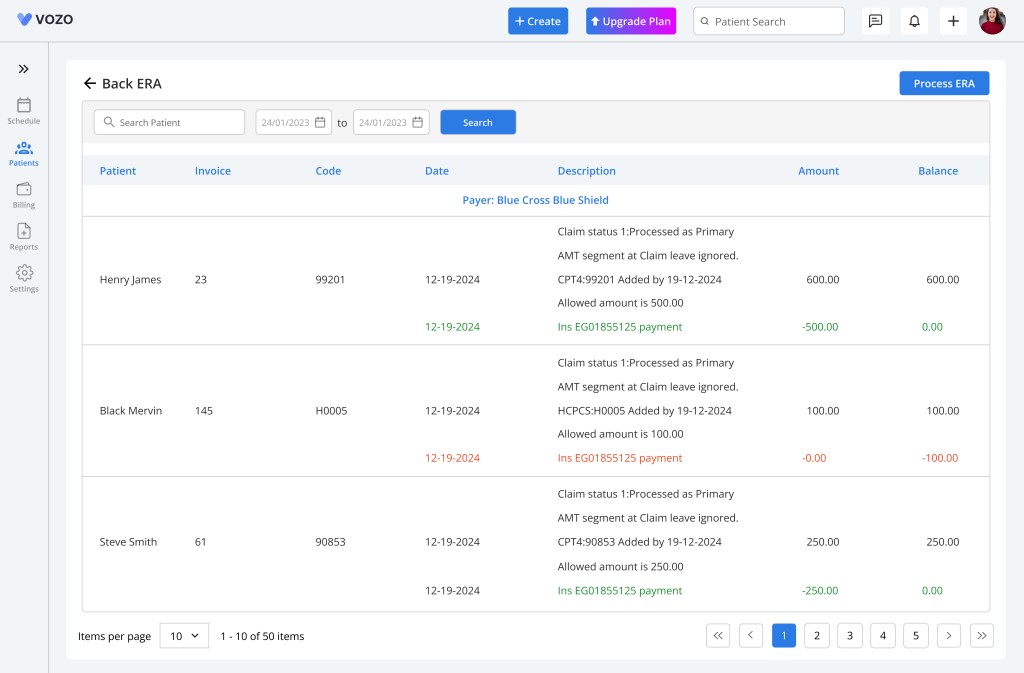
- Click the “View” button to preview the payment amount allocated to the patients based on their appointments and the services.
- Click the “Delete” button to delete the uploaded ERA file.
- Click the Process ERA button to allocate and post payment amounts automatically for all the patients based on their appointments and the services.
- Filter the ERA by “Uploaded Date”, “Cheque Number”, “Insurance Payer”, and “Payment Code”.
- To view deleted ERA files, click on the “Show Archived” button to view the files.
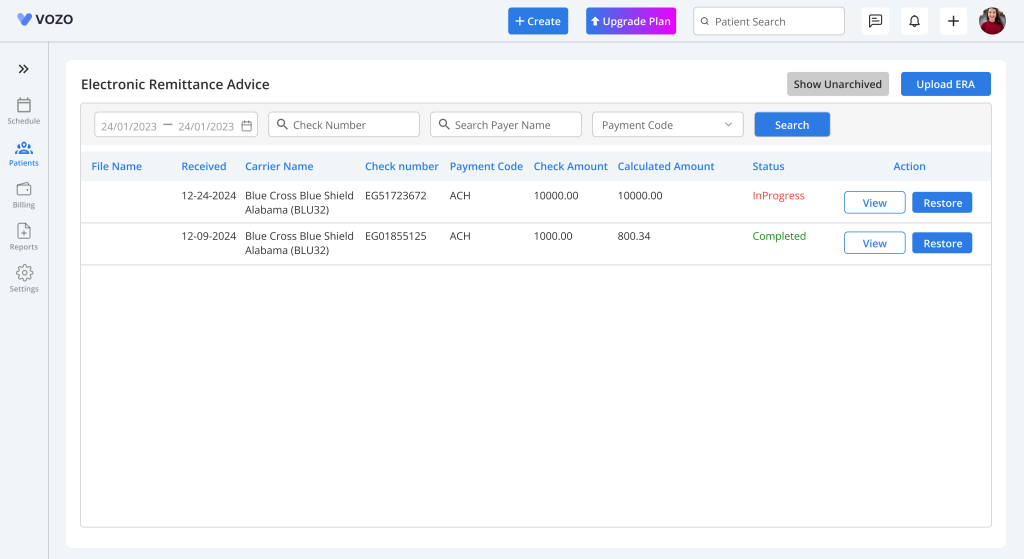
Table of Contents