How can we help?
Lab Orders & Reports
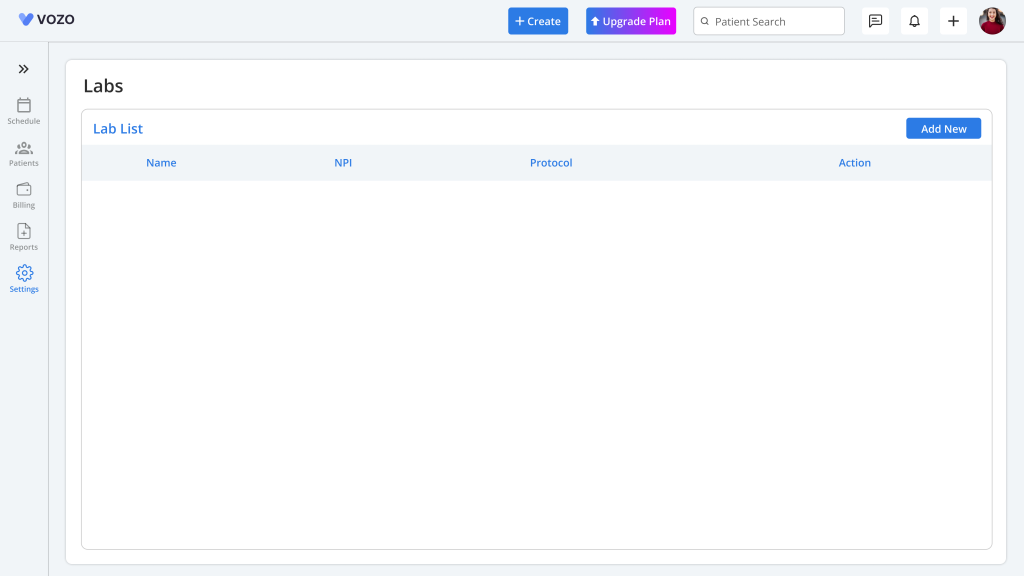
Lab Configuration
- Click on Settings > Billing & Services > Lab menu.
- Add and manage both integrated and manual lab configuration.
- To add new manual labs, click on the “Add New” button
- In the Add Lab pop-up, enter the required lab information and configuration details including:
Lab Information
- Organization Name
- Phone
- Address
- UPIN
- NPI
- TIN
- Taxonomy
Lab Configuration
- Sender ID
- Receiver ID
- Protocol
- Login User ID
- Remote Host
- Result Path
- Order Path
- Click “Save” to save the configuration of the lab information.
Note: If you’re unsure about the technical information, contact your lab provider’s support for help.
- For third-party lab configuration, Vozo will assist in setting up lab integrations as per user request.
Lab Orders
- Once the lab configuration is done you can start setting up your lab orders for the patients.
- Go to Patient list > Select a Patient > Lab Order menu, to add a new lab order.
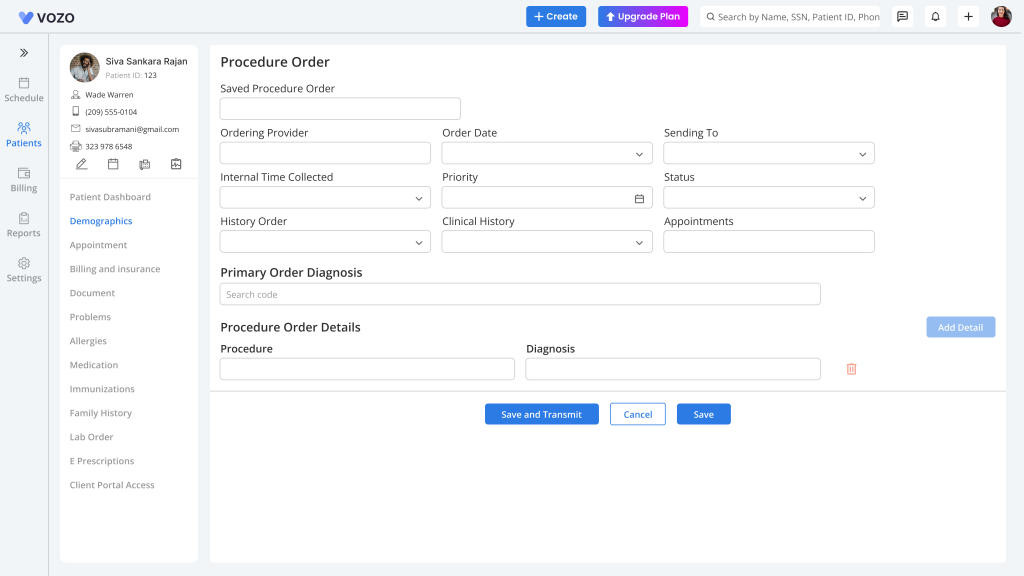
- In the “Procedure Order” page, enter the following details required for lab orders:
- Ordering Provider
- Order Date
- Sending To
- Internal Time Collected
- Status
- Appointment
- Primary Order Diagnosis
- Procedure Order Details (Procedure & Diagnosis)
- After entering all the details click on the “Save” button to just save the order or “Save & Transmit” button to directly send the order to lab.
- If you want to delete the order click on the “Delete” button to remove the lab order.
- To Preview the sent lab order, click the “Saved Procedure Order” dropdown it list the orders, select an order to view the details.
Lab Reports
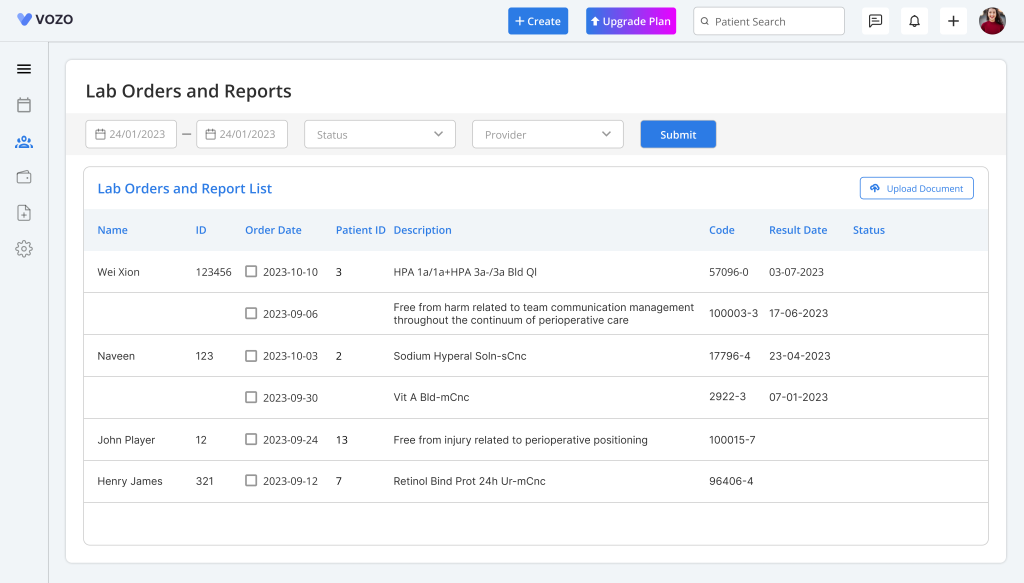
- Go to Patient > Lab Reports menu to view the lab records.
- Track the lab orders sent either internally or through the third-party lab integration and their status.
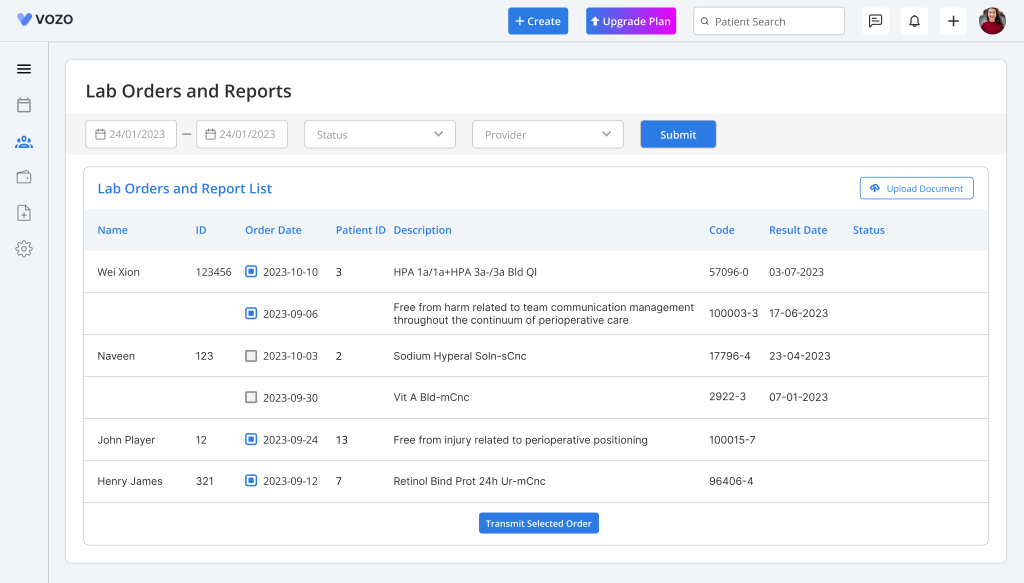
- If an order has already been transmitted, it cannot be selected from the list. Instead, a disabled symbol will be displayed when attempting to click on it.
- Select the checkboxes of the lab orders that are selectable and click on the “Transmit” button to send the orders to the lab.
- Click on the order date of the internally sent lab order to view the preview of the results.
- Click on the “Sign” button to check and sign the lab result, which will then be saved in the “Lab Result” tab of the Patient Document menu.
- Go to Patient > Document – lab result tab.
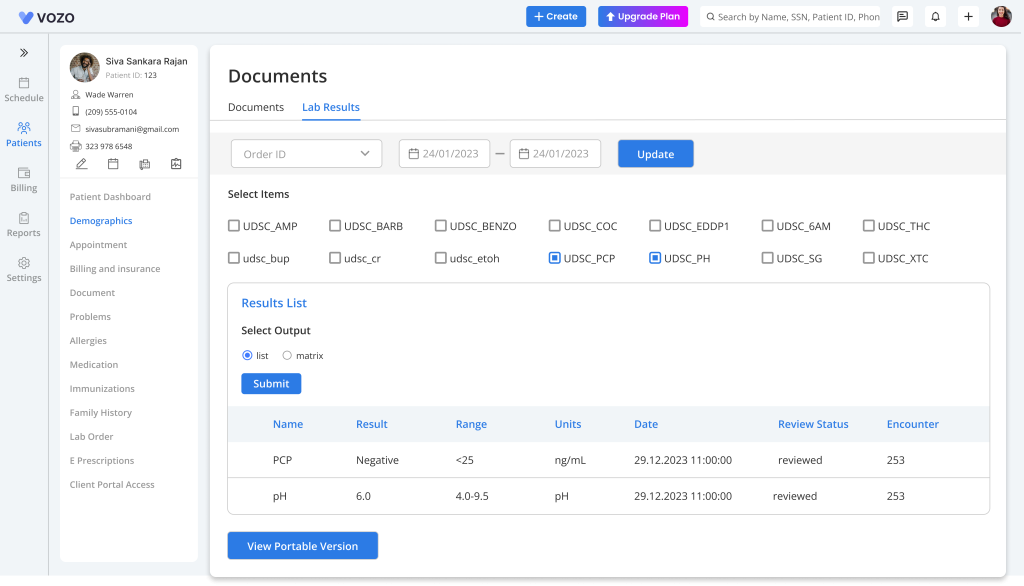
- Click on the “Upload Document” button to upload the lab result received from either the configured lab or from a third-party Integrated lab.
- Filter lab reports by Order Date, Provider, or by Report status.