How can we help?
-
Sign Up Your Account
-
Get Started
-
Appointments
-
Reporting & Analytics
-
Patient Management
- Patient Dashboard
- Patient Demographics
- Adding Patient Insurance
- Prior Authorization
- Insurance Eligibility Verification
- Additional Info
- Manage Patient's Contacts
- Flags
- Manage Patient Homework
- Patient Appointments
- Managing Credit Cards
- Documents
- Problems
- Allergies
- Medications
- Immunizations
- Family History
- Past Medical History
- Client Portal Access
- Creating New Patient
-
E-prescriptions
-
Lab Orders & Results
-
Task Management
-
Messaging
-
Feedback & Support
-
Insurance Billing
-
Practice Dashboard
-
Appointments Dashboard
-
Provider Availability
-
Appointment Profile
-
Billing Profile
-
Audit Log
-
Patient Payments
-
Patient Statements
-
Patient Ledger
-
Fee Schedule
-
Manual Insurance Payment Posting (EOB)
-
Card Transactions
-
Automatic Insurance Payment Posting (ERA - Electronic Remittance Advice)
-
Patient Flag
-
Note Taking
-
Macro Buttons
-
Patient Education
-
Incoming & Outgoing Fax
-
Referral Management
-
Account Settings
-
Billing & Services
-
Scheduling Settings
-
Administration Settings
-
Clinical Notes
-
Add-Ons
-
Explore Vozo
-
Patient Portal
-
Calendar Dashboard
-
Patient List
Home >
Scheduling a Recurring Appointment
Views27
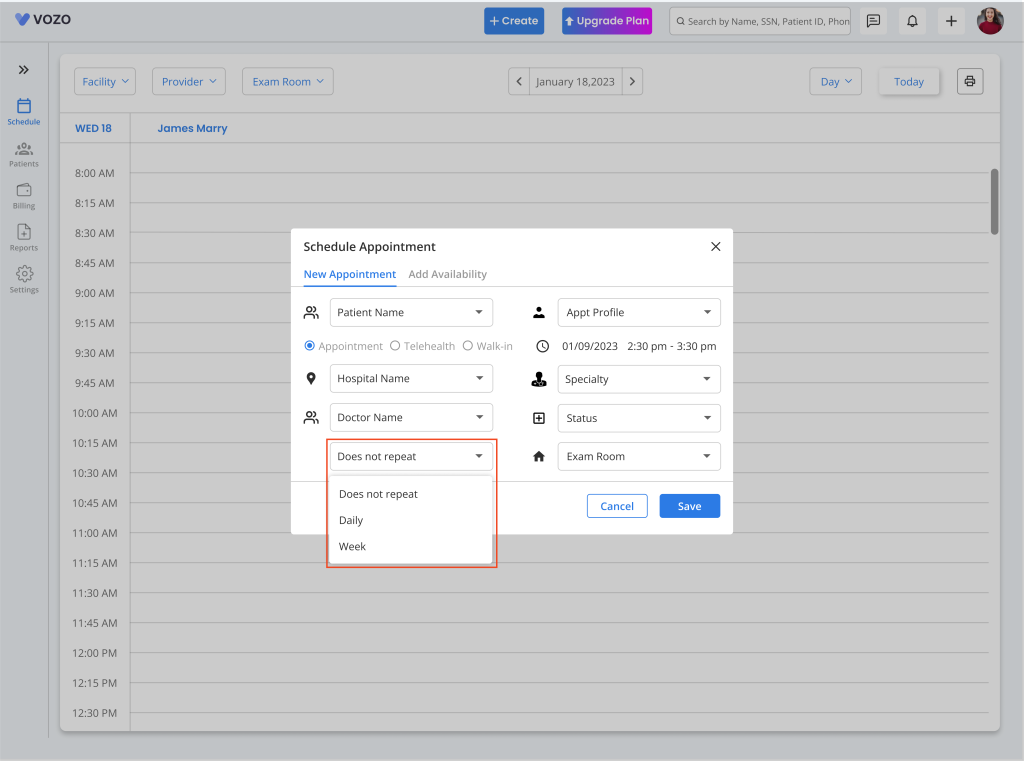
- Click “Schedule > Calendar” from the Schedule module to schedule a recurring appointment.
- You can also select a specific time slot from the calendar or click on the “Create > Create Appointment” button in the top nav bar.

- In the New Appointment pop-up, enter the details for the recurring appointment.
- To set a recurring appointment, click on the “Does not Repeat” dropdown and select either the “Daily” or “Weekly” option based on the appointment pop-up.
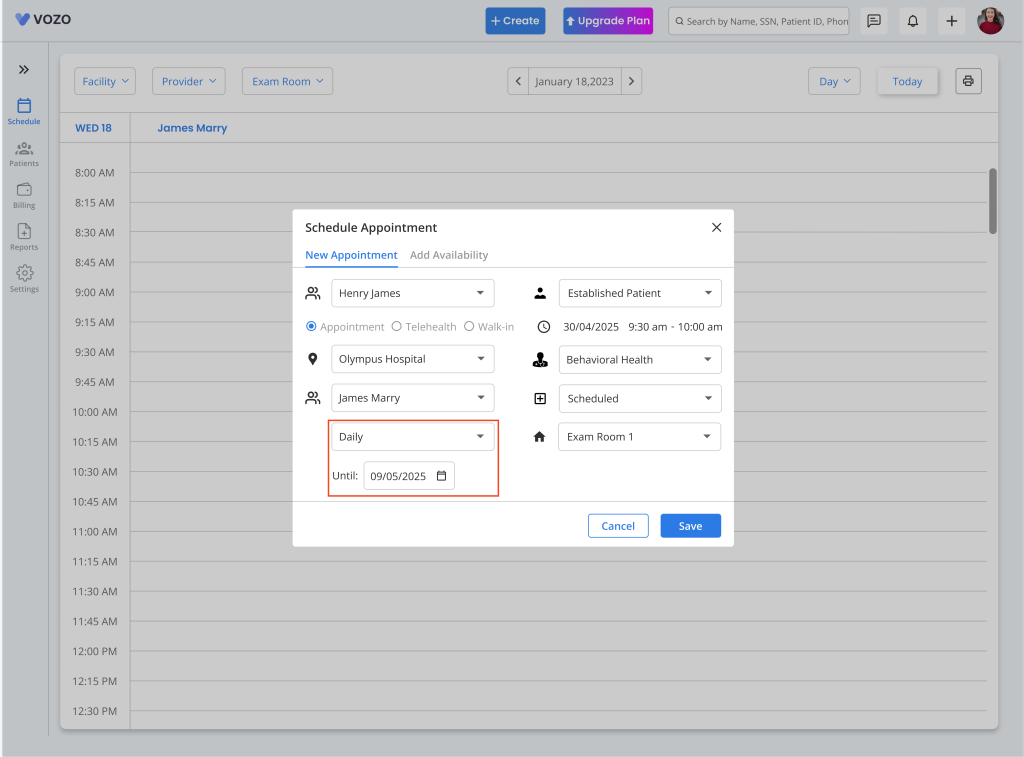
- If the Daily option has been selected, select an “End Date” until which you want the recurring appointment to be scheduled.
- The recurring appointment for the “Daily” option will get scheduled based on the start date and end date of the appointment. start date will consider as today’s date if need user can edit the start date to.
- If the user selects the “Week” option, the “Days in the Week” will be displayed below the dropdown along with the “End Date” selection.
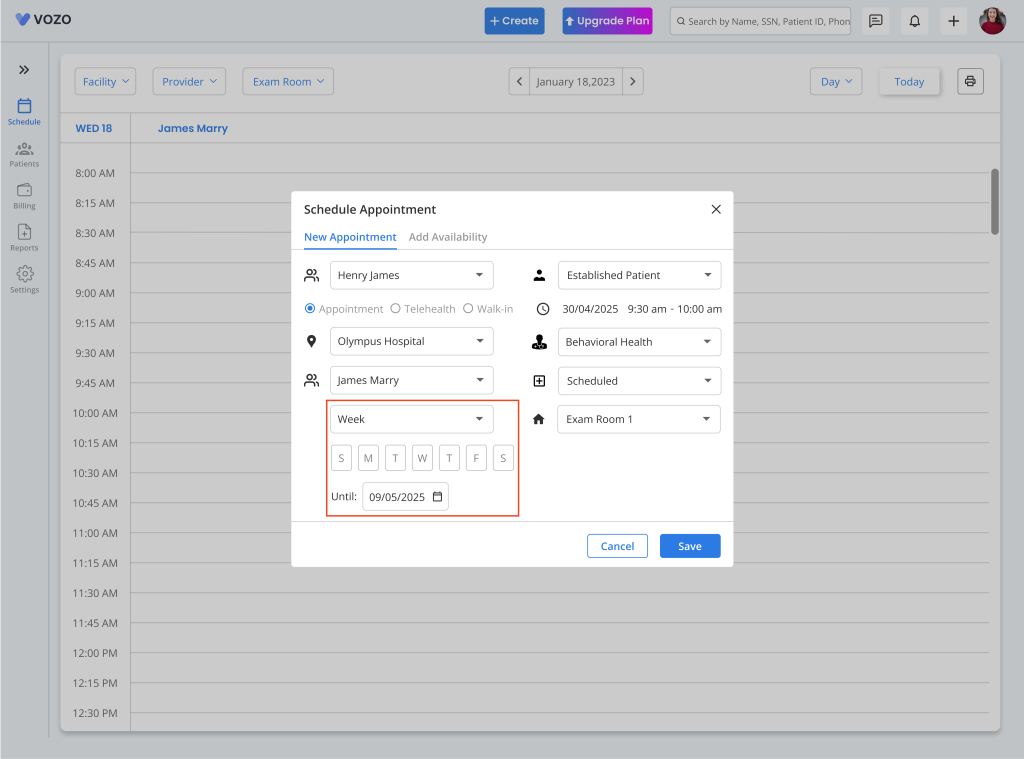
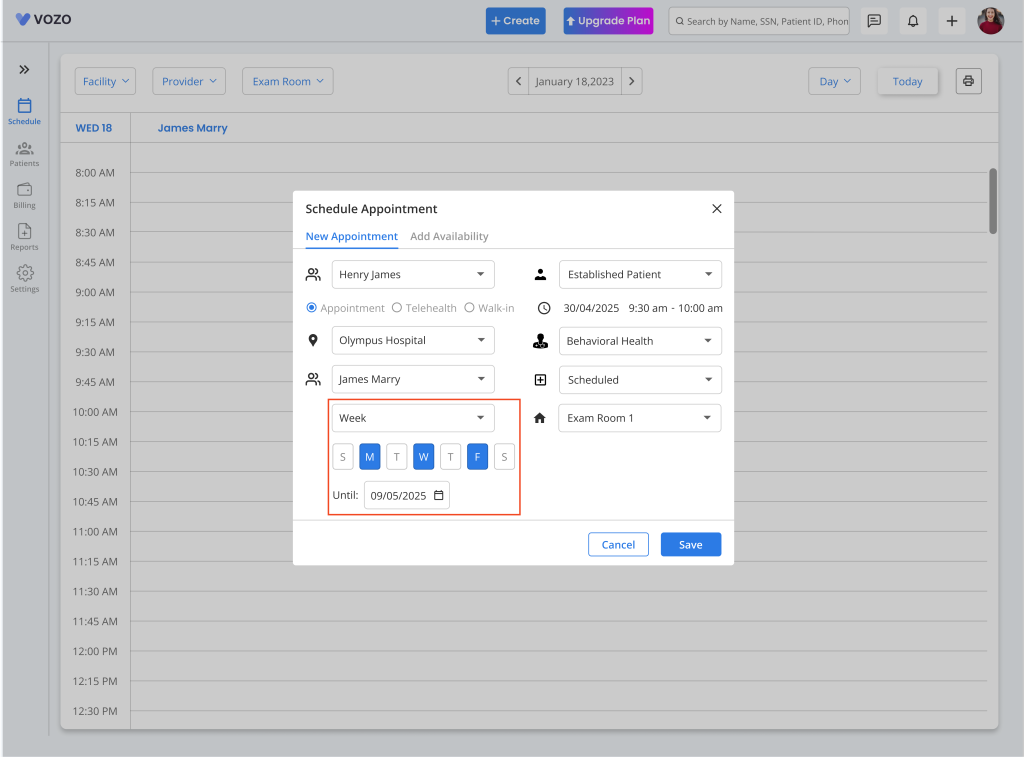
- The provider can select the respective days where they want the appointments to be scheduled and the end date up to which the appointment to be repeated.
- Now the Appointment will get scheduled in the Calendar page based on the selected until date and time.
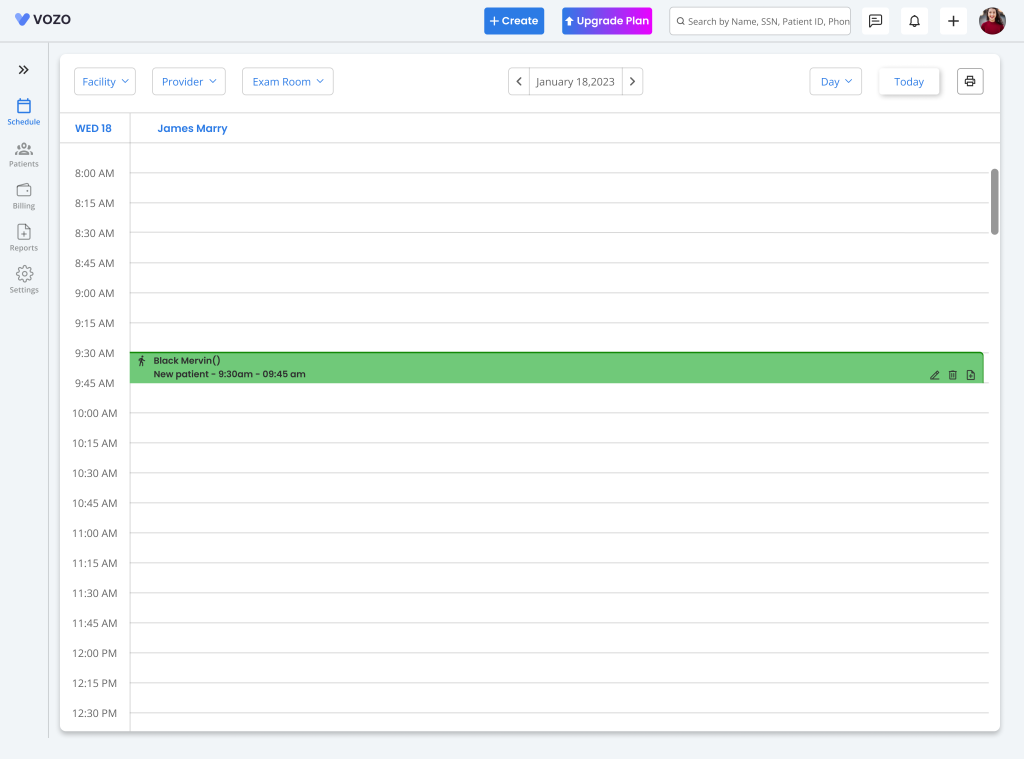
Table of Contents