How can we help?
-
Sign Up Your Account
-
Get Started
-
Appointments
-
Reporting & Analytics
-
Patient Management
- Patient Dashboard
- Patient Demographics
- Adding Patient Insurance
- Prior Authorization
- Insurance Eligibility Verification
- Additional Info
- Manage Patient's Contacts
- Flags
- Manage Patient Homework
- Patient Appointments
- Managing Credit Cards
- Documents
- Problems
- Allergies
- Medications
- Immunizations
- Family History
- Past Medical History
- Client Portal Access
- Creating New Patient
-
E-prescriptions
-
Lab Orders & Results
-
Task Management
-
Messaging
-
Feedback & Support
-
Insurance Billing
-
Practice Dashboard
-
Appointments Dashboard
-
Provider Availability
-
Appointment Profile
-
Billing Profile
-
Audit Log
-
Patient Payments
-
Patient Statements
-
Patient Ledger
-
Fee Schedule
-
Manual Insurance Payment Posting (EOB)
-
Card Transactions
-
Automatic Insurance Payment Posting (ERA - Electronic Remittance Advice)
-
Patient Flag
-
Note Taking
-
Macro Buttons
-
Patient Education
-
Incoming & Outgoing Fax
-
Referral Management
-
Account Settings
-
Billing & Services
-
Scheduling Settings
-
Administration Settings
-
Clinical Notes
-
Add-Ons
-
Explore Vozo
-
Patient Portal
-
Calendar Dashboard
-
Patient List
Home >
Submitting Secondary Insurance Claims
Views17
- Once the primary insurance has processed and paid the claim, if there is any remaining balance, you can generate a secondary insurance claim.
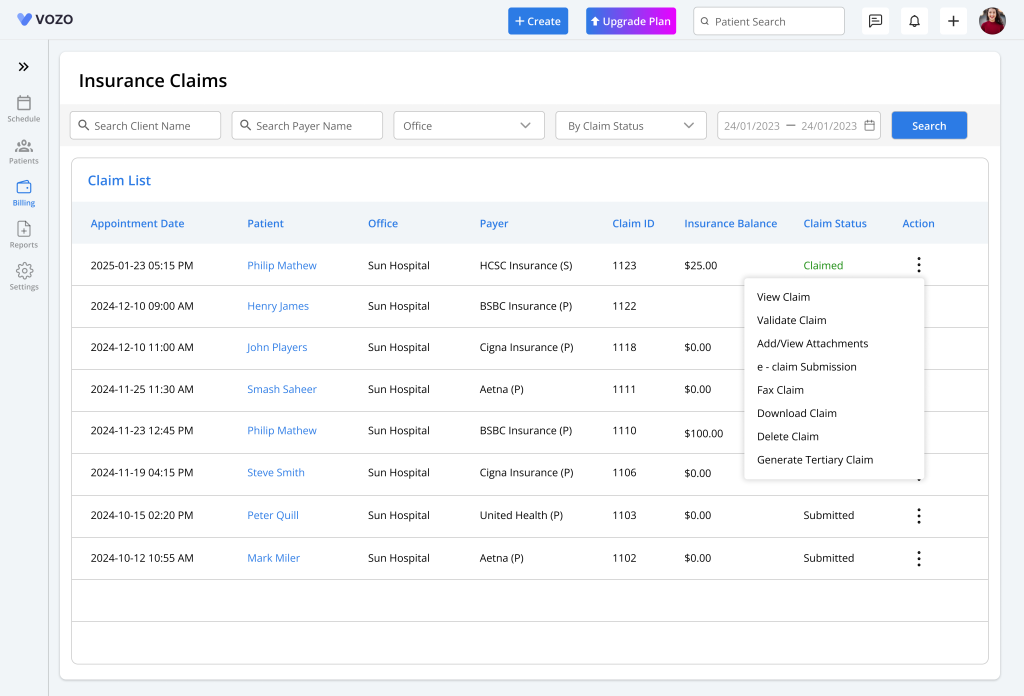
- To do this, go to Billing > Insurance Claim.
- On the Insurance Claim page, the option to Generate Secondary Claim will appear:
- Inside the action menu (three dots) of the primary insurance.
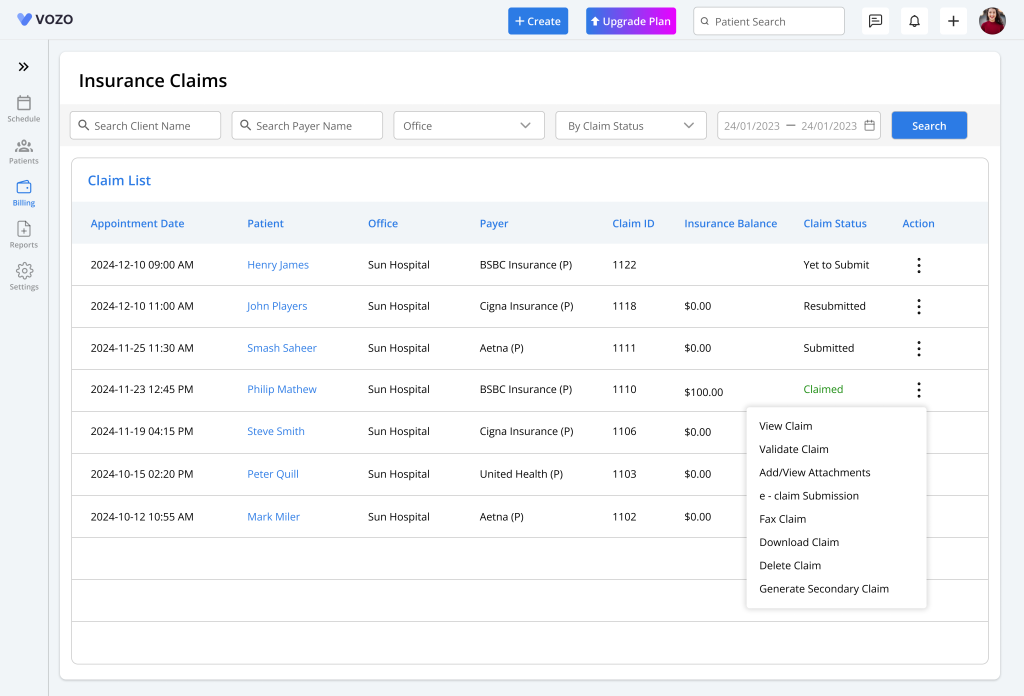
- Or directly within the editable claim form of the appointments that have already been processed.
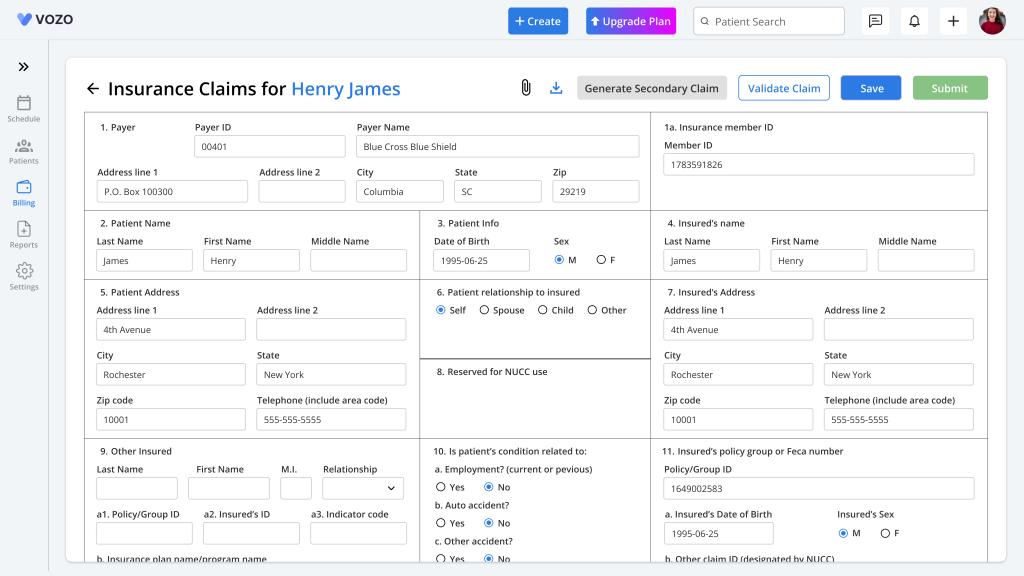
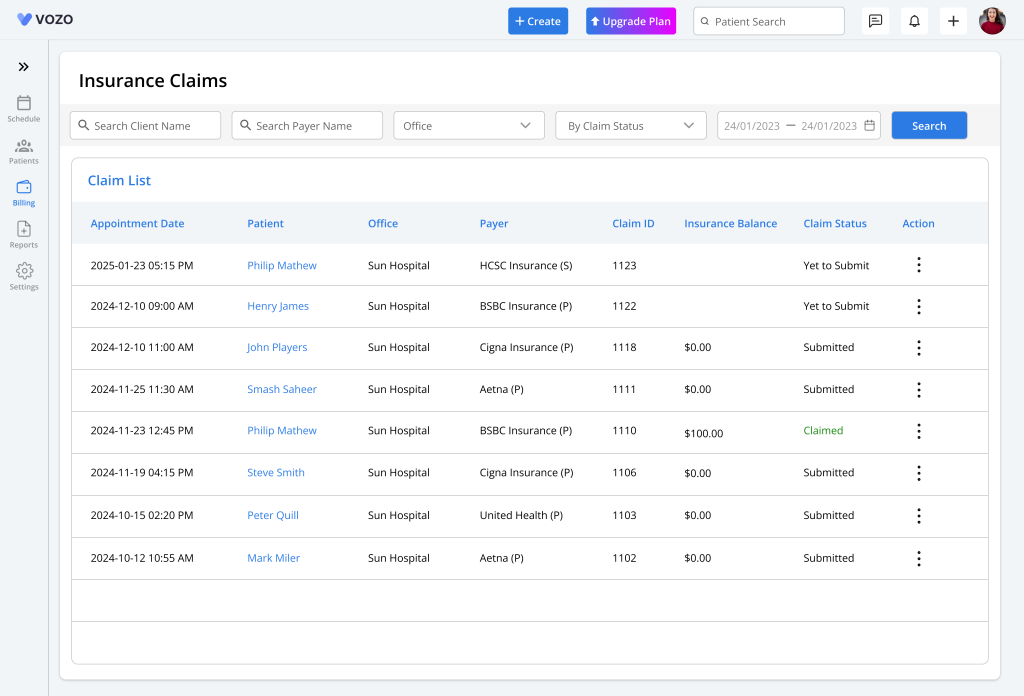
- Clicking Generate Secondary Claim will create a copy of the appointment with the secondary insurance payer’s name.
- Most of the information from the primary claim will be automatically filled in, and some fields may be cleared for editing.
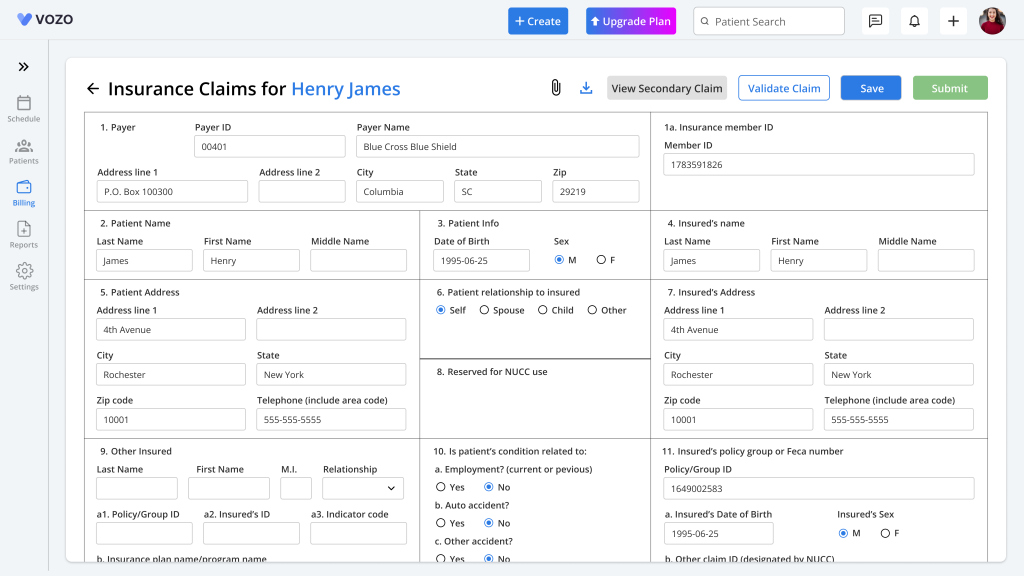
- In the secondary claim form, you’ll also see a View Primary Claim button, which allows you to quickly refer back to the original claim.
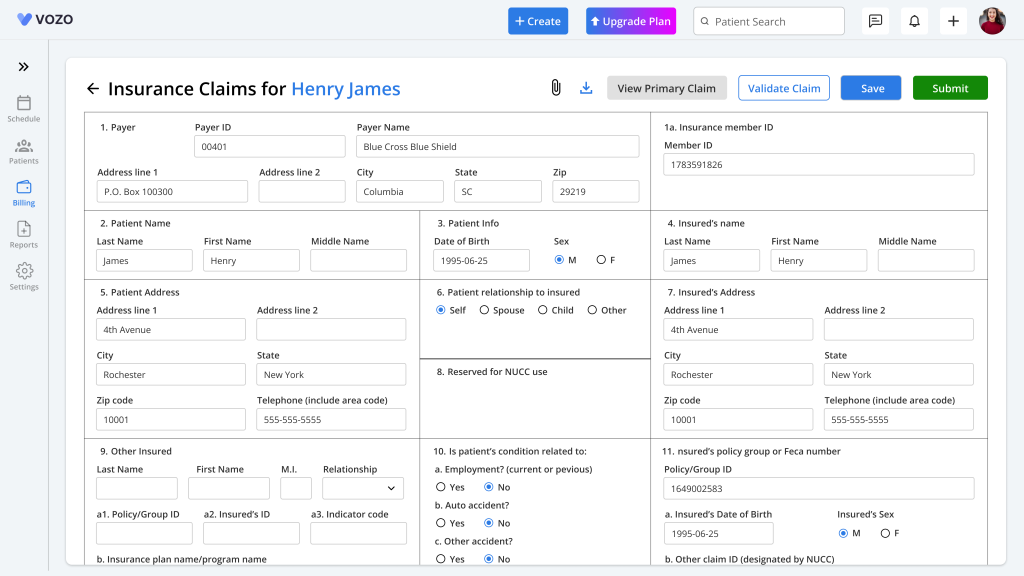
- In the original primary claim, the Generate Secondary Claim button will now change to View Secondary Claim, so you can switch between both claims easily, without needing to go back and forth manually.
- Submitting the secondary claim is just like submitting the primary claim:
- Review the information
- Validate the claim
- Save and submit it to the secondary insurance
- Once the secondary payer reviews the claim, they’ll send a payment response either through an EOB or ERA file.
- The payment process for the secondary claim works the same way as for the primary claim.
- If there’s still a balance left after the secondary insurance payment, you’ll see the option to Generate Tertiary Claim in the action menu of the secondary claim.
- The process for generating, editing, validating, and submitting the tertiary claim is the same as with the secondary claim.
Table of Contents