How can we help?
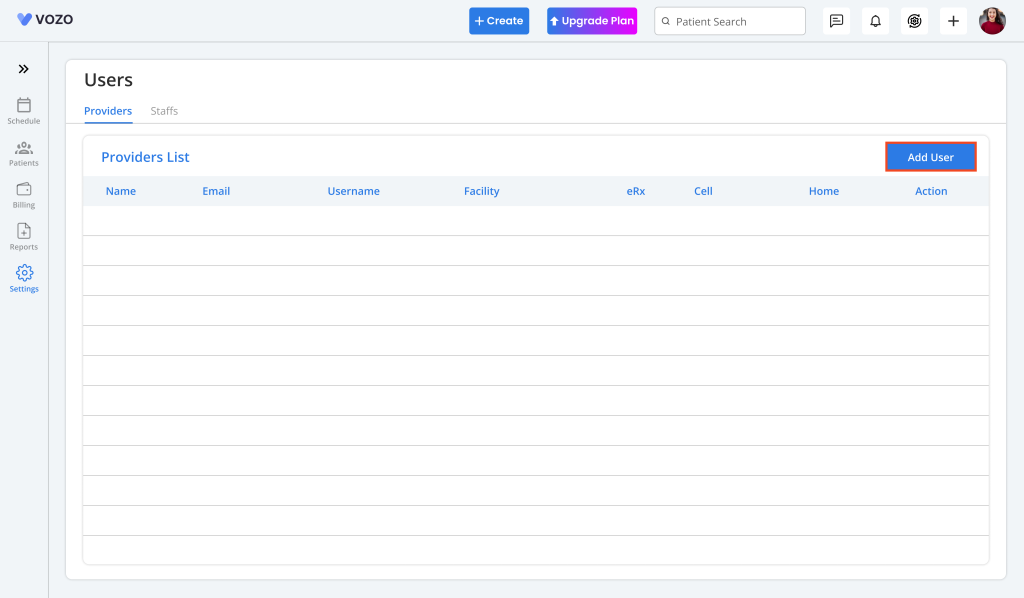
Users
Managing Providers
- Click on Settings > Account Settings > Users menu.
- Add and manage your practice’s Providers and Staff based on their roles.
- In the Provider Tab, click on the “Add Provider” button to add a provider and enter the following details:
- First Name
- Last Name
- Primary Provider
- Enable Co-Sign Clinical Notes
- Role
- Username
- Password
- Default Facility
- Phone Numbers
- Address
- DOB
- Federal Tax ID
- DEA Number
- NPI
- UPIN
- Taxonomy
- Specialty
- Appointment Type (Walk-in, Telehealth, Both)
- Licenses Type
- License Number
- License State
- Expiry Date
- Enable Digital Rx/EPCS (if paid as an Add-on by the Admin)
- Enable Telehealth (If paid as Add-on in Basic Plan)
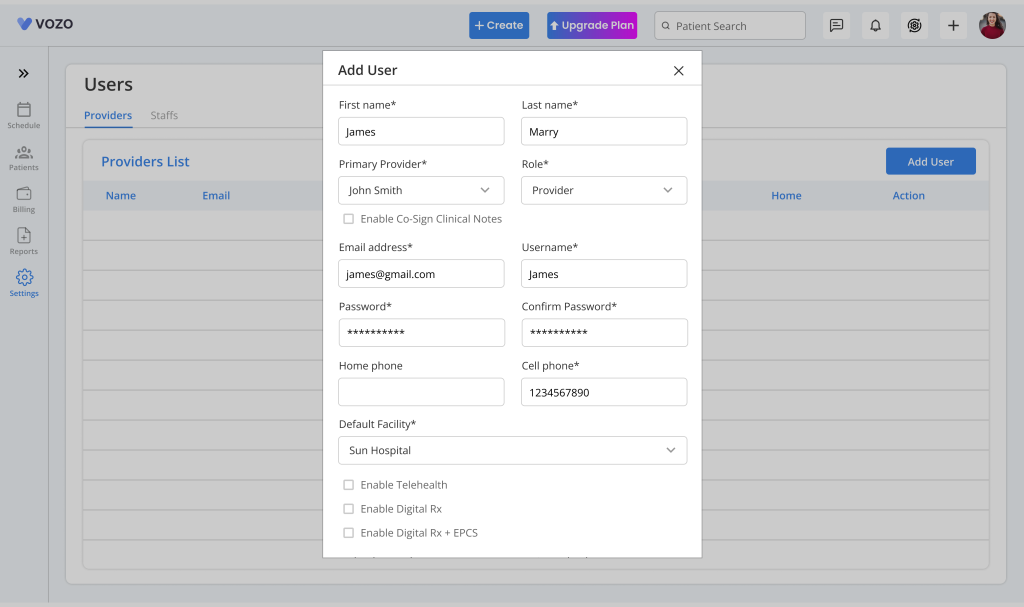
- Click “Save” to save the Provider information in the provider list.
- The saved provider information will be shown in list view.
Note: The number of providers that can be added is based on the number of Add-on clinicians purchased by the admin. Plus the eRx column in the provider list will be checked only if the Digital Rx is enabled for the provider.
6. To edit the provider information, click on the Edit icon, change the details, and click Save to save the changes.

7. Click on the Delete icon to delete the provider from the list.
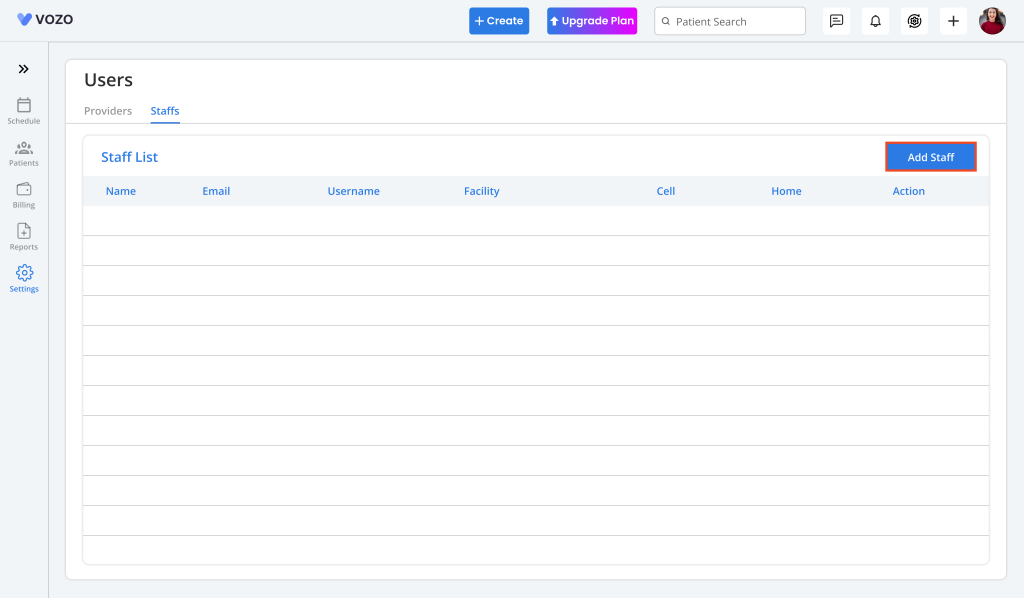
Managing Staff
- In the Staff Tab, click on the “Add Staff” button to add unlimited staff and enter the following details:
- First Name
- Last Name
- Primary Provider
- Role
- Username
- Password
- Default Facility
- Phone Numbers
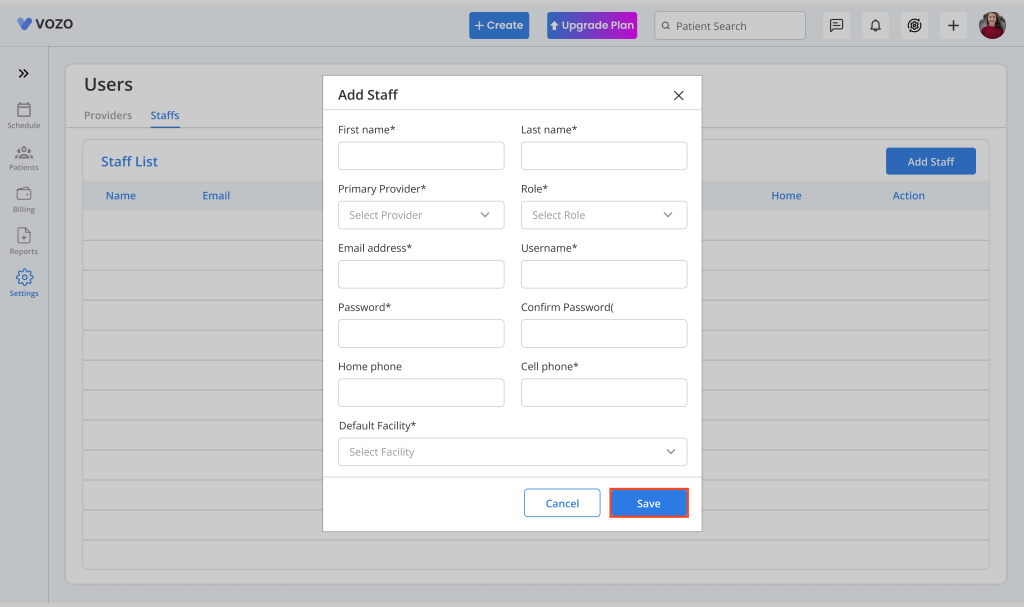
- Click “Save” to save the Staff information in the staff list.
- The saved staff details will be shown in list view.
- To edit the staff information, click on the Edit icon, change the details, and click Save to save the changes.
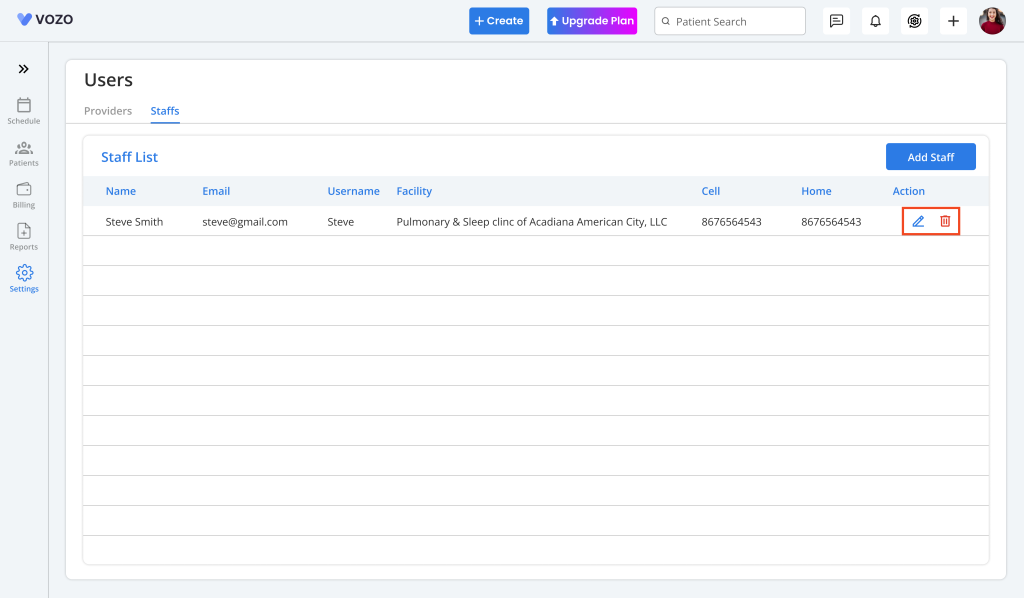
- Click on the Delete icon to delete the staff from the list.