How can we help?
Patient Group & Group Appointment
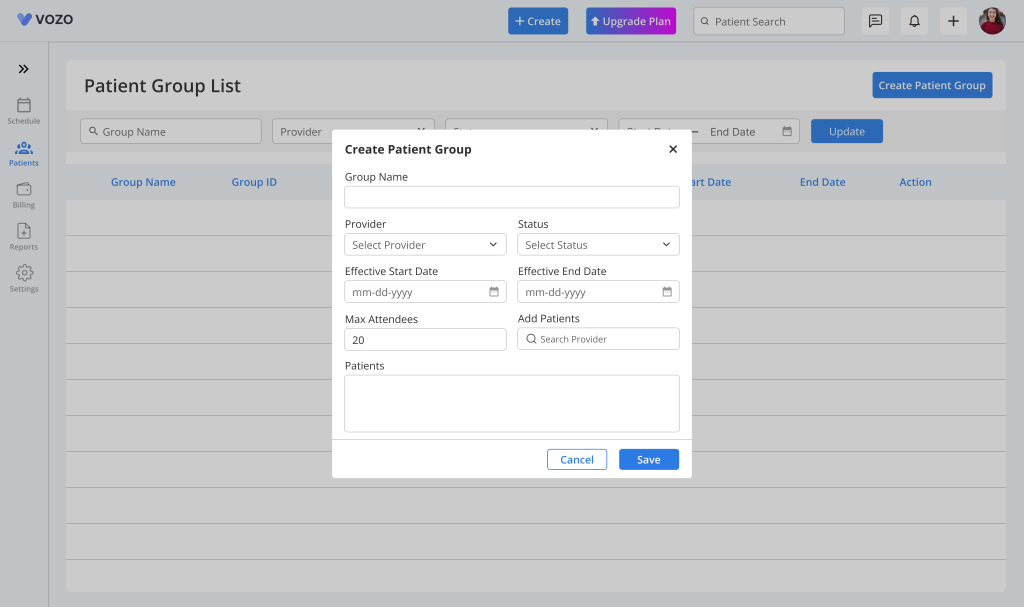
- To create a patient group, navigate to the Patient module and click “Patient Group” below the Patient List.
- Click “Create Patient Group” and enter details such as Group Name, Provider, Status, Start and End Date, and Maximum Attendees.
- Add patients using the Add Patients search option and verify them in the list before saving. Once saved, the group will appear in the Patient Group list for future use.
View & Manage Patient Groups
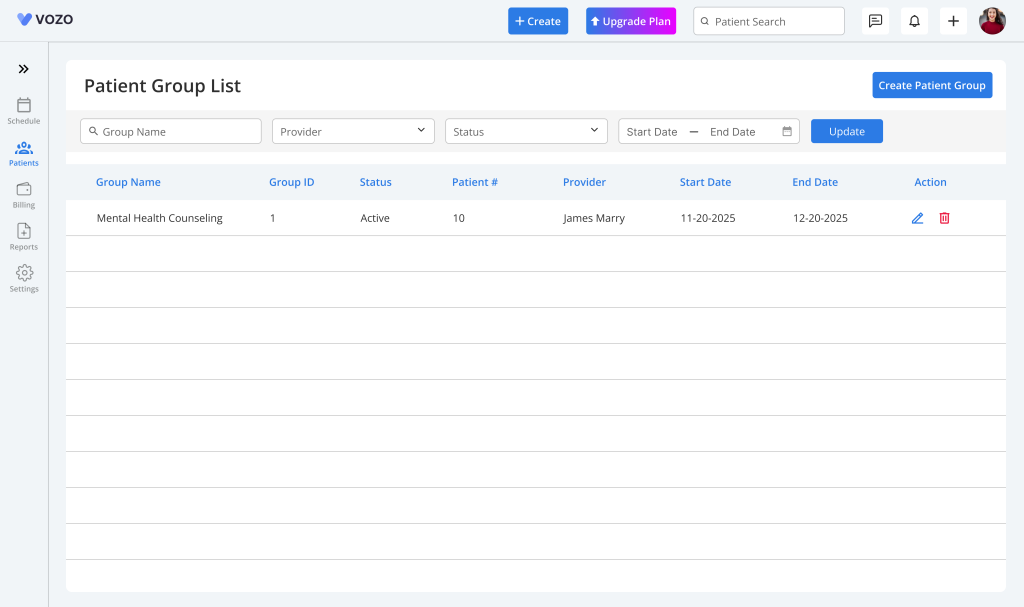
- To manage existing groups, go to Patient → Patient Group and view all created groups in the list. You can search by Group Name or apply filters such as Provider, Status, and Date.
- Use the Edit option to update group details or Delete to remove a group when it is no longer needed.
Schedule a Group Appointment
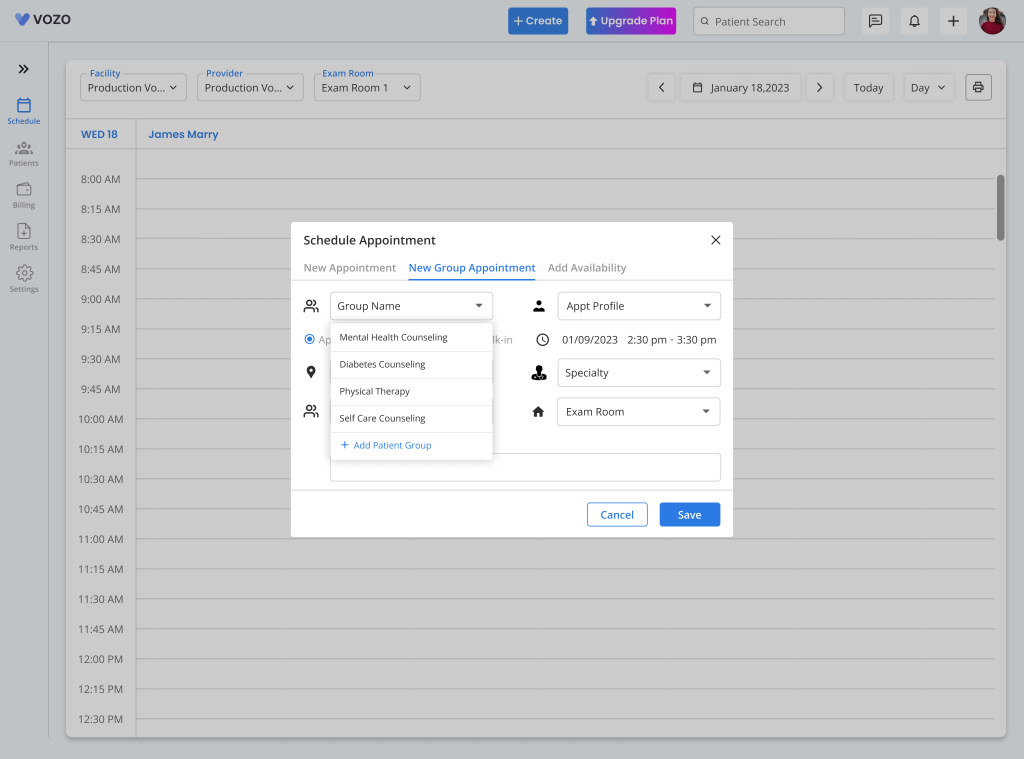
- Navigate to the Calendar/Scheduling module and click “Create” or select a time from the “Time Slot”, then select the “New Group Appointment” tab to begin scheduling.
- Enter required details such as Group Name, Appointment Type, Appointment Profile, Date & Time, Facility, Specialty, Provider, Exam Room, and Reason, then click “Save” to add the appointment to the calendar.
View Group Appointment Summary
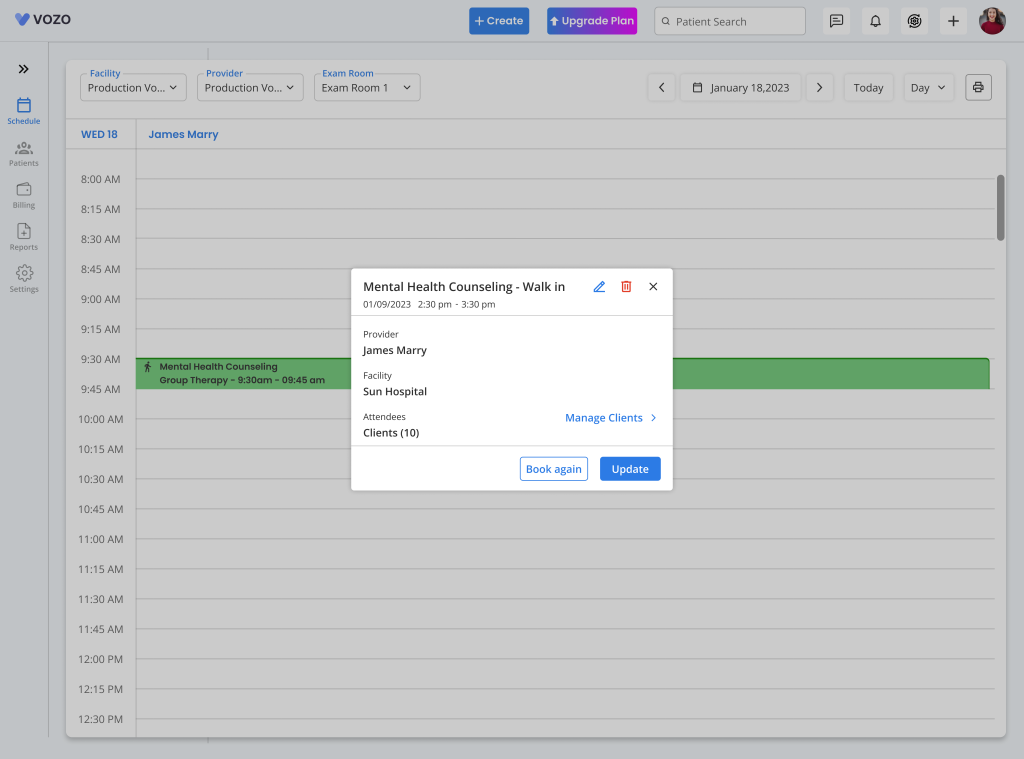
- Open the calendar and click on the scheduled group appointment to view its summary. The summary includes Group Name, Appointment Type, Date & Time, Provider, Facility, and number of attendees.
- From this view, you can perform actions such as Manage Clients, Update, or Book Again for quick rescheduling.
Manage Attendees & Track Attendance
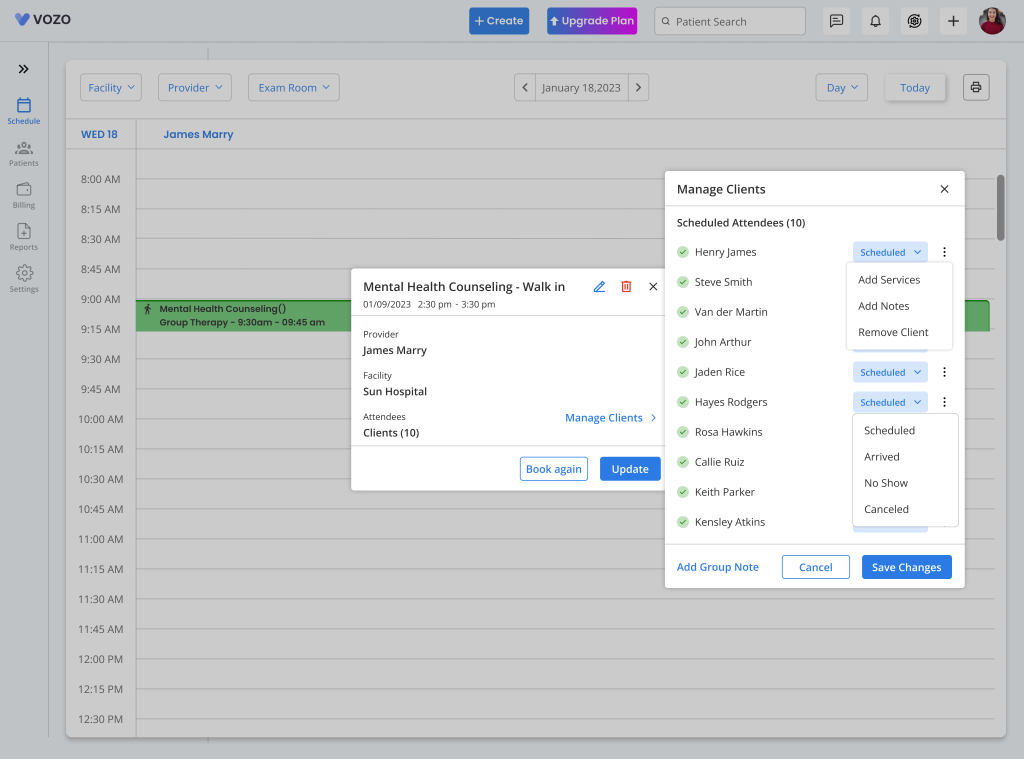
- Click “Manage Attendees” to update attendance for each patient in the group. You can assign statuses such as Scheduled, Arrived, No Show, or Cancelled.
- For telehealth appointments, statuses include Doctor Confirmed, Meet Completed, and Meet Cancelled. Once marked as Arrived or Meet Completed, the status cannot be changed.
Add Notes & Services
- Within the Manage Attendees section, use the ⋮ menu for each patient to add services or notes as needed.
- You can also add a Group Note that applies to all patients in the group, ensuring consistent documentation across participants.
Start Telehealth Session
- For telehealth appointments, ensure the patient status is Doctor Confirmed before starting the session.
- Click “Start Video Call” to begin the session, and only patients with the meeting link will be able to join.
Remove Patient from Appointment
- To remove a patient, go to Manage Attendees, open the ⋮ menu, and click “Remove Client” to delete them from the group appointment.
Billing & Payments
- Open the group appointment and navigate to Manage Attendees, then select a patient and click “View Appointment”.
- From there, you can add services, generate invoices or claims, and process payments. Billing is handled individually for each patient.
Where Group Appointments Appear
- Group appointments can be viewed in multiple sections such as Patient Appointments (Past Appointments), Appointment Dashboard, and Appointment Reports → Group Appointment tab.
- They are displayed with identifiers like Walk-in – Group or Telehealth – Group, and are also accessible from Patient Dashboard, Billing & Payments, Claims, and Clinical Reports.