How can we help?
Appointment Waitlist
- To access the Appointment Waitlist, navigate to the Schedule module and click on the Calendar menu. Near the filter section, select the Appointment Waitlist icon to open the Appointment Waitlist page.
- The Appointment Waitlist page allows providers and staff to manage appointment requests submitted for future scheduling availability.
Appointment Waitlist Page
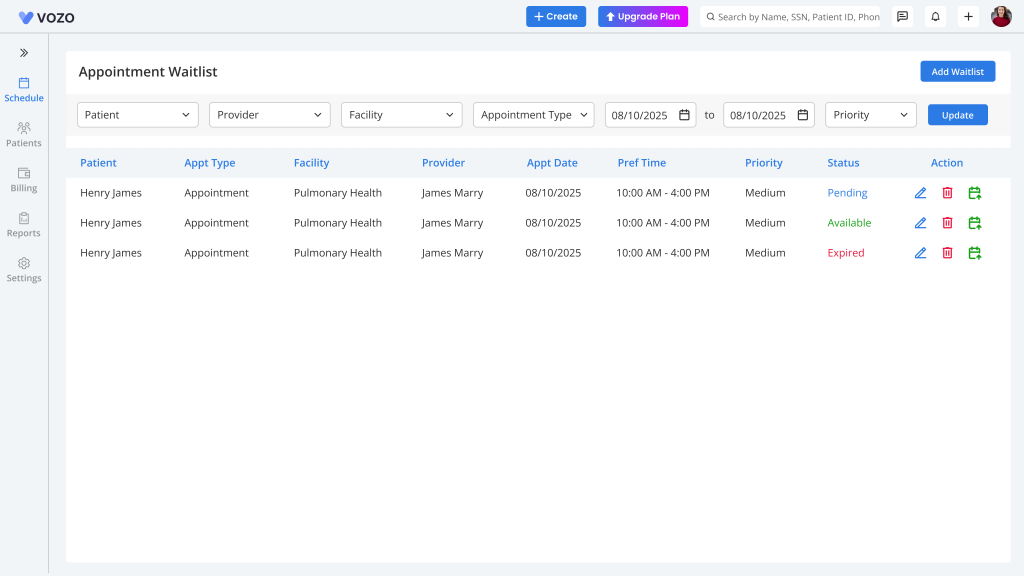
- The Appointment Waitlist page displays all waitlist requests along with filtering options to help quickly locate specific requests.
- Users can filter waitlist records using details such as Patient, Provider, Facility, Appointment Type, Start Date, End Date, and Priority.
- After applying the required filters, the system displays the corresponding waitlist records automatically.
Add a Waitlist Appointment
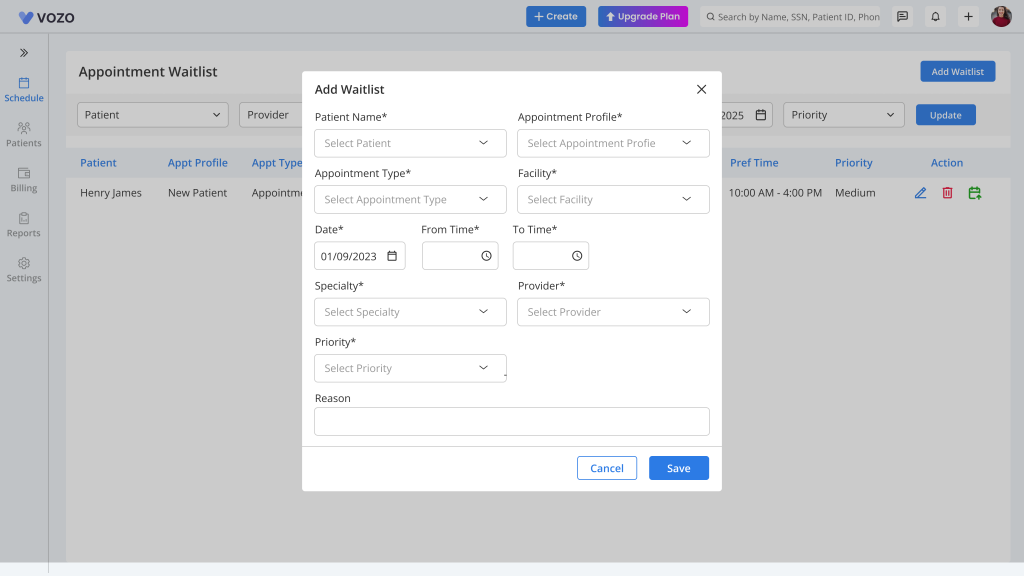
- To create a new waitlist request, open the Appointment Waitlist page and click the “Add Waitlist” button.
- A popup window will appear where you can enter appointment details including Patient Name, Appointment Profile, Appointment Type, Facility, Date, Time Range, Specialty, Provider, Priority, and Reason.
- After entering all required information, click “Save” or “Submit” to add the request to the Appointment Waitlist.
Manage Waitlist Appointments
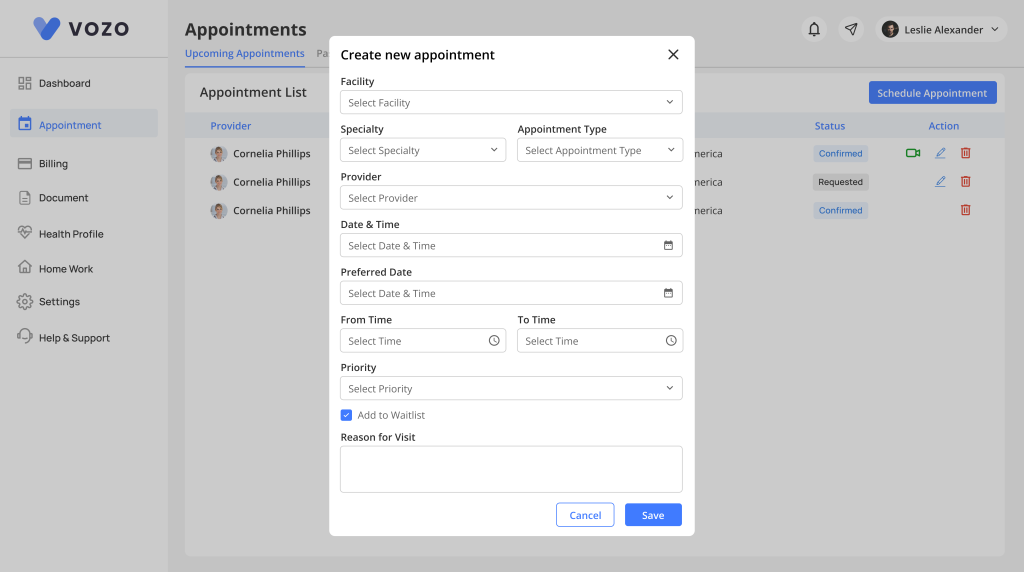
- In the Appointment Waitlist list, locate the required patient request and click the preferred Action button under the action column to manage the request.
- Select “Accept Appointment” to proceed with scheduling the appointment. The Schedule Appointment popup will open with patient information automatically prefilled.
- Users can modify appointment details if needed before saving and confirming the booking.
- The system automatically updates the waitlist appointment status based on the selected appointment date.
- Statuses include:
- Available – Displayed when the appointment date is current or upcoming
- Expired – Displayed when the appointment date has already passed
Waitlist Count Indicator
- The Appointment Waitlist icon on the Calendar page displays the total number of active waitlist requests.
- This count updates automatically whenever new waitlist requests are added to the system.
Patient Portal Waitlist Requests
- Patients can also submit waitlist requests directly through the Patient Portal while requesting appointments.
- During appointment request creation, patients can select the “Add to Waitlist” checkbox before submitting the request.
- Once submitted, the request automatically appears in the Appointment Waitlist page, where providers can review and take appropriate action.
This workflow enables providers and staff to efficiently manage appointment availability, monitor patient requests, and streamline scheduling through the Appointment Waitlist system.