How can we help?
Imaging
Create Imaging Orders, Import Results, and Review Diagnostic Images
The Imaging feature helps providers create imaging orders, upload imaging results, review reports, and manage imaging tests from the patient detail page.
Access the Imaging Menu
- Open the Patient Detail Page.
- Click Imaging from the menu.
- The Imaging page contains three tabs:
- Imaging Orders
- Imaging Results
- Imaging Test
Imaging Test
- The Imaging Test tab helps manage imaging categories and tests.

Add Imaging Type
- Open Imaging Test tab.
- Click Add Imaging Type.
- Enter imaging type name.
- Click Save.
- Example:
- MRI
- X-Ray
- Ultrasound
Add Imaging Tests
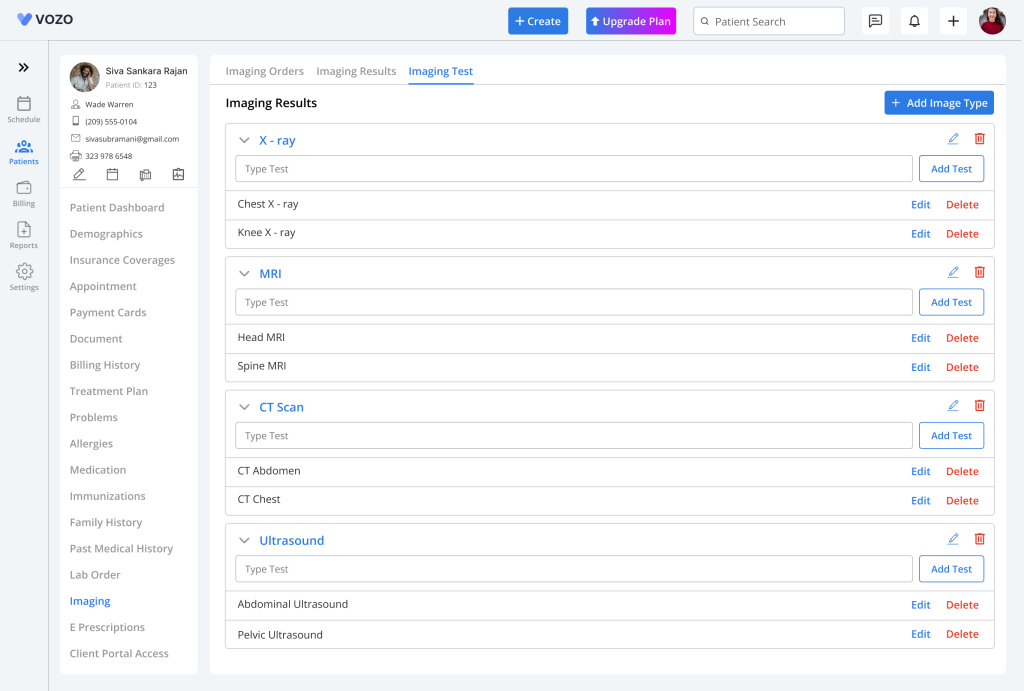
- After adding the imaging type:
- Select the imaging type.
- Click Add Test.
- Enter test name.
- Click Save.
- Example:
Imaging Type: MRI
Tests:
- MRI Brain
- MRI Spine
- MRI Knee
Imaging Orders
Create a New Imaging Order
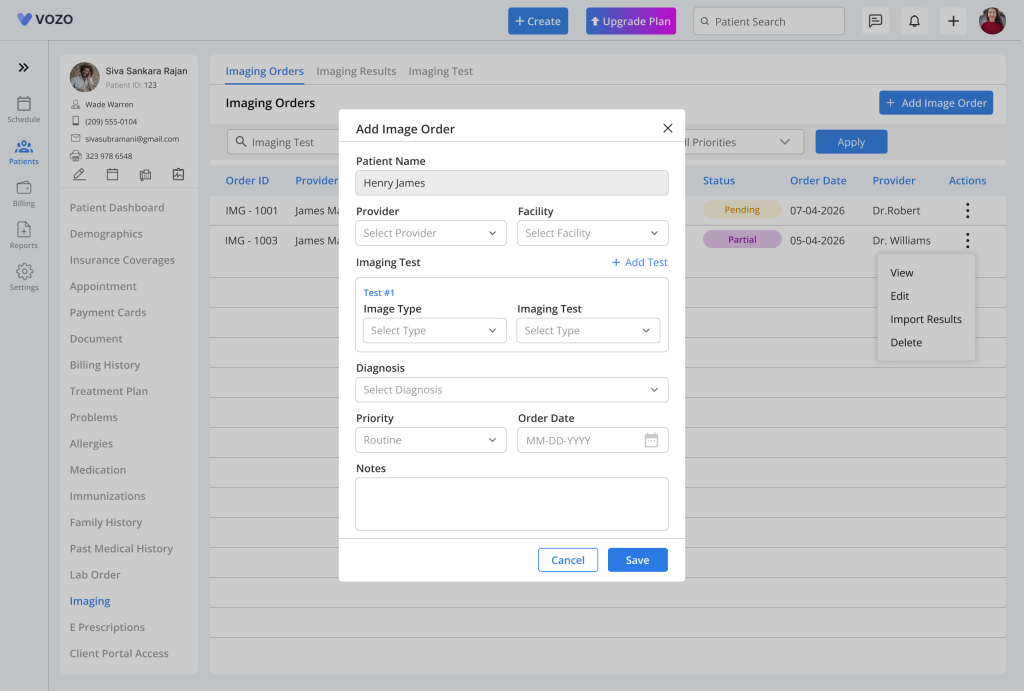
- Open the Imaging Orders tab.
- Click Add Imaging Order.
- A popup window will open.
Enter Imaging Order Details
- The following details can be added:
- Patient Name – Automatically selected by the system.
- Imaging Type – Choose the imaging category.
Example:
- X-Ray
- CT Scan
- MRI
- Ultrasound
- Imaging Test – Select one or more imaging tests.
Example:
- Chest X-Ray
- MRI Brain
- Abdomen Ultrasound
- Diagnosis – Add one or multiple diagnosis codes if needed.
- Priority – Choose the order priority:
- Routine – Regular imaging request.
- Stat – Immediate attention required.
- Urgent – High-priority imaging request.
- Review entered details.
- Click Save.
- After saving:
- Order appears in Imaging Orders
- Default status becomes Pending
Imaging Order Status
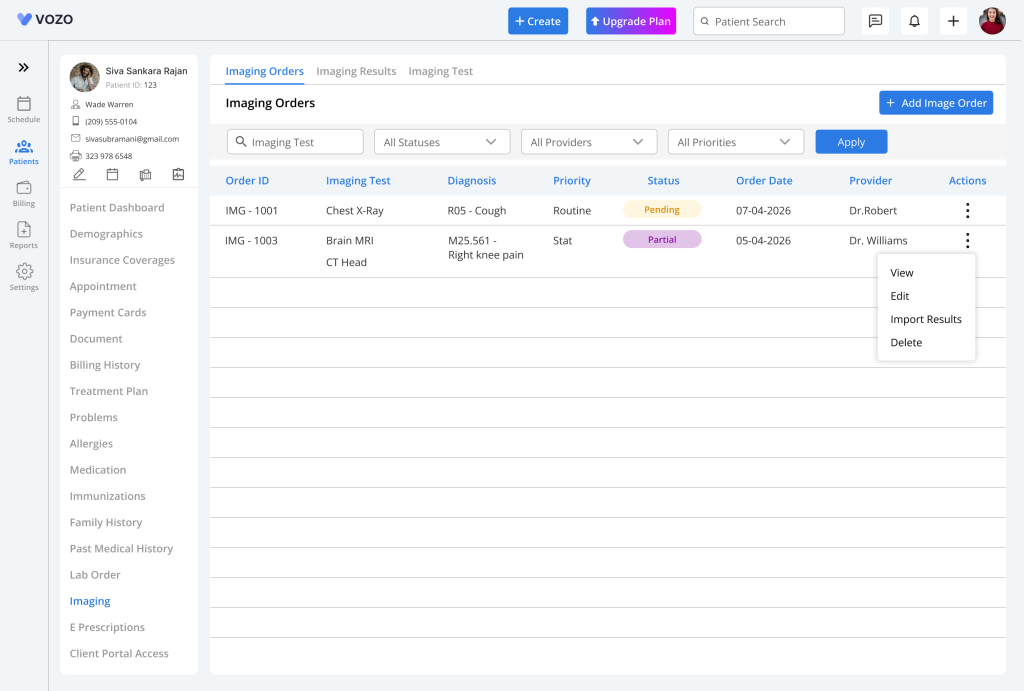
- Pending – No results imported yet.
- Partial – Multiple tests were ordered, Only some test results were uploaded
Example:
3 imaging tests ordered → 1 uploaded → status becomes Partial
- The order stays in Partial status until all results are uploaded.
Import Imaging Results
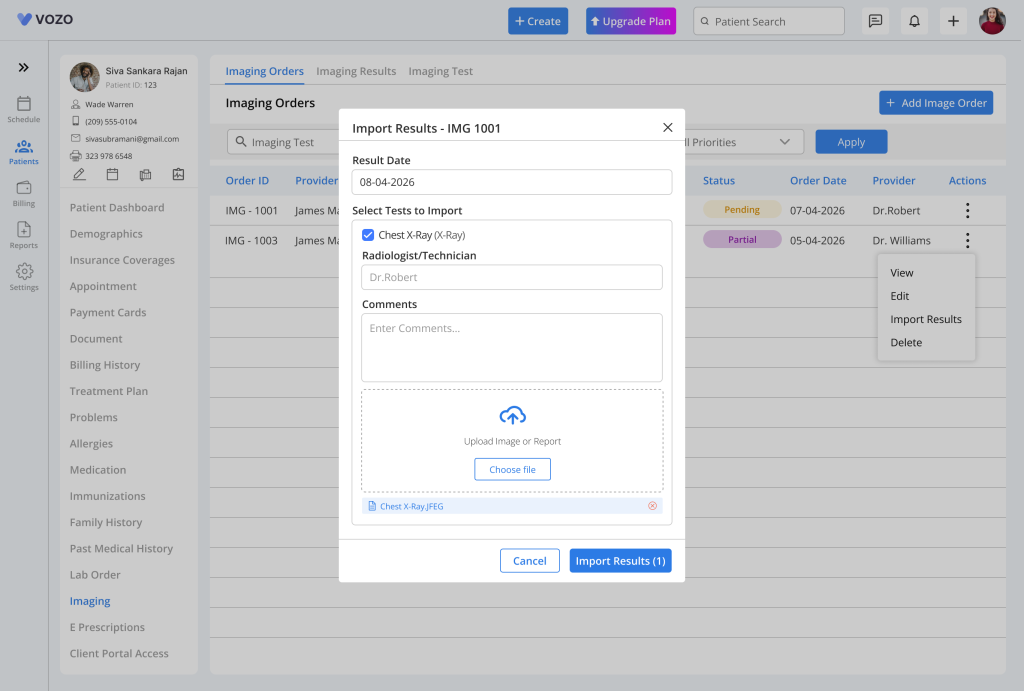
- To upload imaging results:
- Open Imaging Orders.
- Click Import Result.
- A popup window opens.
- Complete the following:
- Select Test – Use checkbox to select the required test.
- Radiologist/Technician Name – Enter the provider or technician name.
- Upload Result File – Supported file types:
- JPEG
- PNG
- DCM
After Upload
- Once upload is completed:
- Result is saved successfully
- Imaging order moves to Imaging Results
- Status updates automatically
Imaging Results
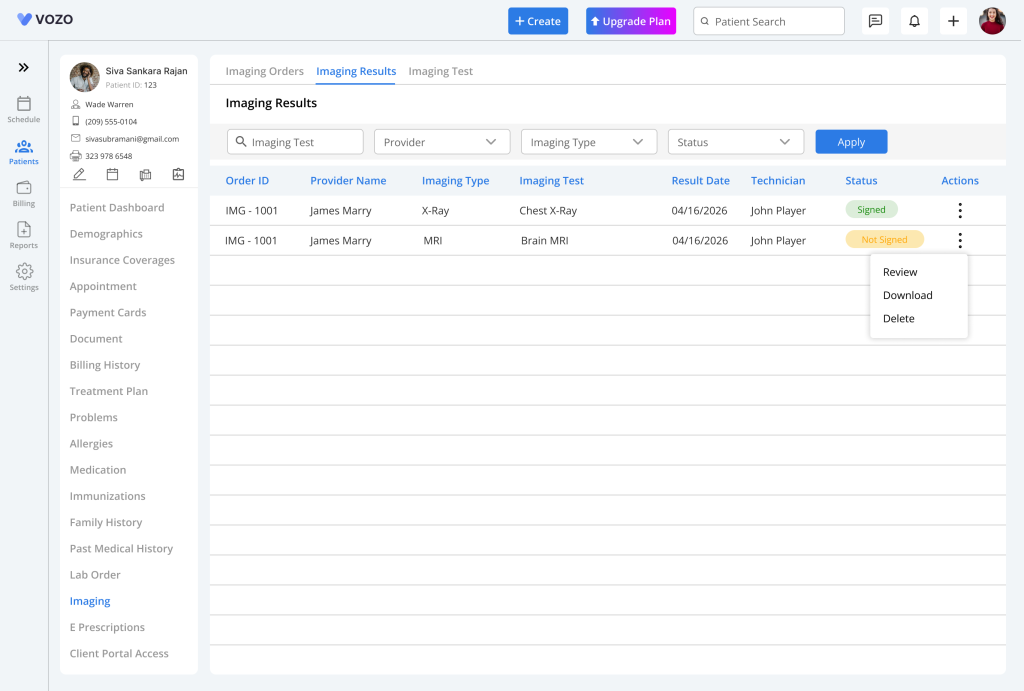
- The Imaging Results tab shows all uploaded imaging reports.
Result Status
- After importing results:
- Status shows as: Not Signed – This means the result is uploaded but not yet reviewed.
Review Imaging Results
- Open Imaging Results.
- Click Action.
- Select Review.
- A review popup window opens.
Review and Sign
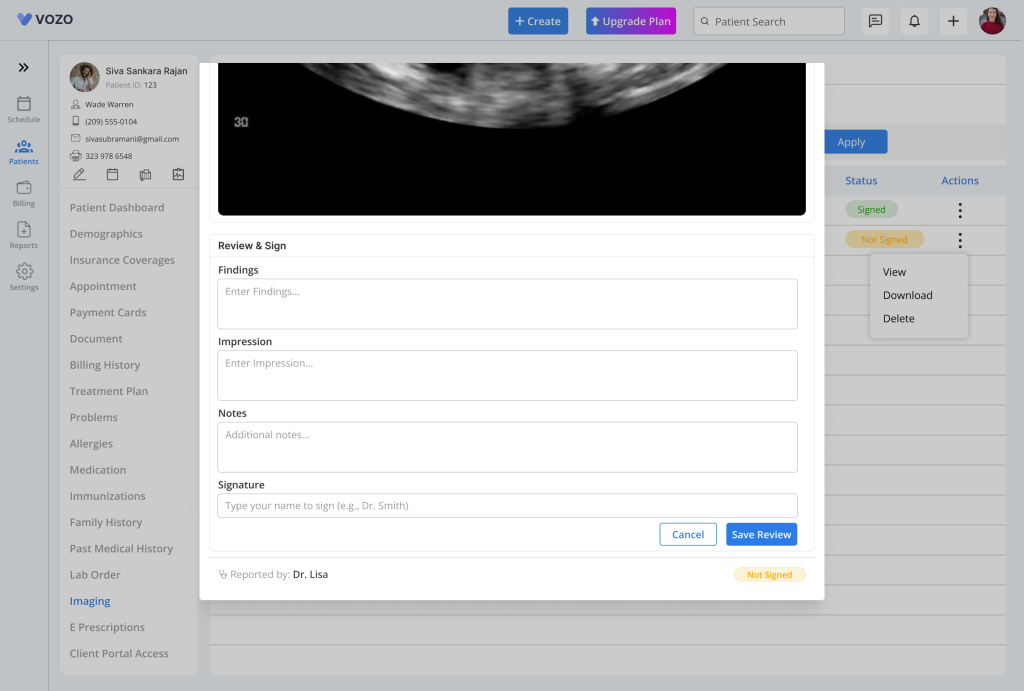
- Inside Review and Sign:
- Enter required review details
- Add notes if needed
- Click Save Reviews
- After saving:
- Review is completed
- Result remains available in imaging history
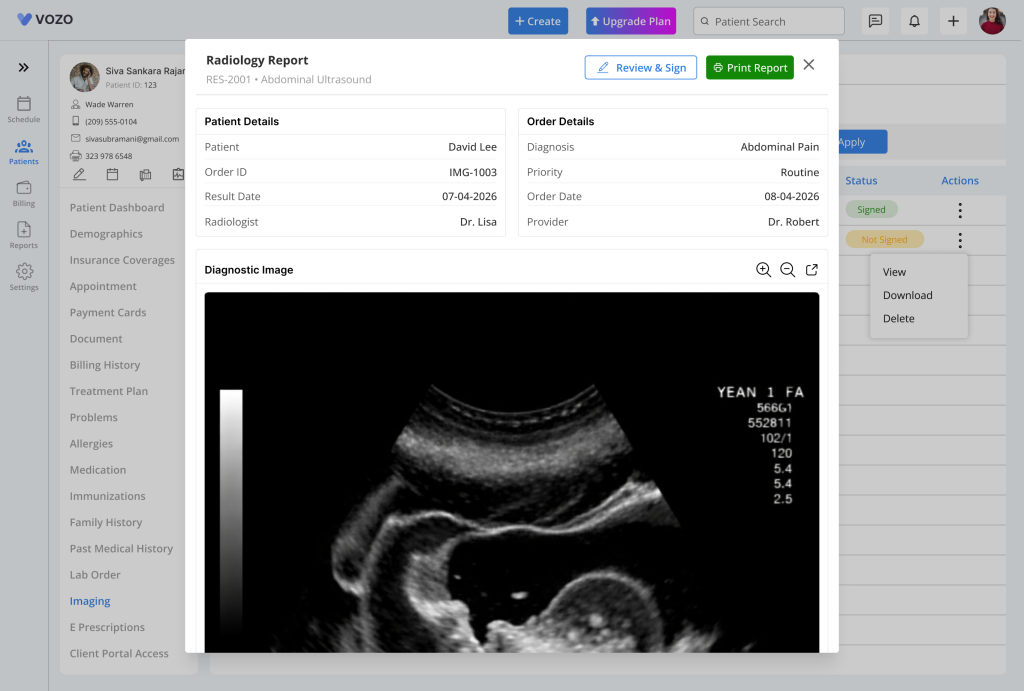
Diagnostic Image Preview
- Users can preview uploaded images.
- Available actions:
- Open Image – Click image preview.
- Enlarge Image – Opens the image in a new browser tab.
DCM File Viewer
- If uploaded file is DCM:
- The system opens the file in DICOM Viewer
- Users can review imaging scans directly from the viewer.