How can we help?
Processing Patient Refund
Issue a Full or Partial Refund to Patient
The Refund feature allows billing users to refund patients for paid invoices. You can process either a full refund or a partial refund, and the system automatically updates the invoice, refund history, and patient portal.
Access the Refund Option
- Go to the Billing section in the application.
- Open the patient invoice that needs a refund.
- Click the Refund button available next to the invoice.
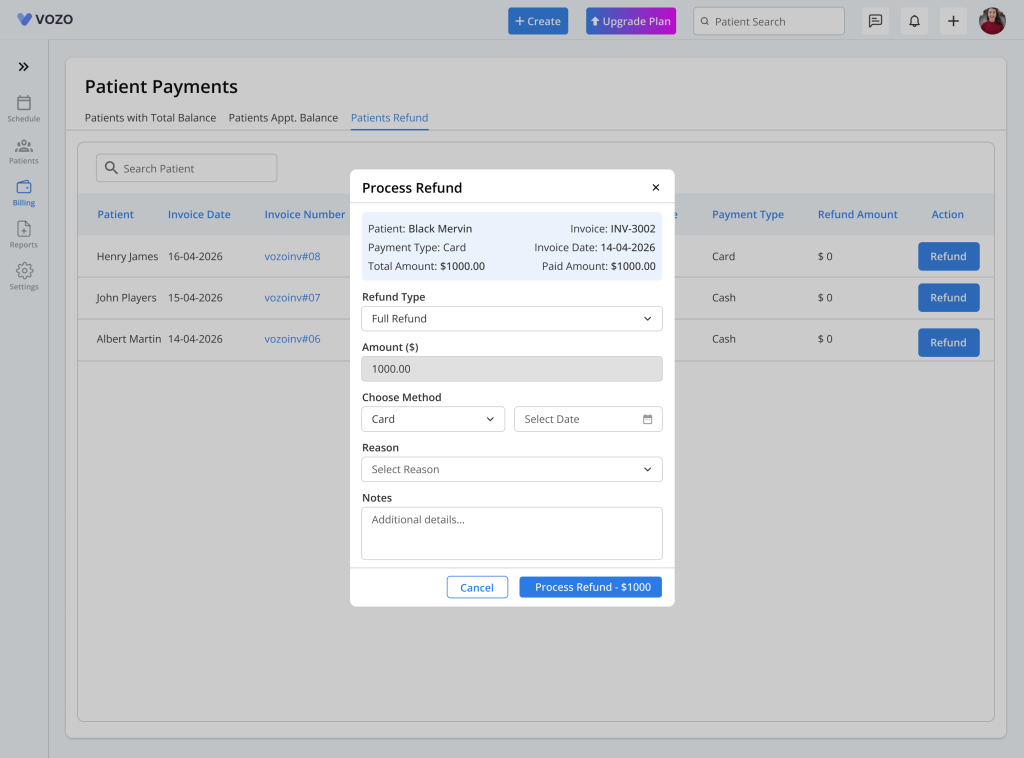
- The Refund popup will open with patient and invoice details.
Review Invoice Details
- Before creating the refund, verify the invoice details shown on the screen:
- Patient Name – automatically displayed
- Invoice Number – automatically displayed
- Total Amount – invoice total amount
- Paid Amount – amount already paid by the patient
- You can also review previous refunds under Refund History.
- Refund history shows:
- Refund Amount
- Refund Type
- Refund Date
- Refund Status
- Refund Reason
Choose the Refund Type
Select the refund type based on the payment:
Full Refund
- The system automatically fills the full paid amount.
- Amount cannot be edited.
- Used when refunding the entire payment.
Partial Refund
- Enter the amount manually.
- Amount should be less than or equal to the paid amount.
- Used when refunding only part of the payment.
Select Refund Method
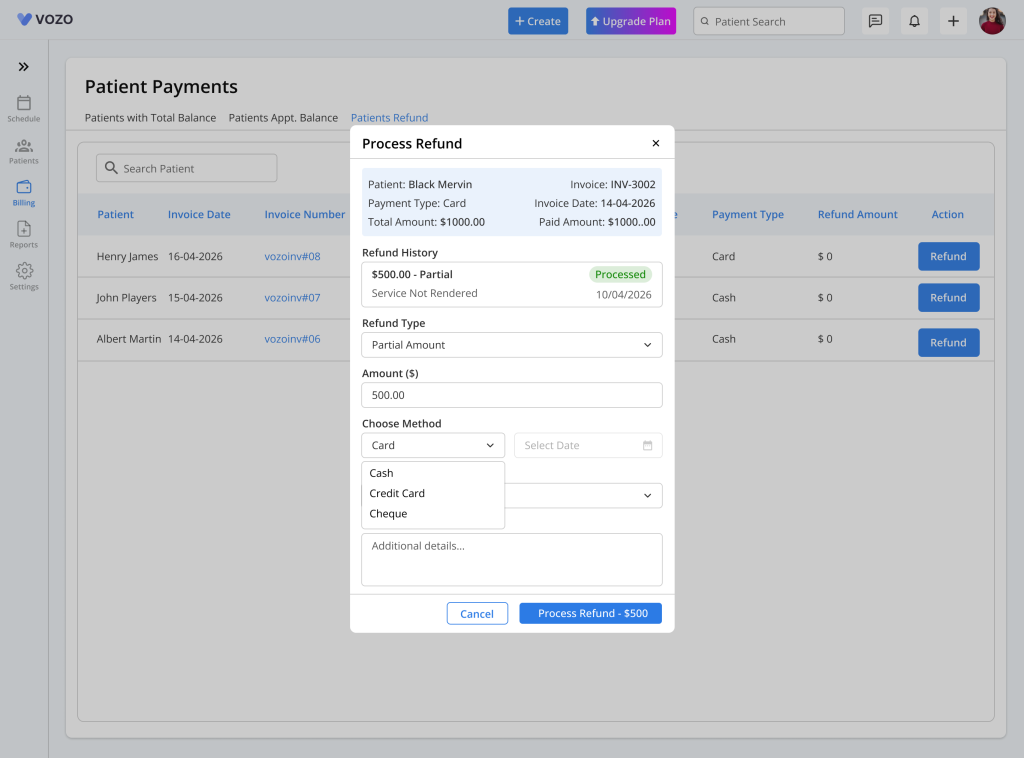
Choose how the refund is being processed:
- Cash – refund given manually
- Cheque – refund given through cheque
- Card – refund is processed back to the patient’s bank card automatically
Enter Refund Details
Complete the remaining fields:
Refund Date
- Select the refund processing date.
Reason (Required)
Choose the refund reason from the dropdown list.
Example:
- Overpayment
- Duplicate Payment
- Billing Adjustment
- Appointment Cancellation
Notes (Optional)
Add any extra information related to the refund.
Example:
- Refund approved by billing team
- Duplicate charge corrected
Submit the Refund
- Review all entered details.
- Click Submit.
- The system processes the refund.
- A confirmation message will appear.
After submission:
- Refund is saved in refund history
- Invoice balance updates automatically
- Patient portal displays refund details
- Refund report is updated
- Audit log is created
- Email notification is sent to the patient
How Credit Balance Works
- If the patient has available credit balance, the system uses that first before issuing the actual refund.
Example:
Paid Amount: $2,000
Available Credit: $500
Requested Refund: $1,000
System action:
- $500 deducted from patient credit
- Remaining $500 refunded to patient
View Refund Reports
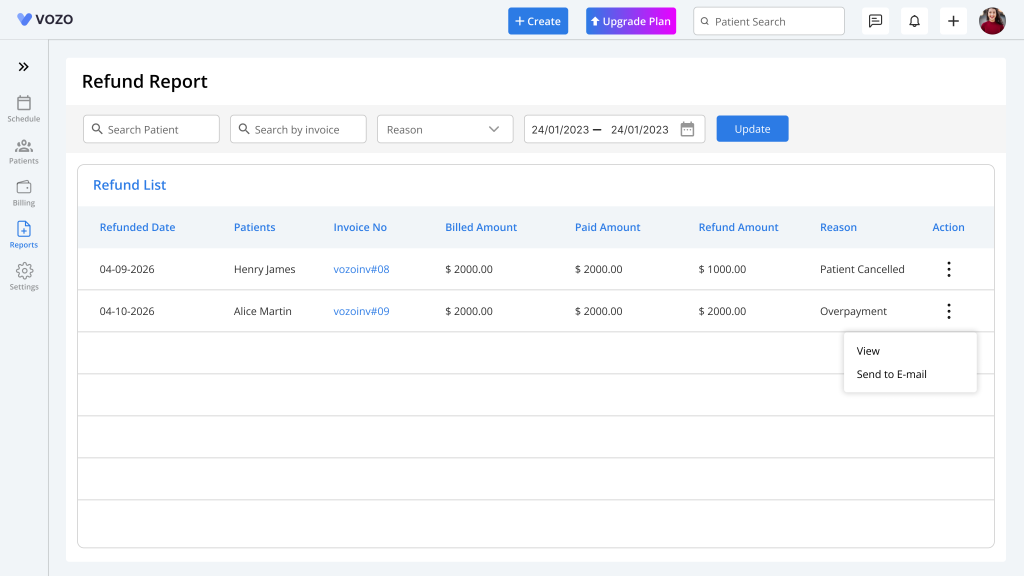
To track refunds:
- Open Reports
- Select Refund Report
Available filters:
- Date Range
- Patient Name
- Refund Type
- Payment Method
- Refund Status
Available actions:
- View refund details
- Export report
- Send refund email to patient
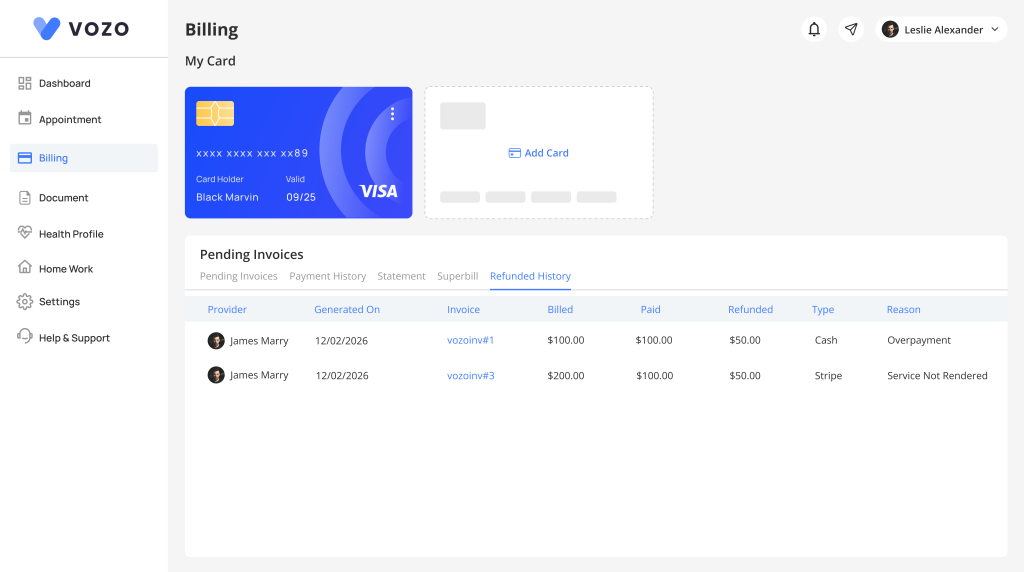
Patient Portal
Patients can also view refund information in the portal.
Visible details:
- Refunded Amount
- Refund Date
- Refund Method
- Refund History