How can we help?
Users
Managing Providers
- Click on Settings > Account Settings > Users menu.
- Add and manage your practice’s Providers and Staff based on their roles.
- In the Provider Tab, click on the “Add Provider” button to add a provider and enter the following details:
- First Name
- Last Name
- Primary Provider
- Enable Co-Sign Clinical Notes
- Role
- Username
- Password
- Default Facility
- Phone Numbers
- Address
- DOB
- Federal Tax ID
- DEA Number
- NPI
- UPIN
- Taxonomy
- Specialty
- Appointment Type (Walk-in, Telehealth, Both)
- Licenses Type
- License Number
- License State
- Expiry Date
- Enable Digital Rx/EPCS (if paid as an Add-on by the Admin)
- Enable Telehealth (If paid as Add-on in Basic Plan)
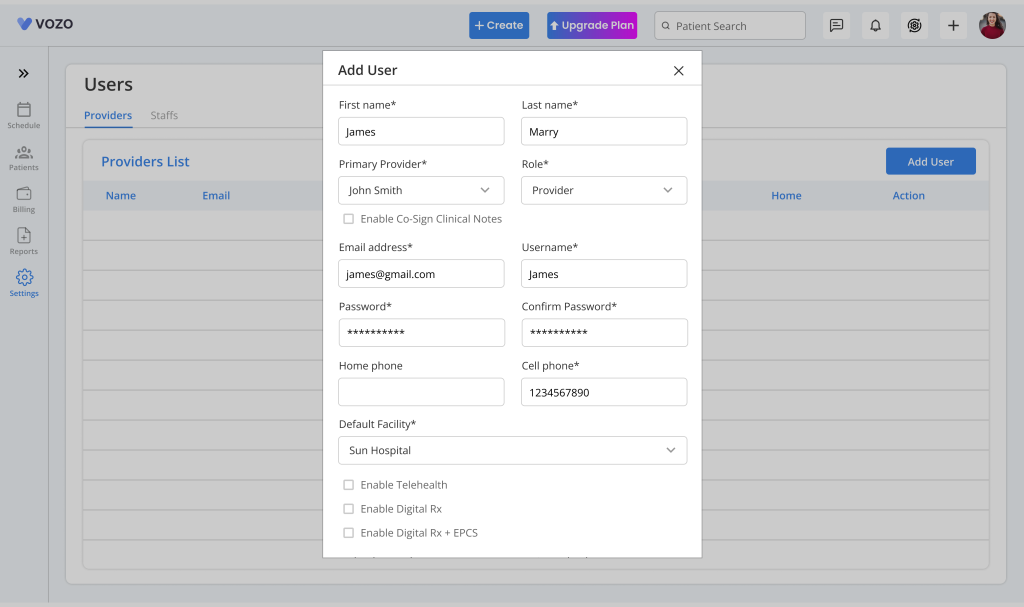
- Click “Save” to save the Provider information in the provider list.
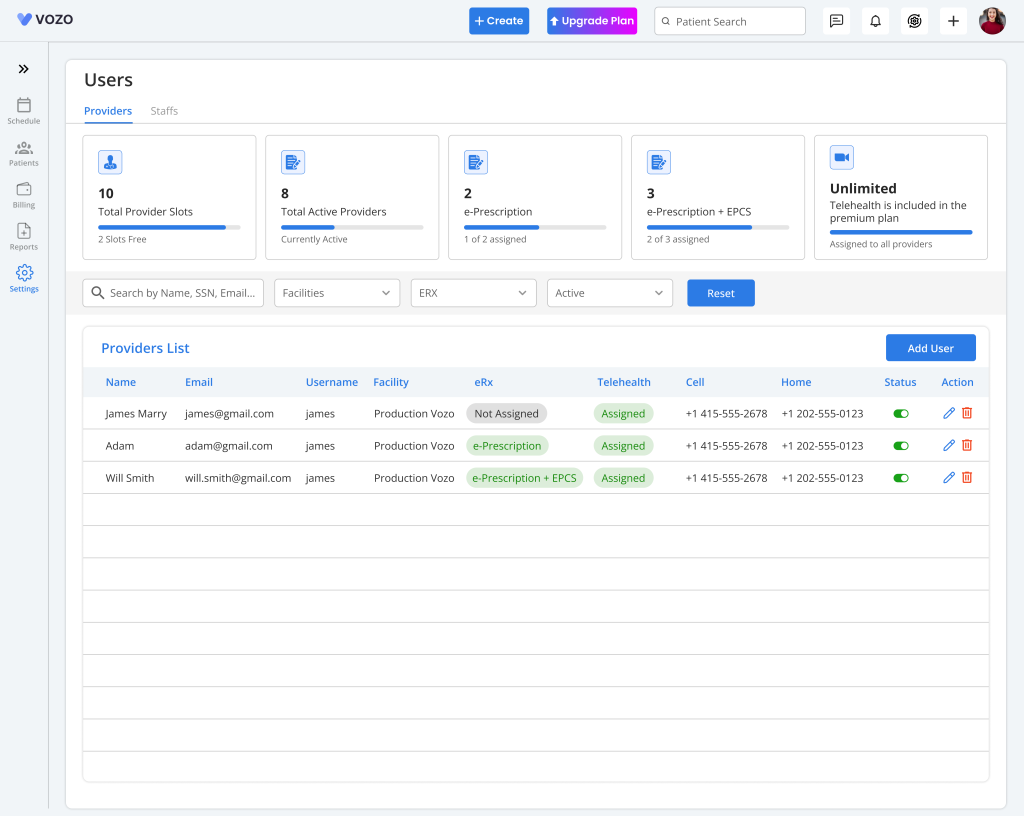
- The saved provider information will be shown in list view. At the top of the page, a set of summary cards is displayed, giving a quick overview of purchased licenses and current system usage.
- These summary cards help you understand capacity and utilization at a glance by showing key details such as total provider slots purchased, number of active providers, E-Prescription licenses, combined E-Prescription + EPCS licenses, and Telehealth licenses.
- For Premium plan users, the Telehealth license card displays Unlimited, indicating no restriction.
- To edit the provider information, click on the Edit icon, change the details, and click Save to save the changes.
Note: The number of providers that can be added is based on the number of Add-on clinicians purchased by the admin. Plus the eRx column in the provider list will be checked only if the Digital Rx is enabled for the provider.
Summary Cards Overview
- The summary cards section provides a consolidated view of license usage and availability, helping administrators quickly monitor system limits and current consumption.
- The cards display the following information:
- Provider Slots Purchased – Maximum number of providers allowed in the system
- Active Providers – Total number of providers currently active
- E-Prescription Licenses Purchased – Total ERX licenses available
- E-Prescription + EPCS Licenses Purchased – Combined controlled and non-controlled prescription licenses
- Telehealth Licenses Purchased – Total telehealth access licenses (or Unlimited for Premium plans)
Filters – Search and Manage Providers
- Below the summary cards, a filter section is available to help you quickly locate and manage providers. These filters improve efficiency when working with large provider lists.
- The Search filter allows you to find providers using keywords such as provider name, username, or other related details, making it easy to locate specific records.
- The Facility filter helps you narrow down providers based on their assigned location, such as Main Clinic, Secondary Location, or Telehealth Facility.
- The ERX filter allows you to categorize providers based on their electronic prescription access, including Not Assigned, E-Prescription, and E-Prescription + EPCS.
- The Telehealth filter helps identify providers who have telehealth access assigned or not assigned within the system.
- The Status filter allows you to view providers based on whether they are Active or Inactive.
Provider Status Management
- Each provider in the list includes an Active/Inactive toggle, allowing quick status updates directly from the list view.
- When you change the provider status, the system displays a confirmation alert to ensure the action is intentional before applying the update.
- When a provider is marked as Inactive, they are no longer counted in the active provider total and cannot access system features associated with active status.
- When a provider is switched back to Active, they are included again in the active provider count and regain applicable access.
- The system provides confirmation alerts before completing critical actions to prevent unintended changes and ensure clarity.
- Alerts are displayed when:
Changing provider status (Active ↔ Inactive)
Deleting a provider
Delete Provider
- To permanently remove a provider, locate the provider in the list and click the Delete option.
- A confirmation message will appear explaining the impact of deletion. Click Confirm to proceed or cancel to retain the provider.
- Deleting a provider permanently removes all associated data from the system, and this action cannot be reversed.
Impact of Inactivating a Provider
- When a provider is set to Inactive, the system automatically updates license usage and availability.
- One provider slot becomes available again, reducing the active provider count and freeing capacity for new providers.
- Any assigned add-ons such as E-Prescription (ERX) and Telehealth are automatically removed when the provider is inactivated.
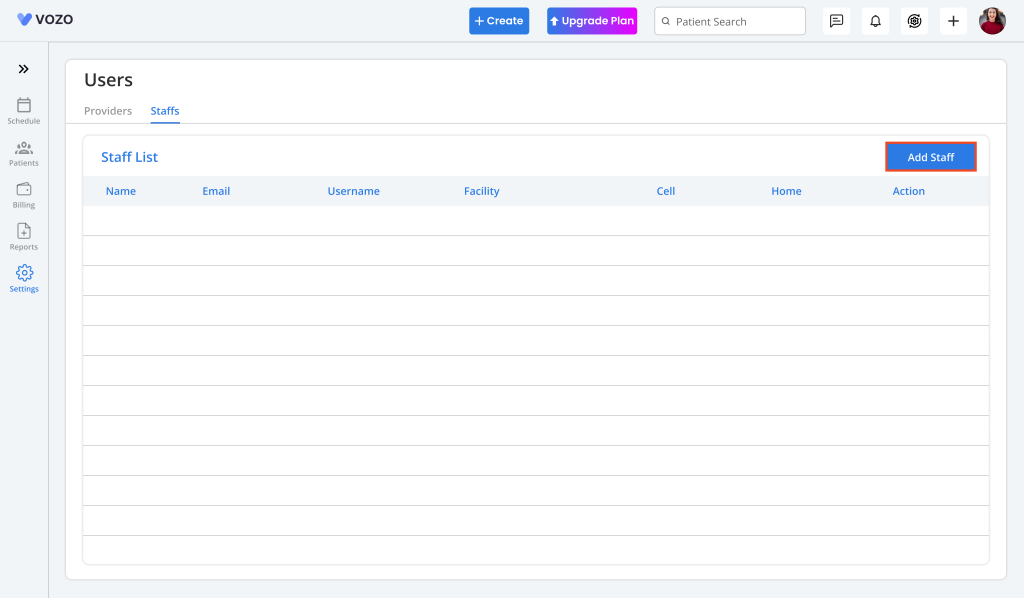
Managing Staff
- In the Staff Tab, click on the “Add Staff” button to add unlimited staff and enter the following details:
- First Name
- Last Name
- Primary Provider
- Role
- Username
- Password
- Default Facility
- Phone Numbers
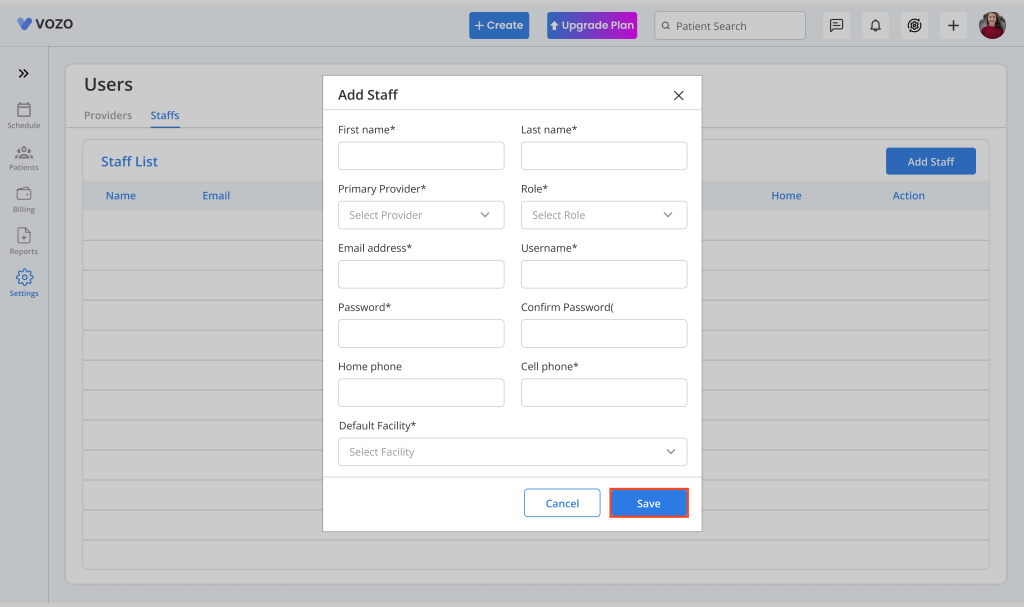
- Click “Save” to save the Staff information in the staff list.
- The saved staff details will be shown in list view.
- To edit the staff information, click on the Edit icon, change the details, and click Save to save the changes.
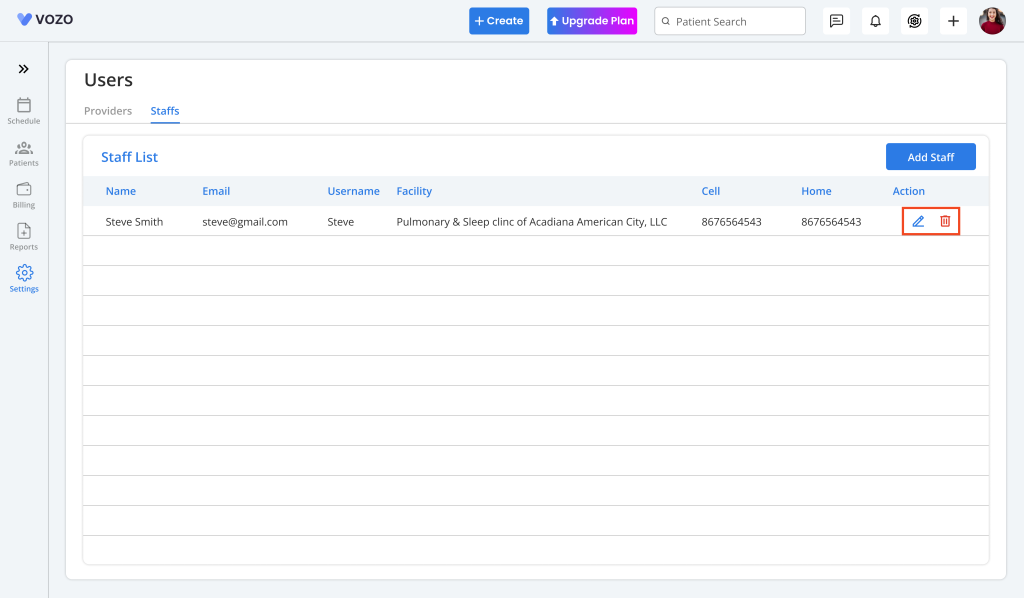
- Click on the Delete icon to delete the staff from the list.